
In this article I am going to describe how I made an led fidget spinner.
Spinners are something to play with instead of clicking your pen or biting your fingernails. They are surprisingly addictive and sometimes help you concentrate.
The basic construction is a housing or holder with a bearing in the centre. To use it you just hold the spinner between a thumb and finger and spin it.
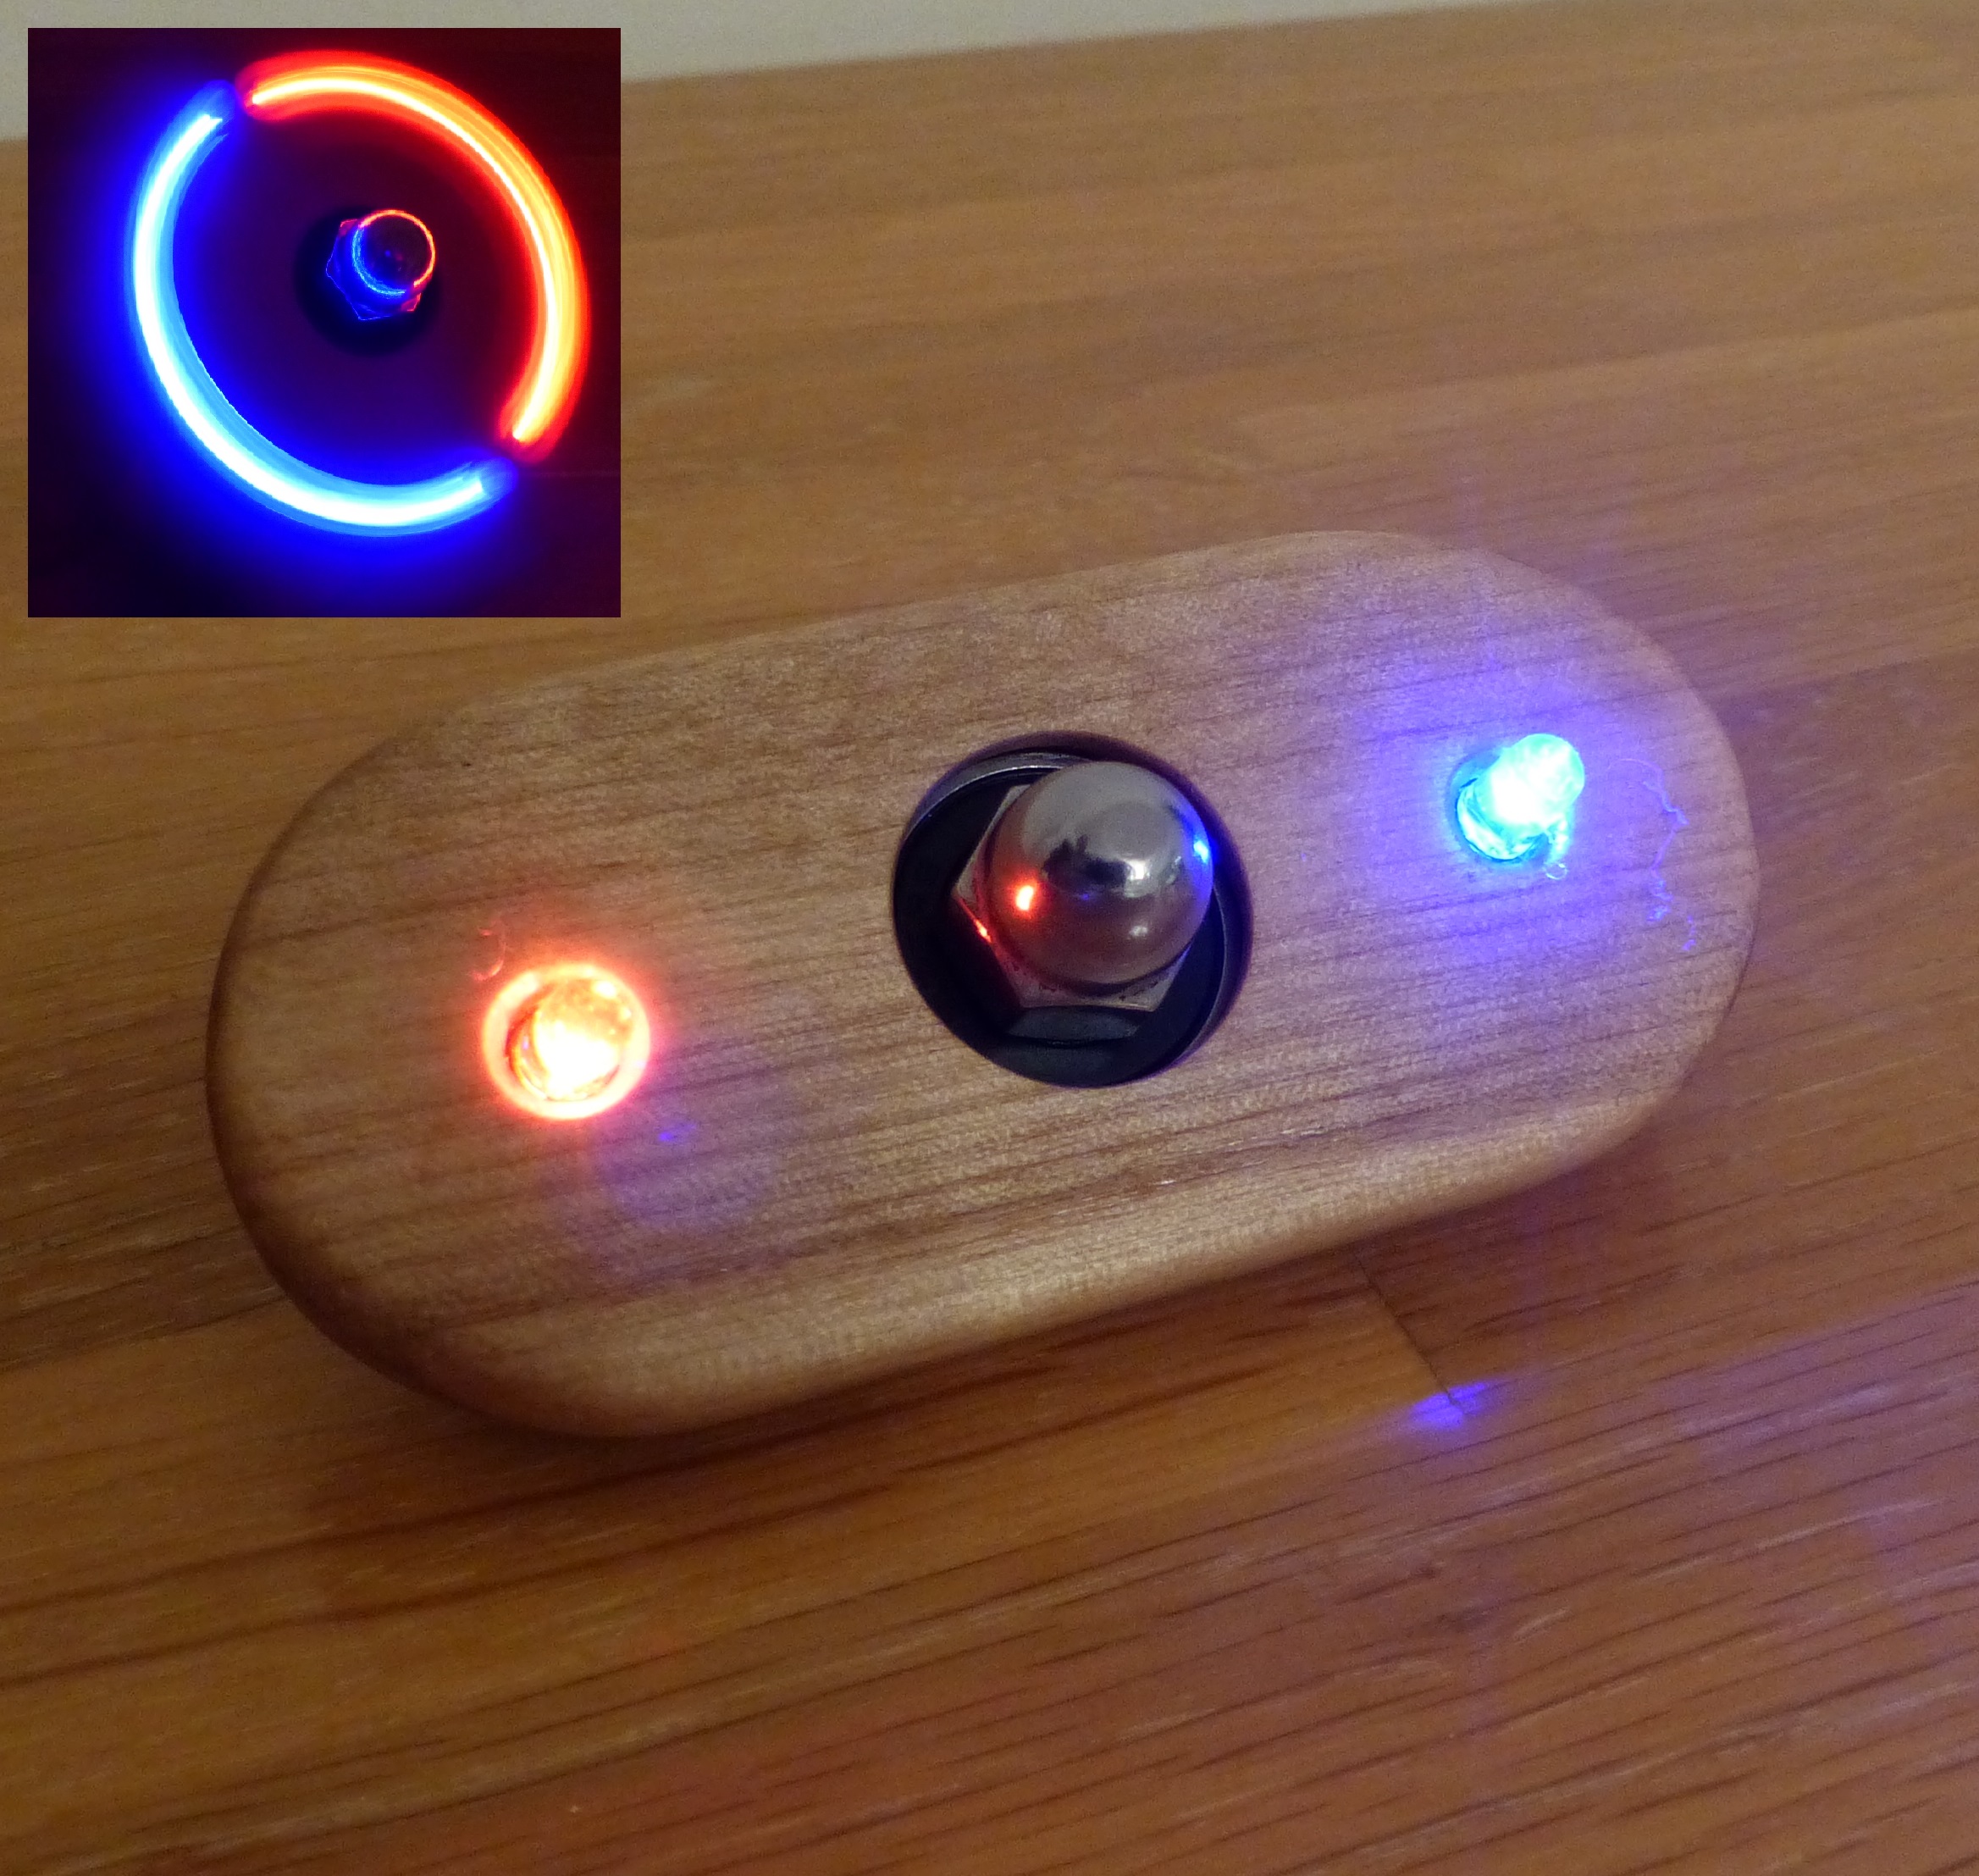
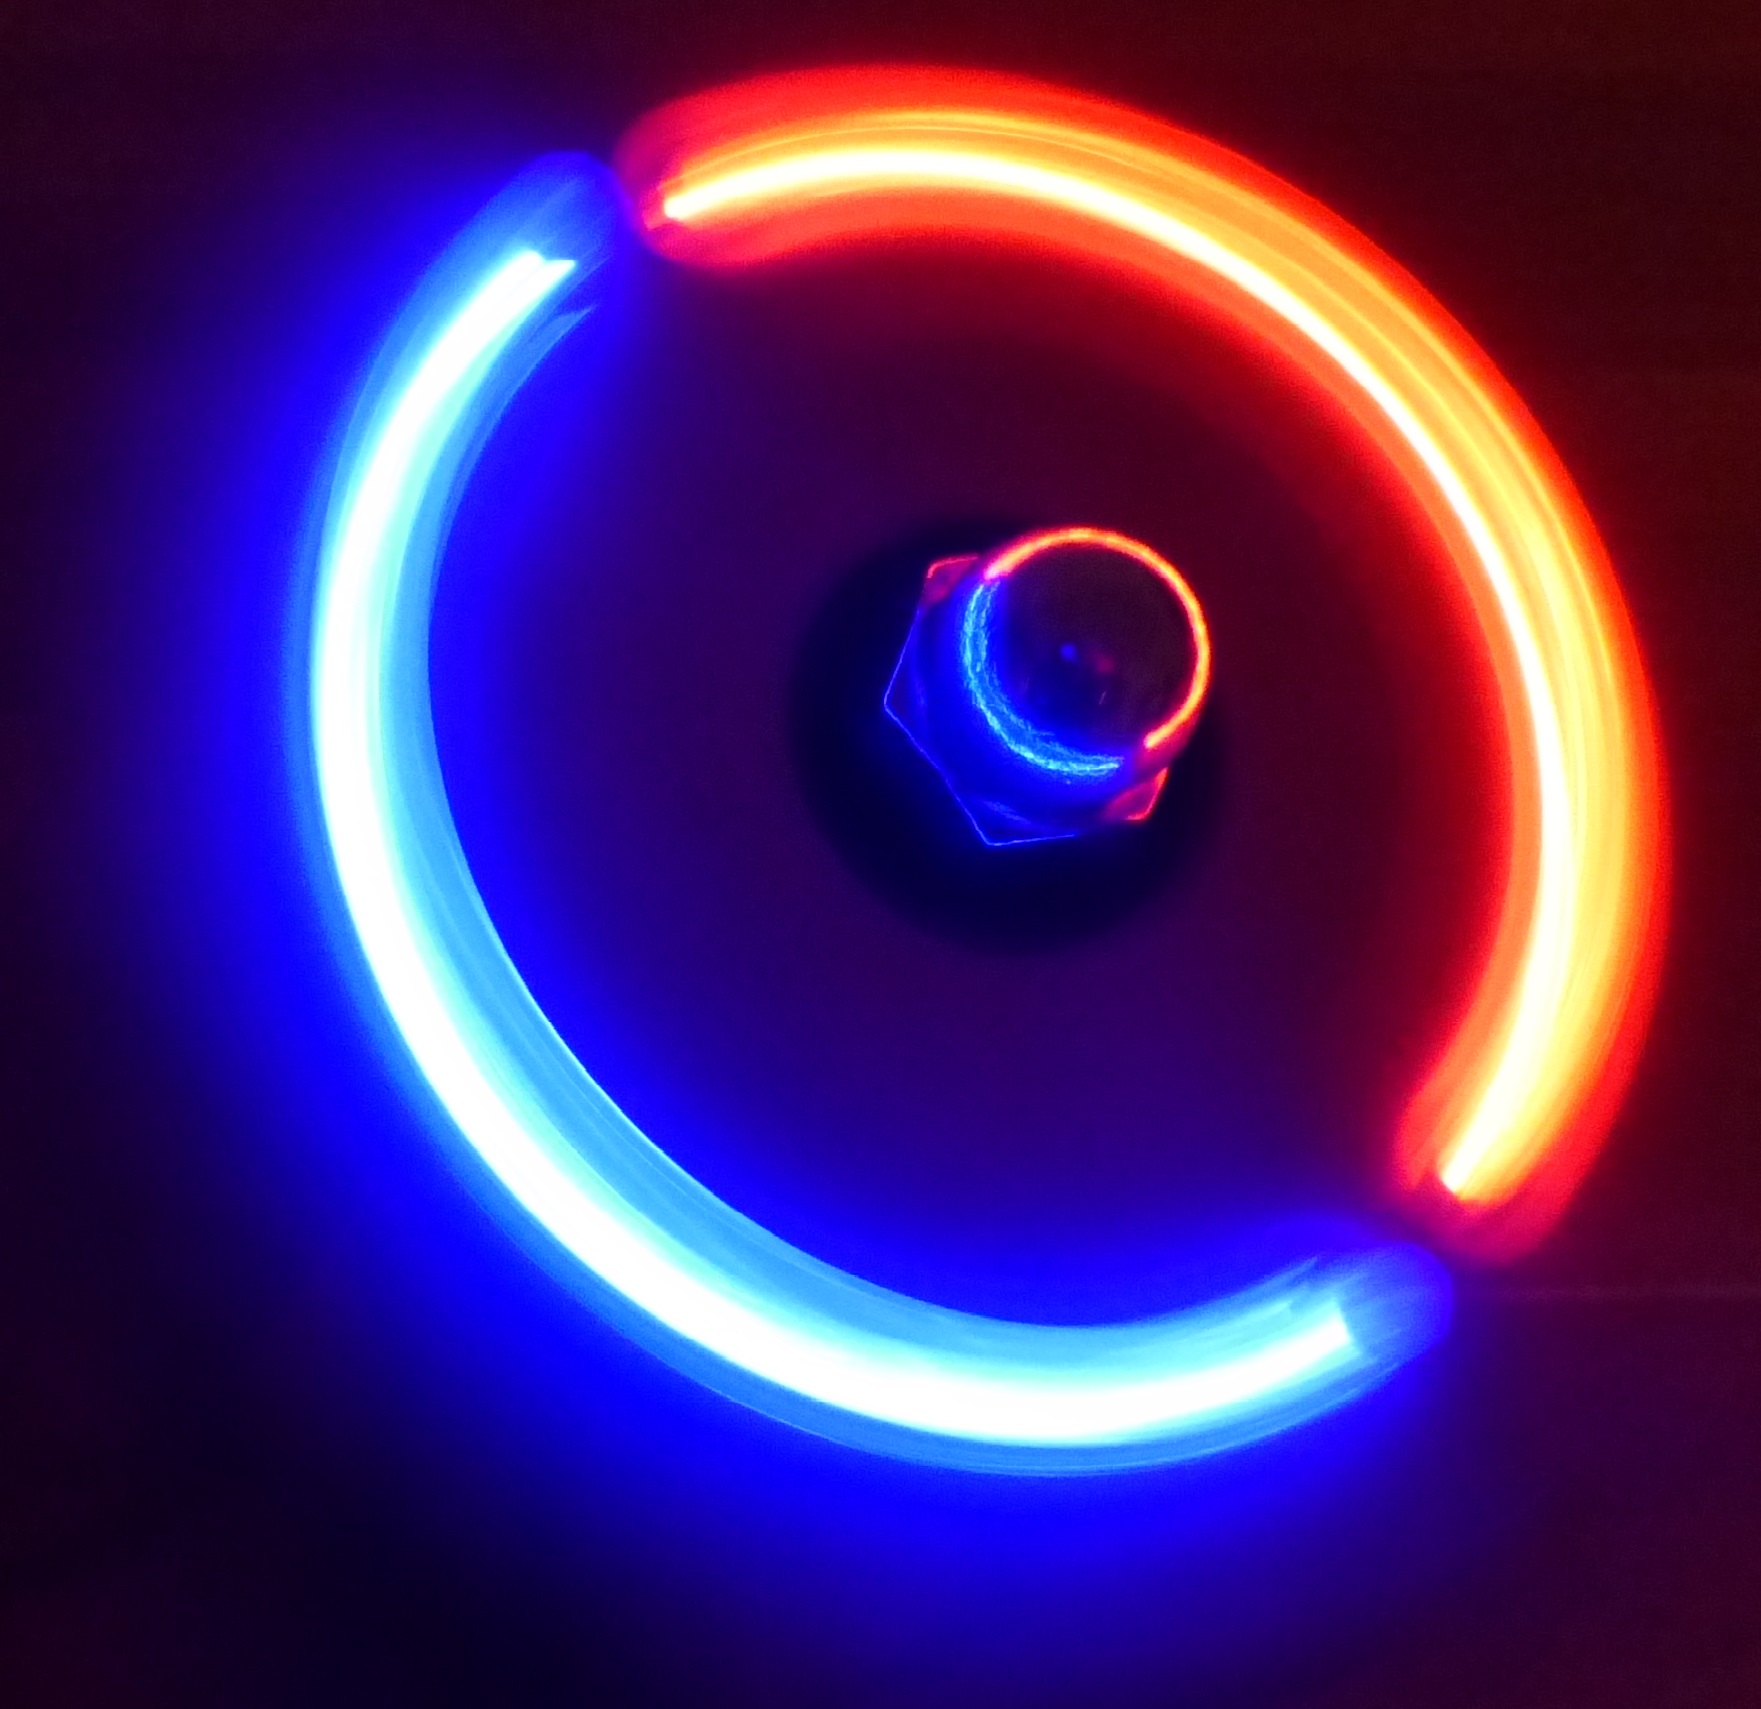
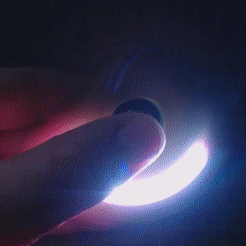
I decided to make a wooden spinner, which has a nice tactile feel, and incorporate leds into it. The leds that I have used have a built-in program that changes the led colour fairly quickly, resulting in some interesting results when the spinner spins.
Parts & Tools
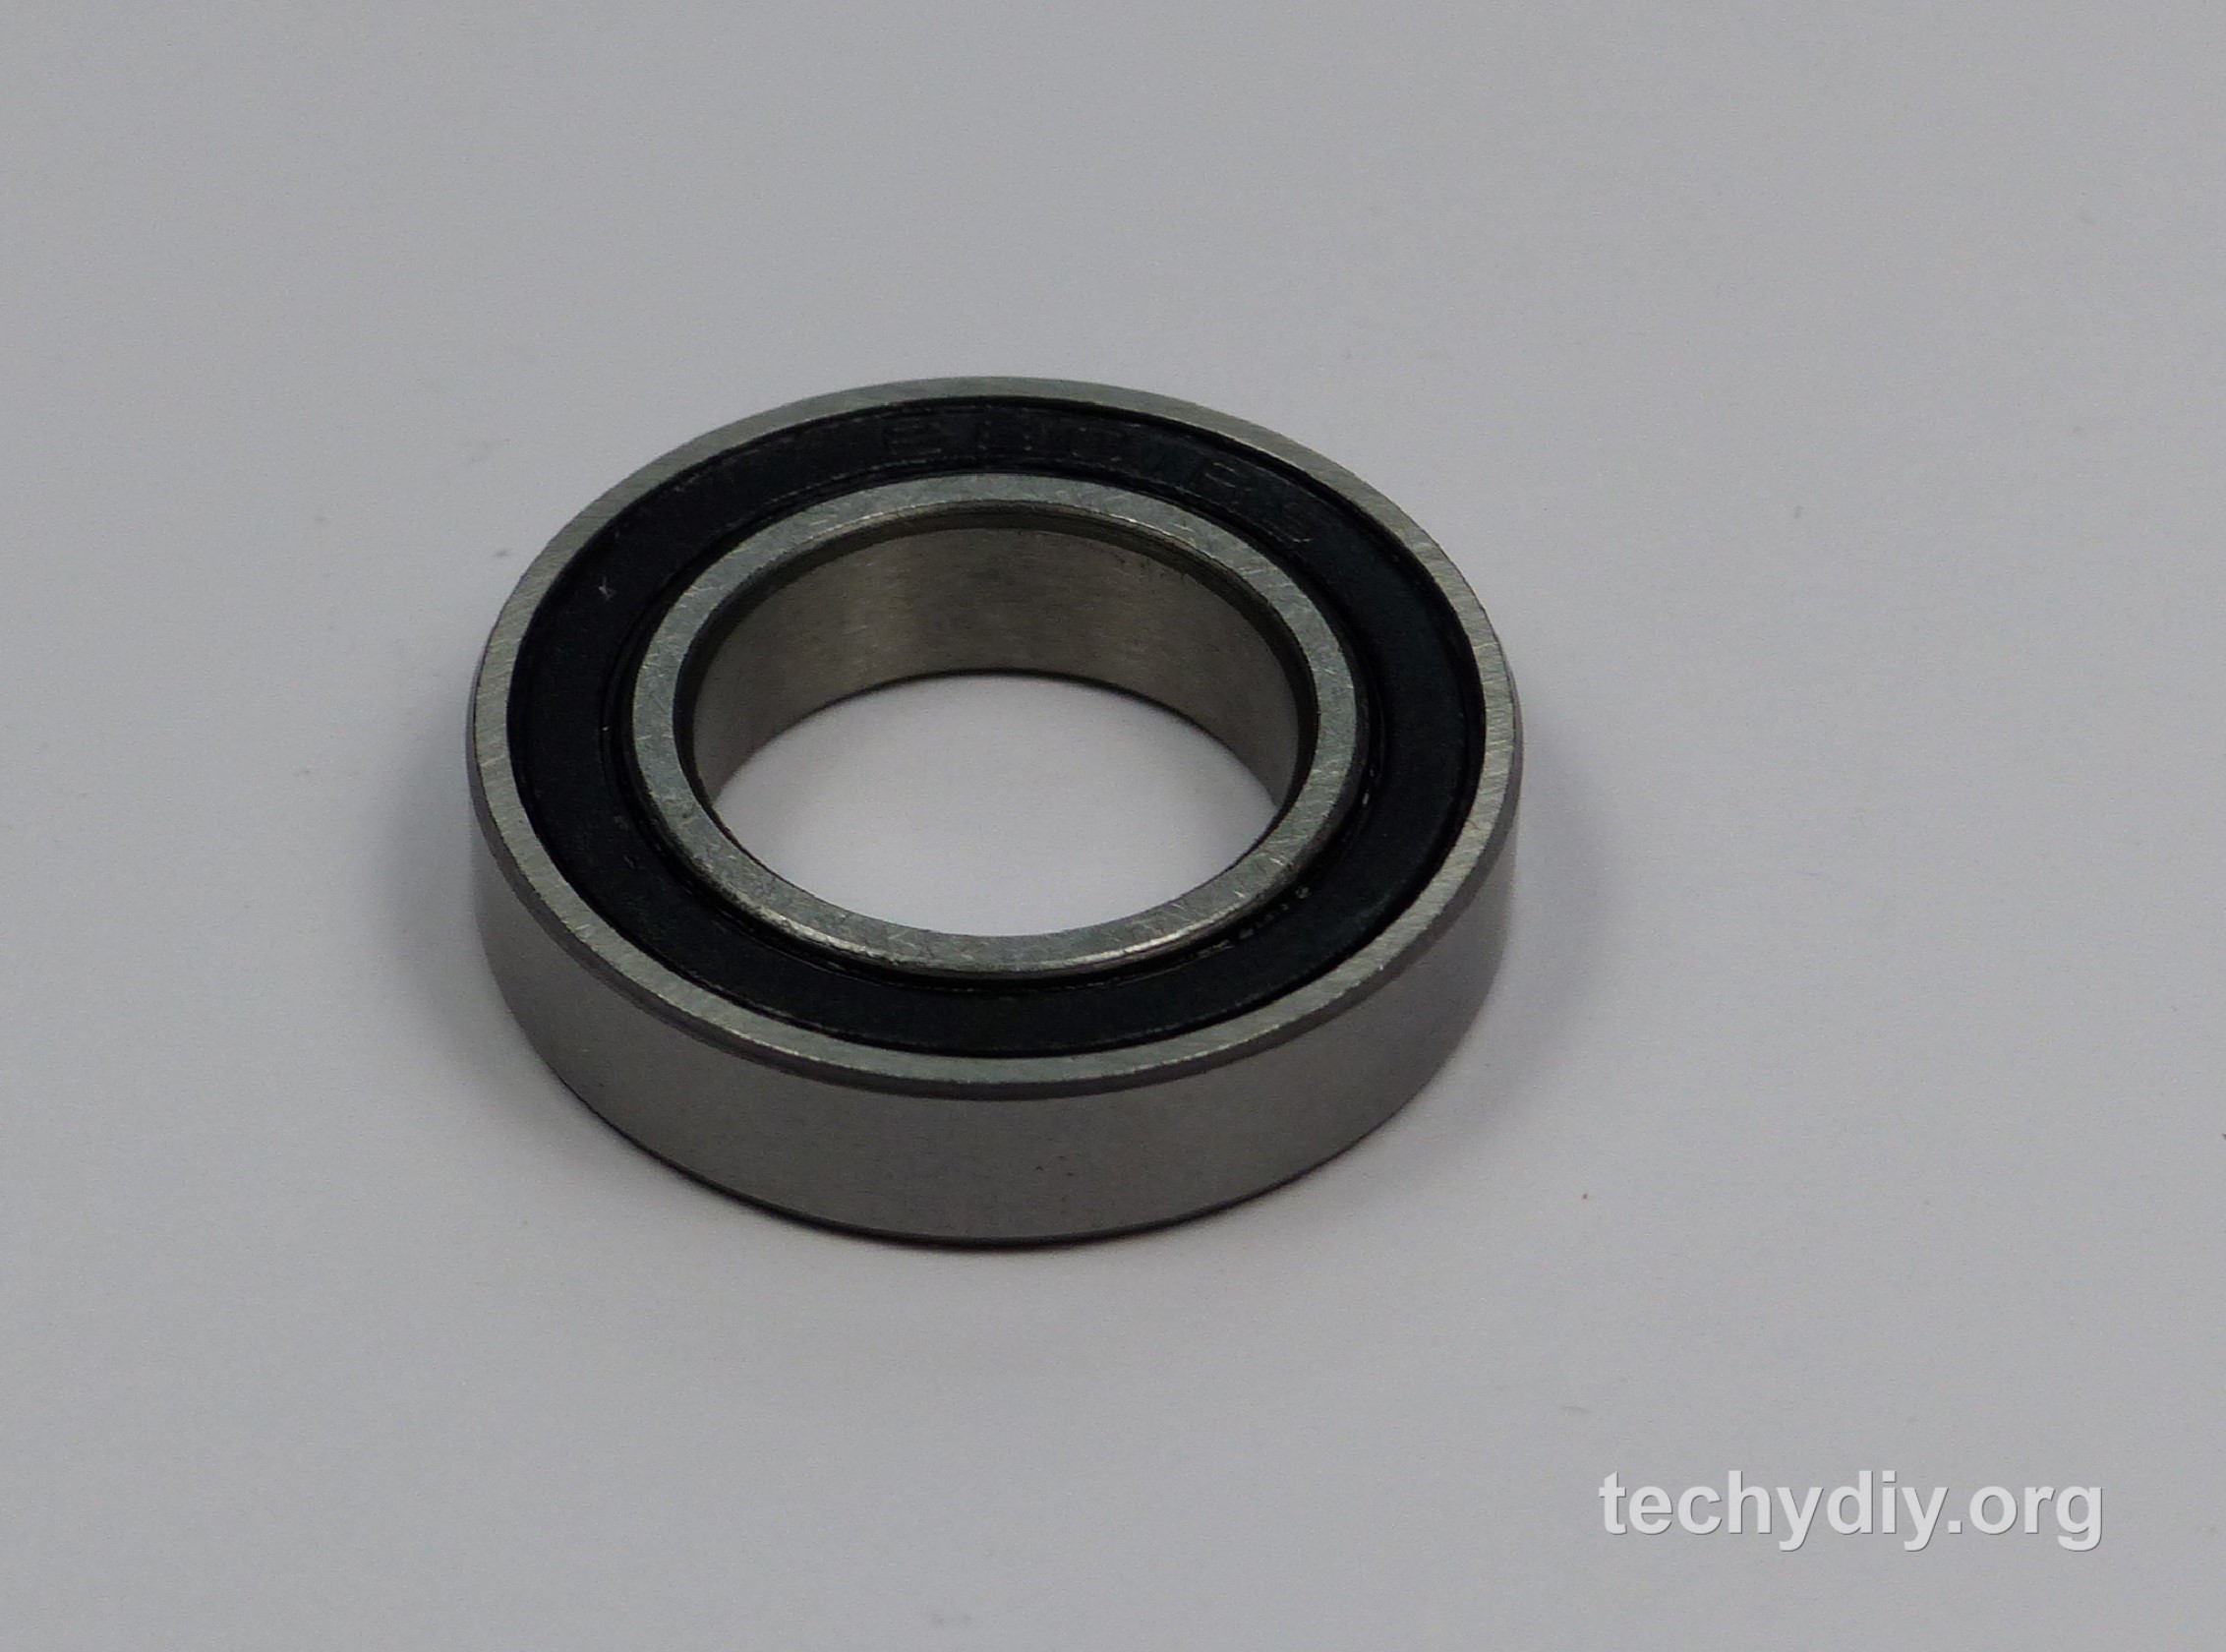

Bearing 22x8x7mm 2RS US UK Deutschland España
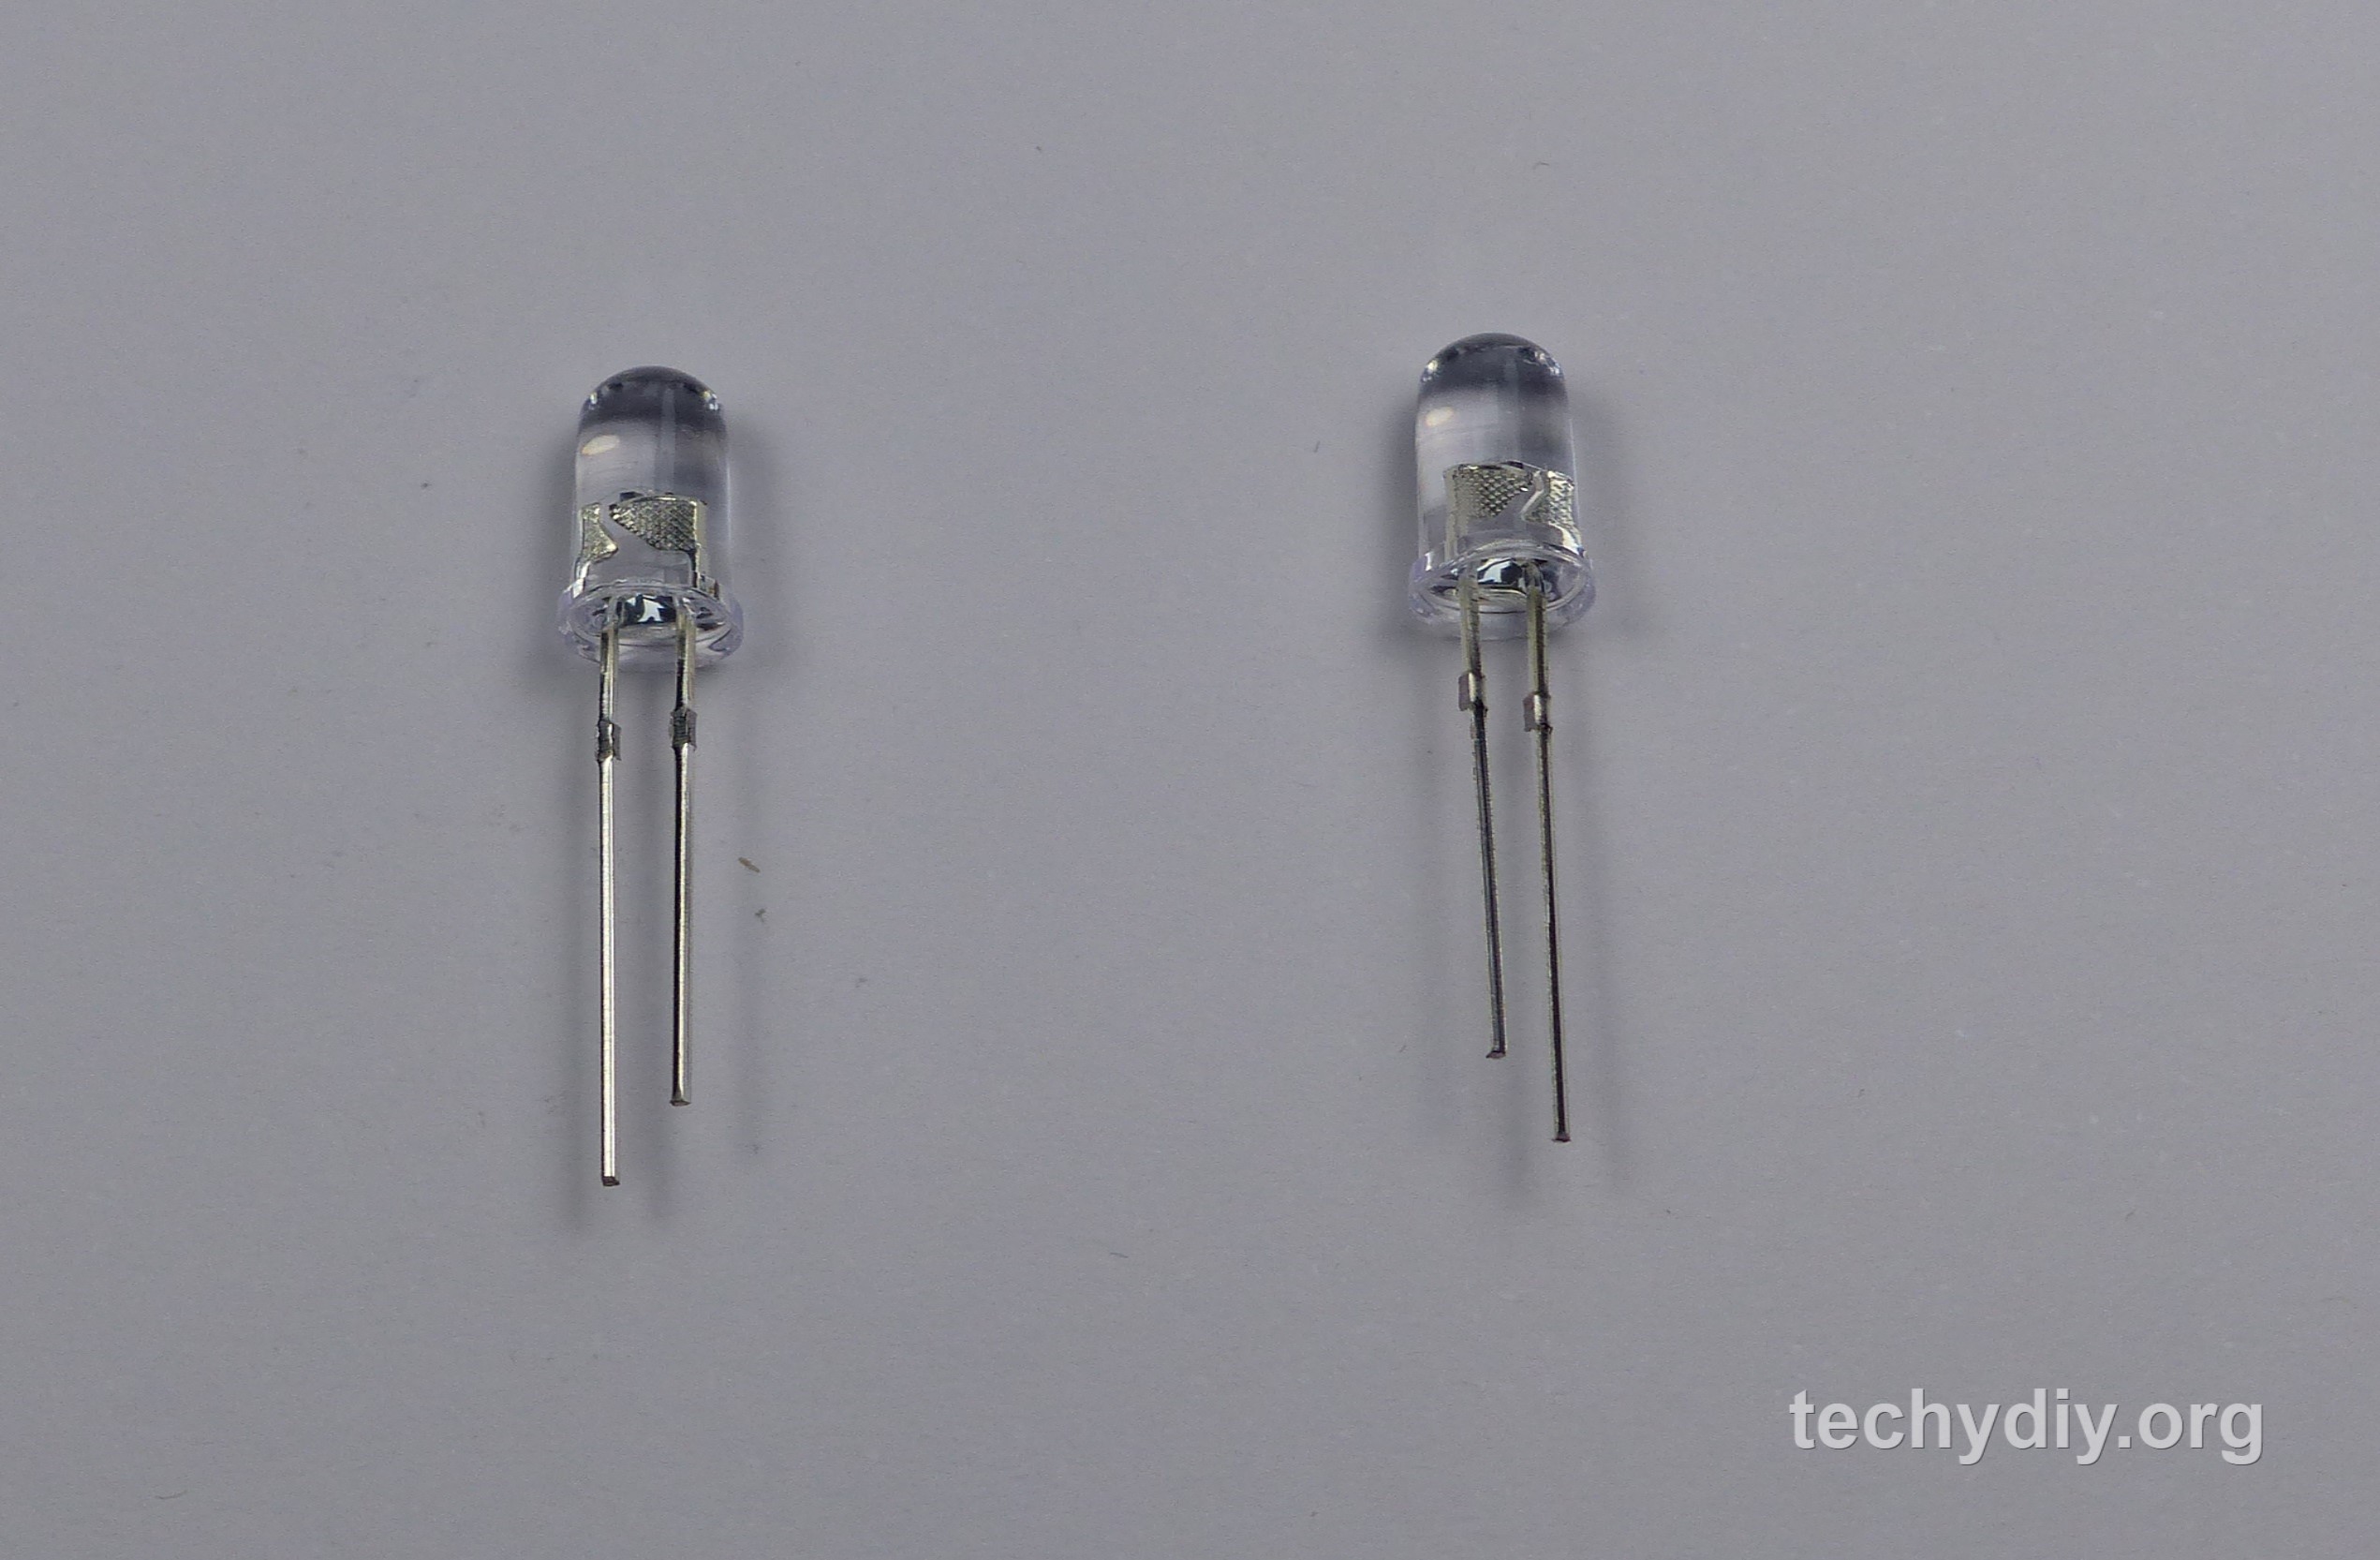
Fast flashing led US UK Deutschland España
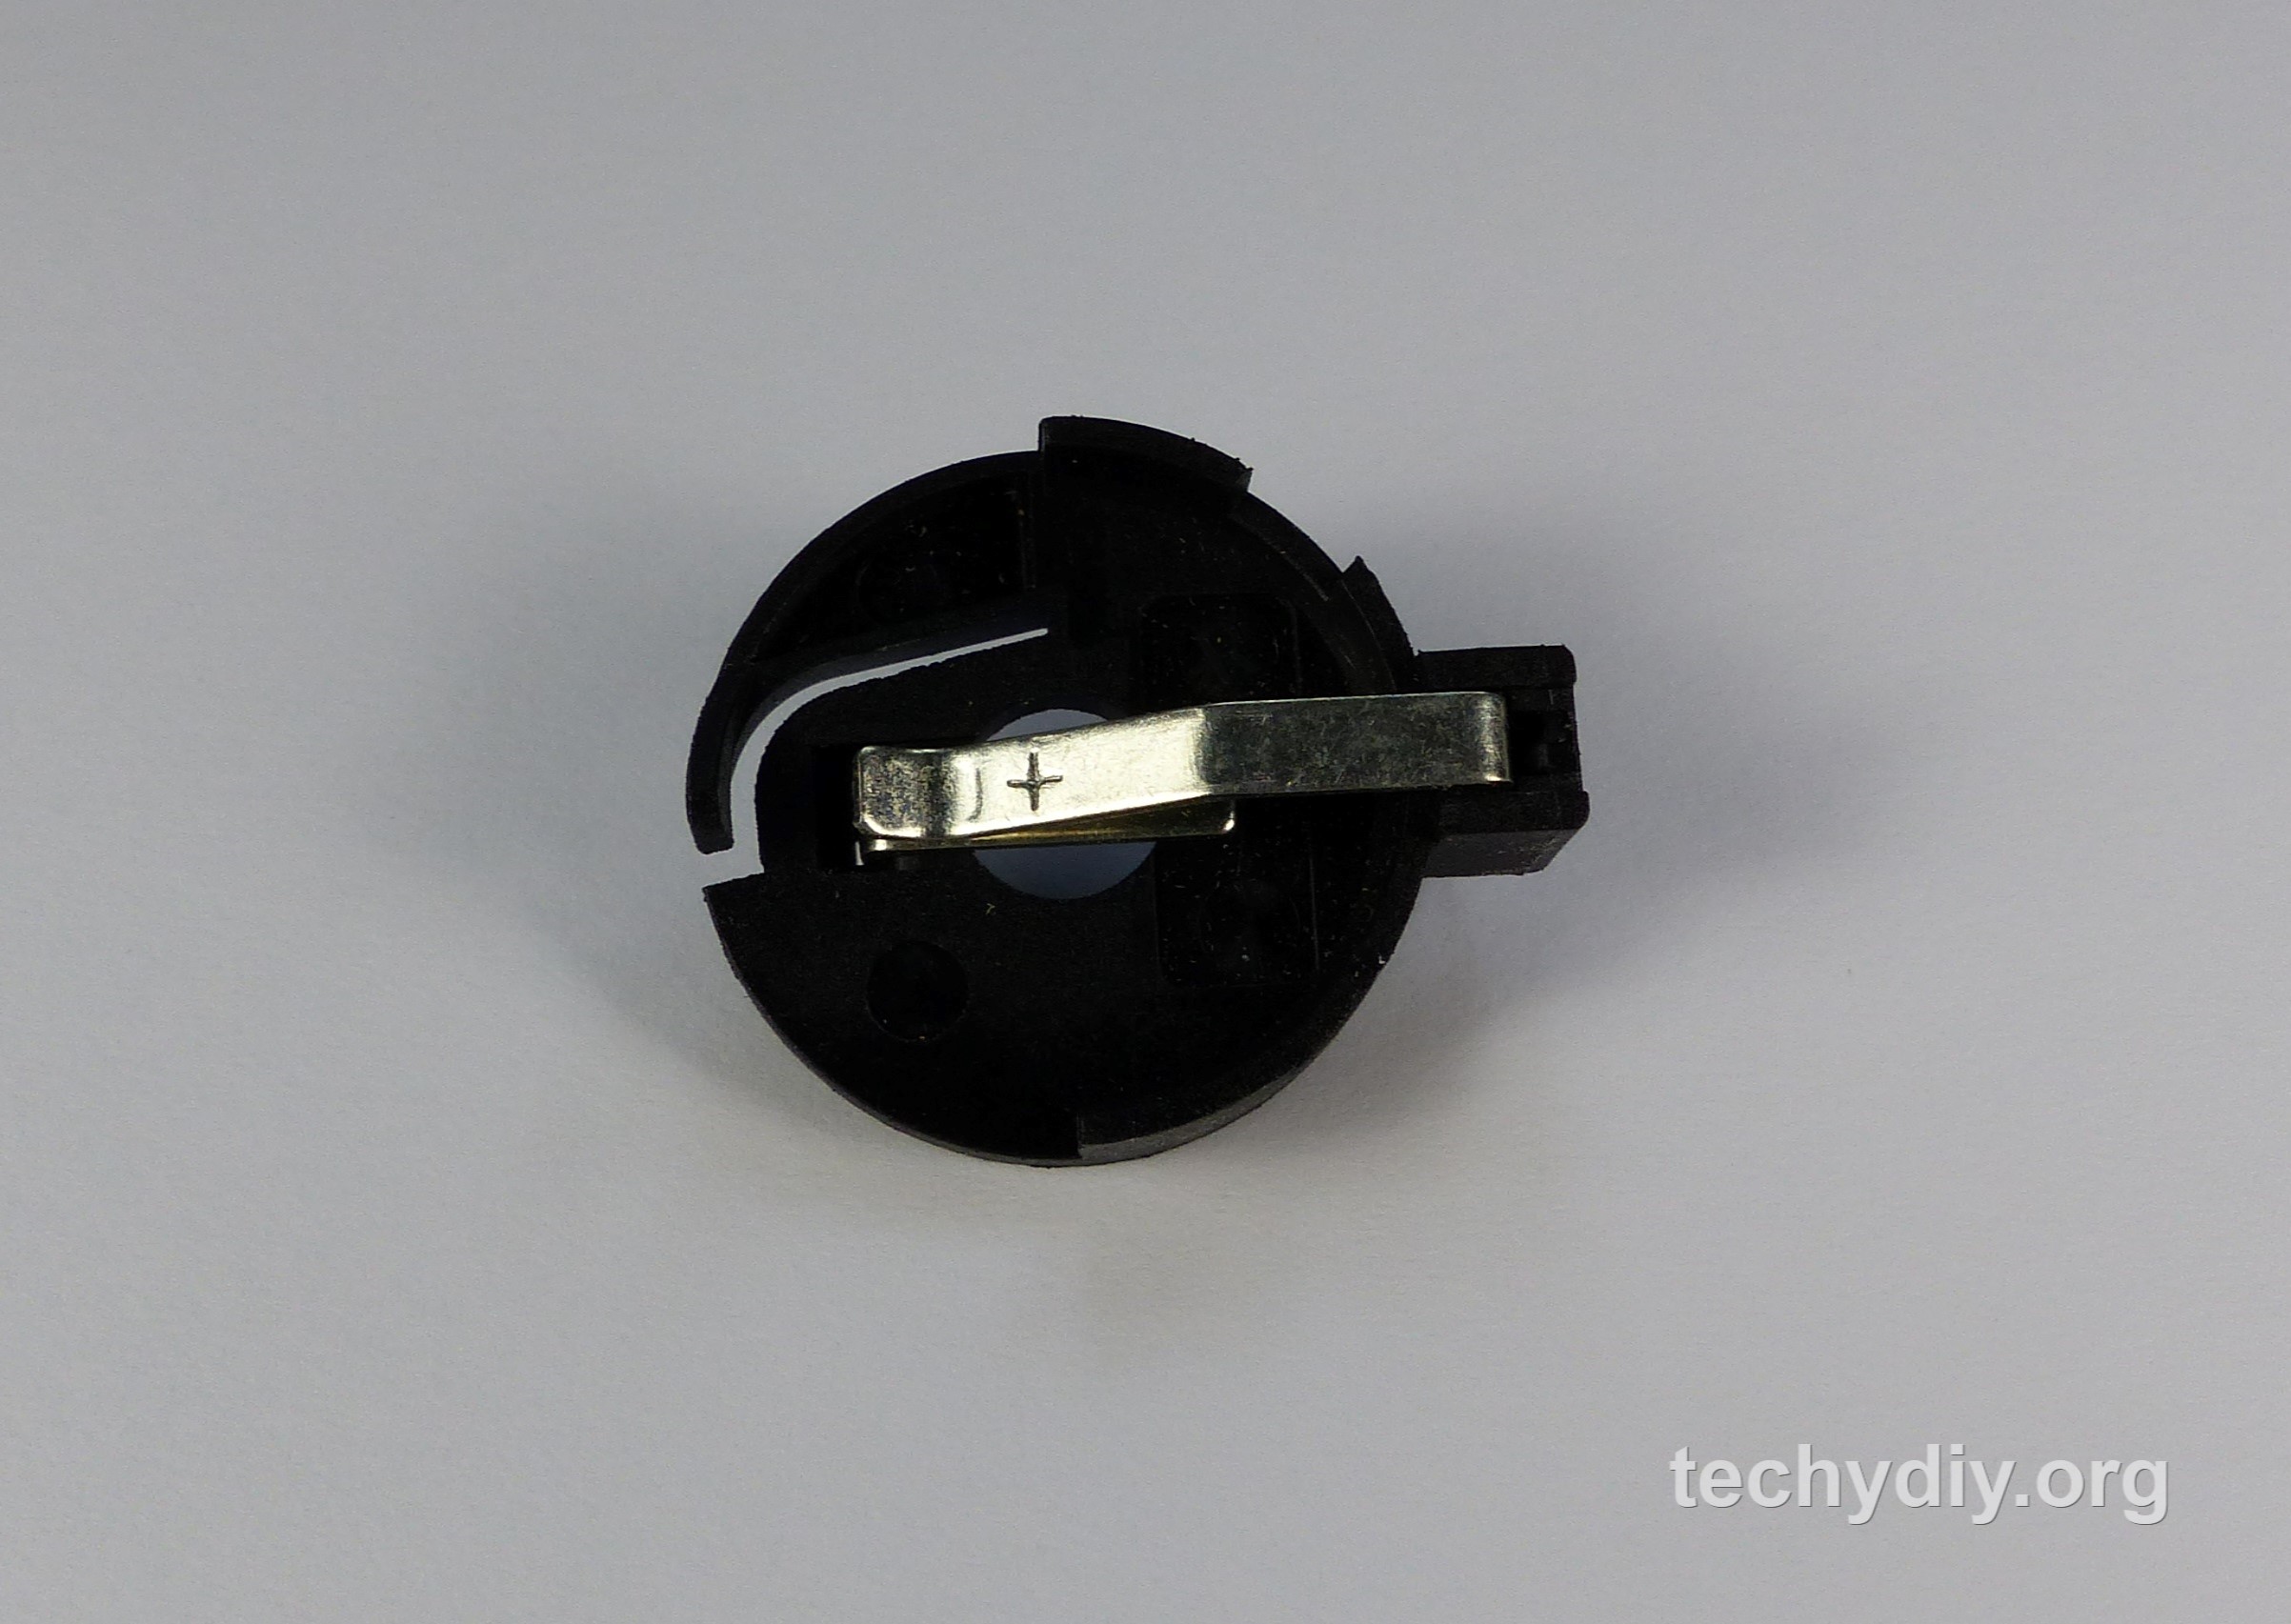
Battery holder US UK Deutschland España
Coin battery US UK Deutschland España
M8x20mm stainless steel bolt US UK DE ES
M8 stainless steel dome nuts US UK DE ES
Jigsaw US UK Deutschland España
Router US UK Deutschland España
Mitre saw US UK Deutschland España
Drill press US UK Deutschland España
Soldering iron US UK Deutschland España
Hot glue gun US UK Deutschland España
Forstner drill bit US UK Deutschland España
Countersink drill bit US UK Deutschland España
Design & template
To start with I created a design using Google Sketchup and then used that to create a cutting and drilling template.
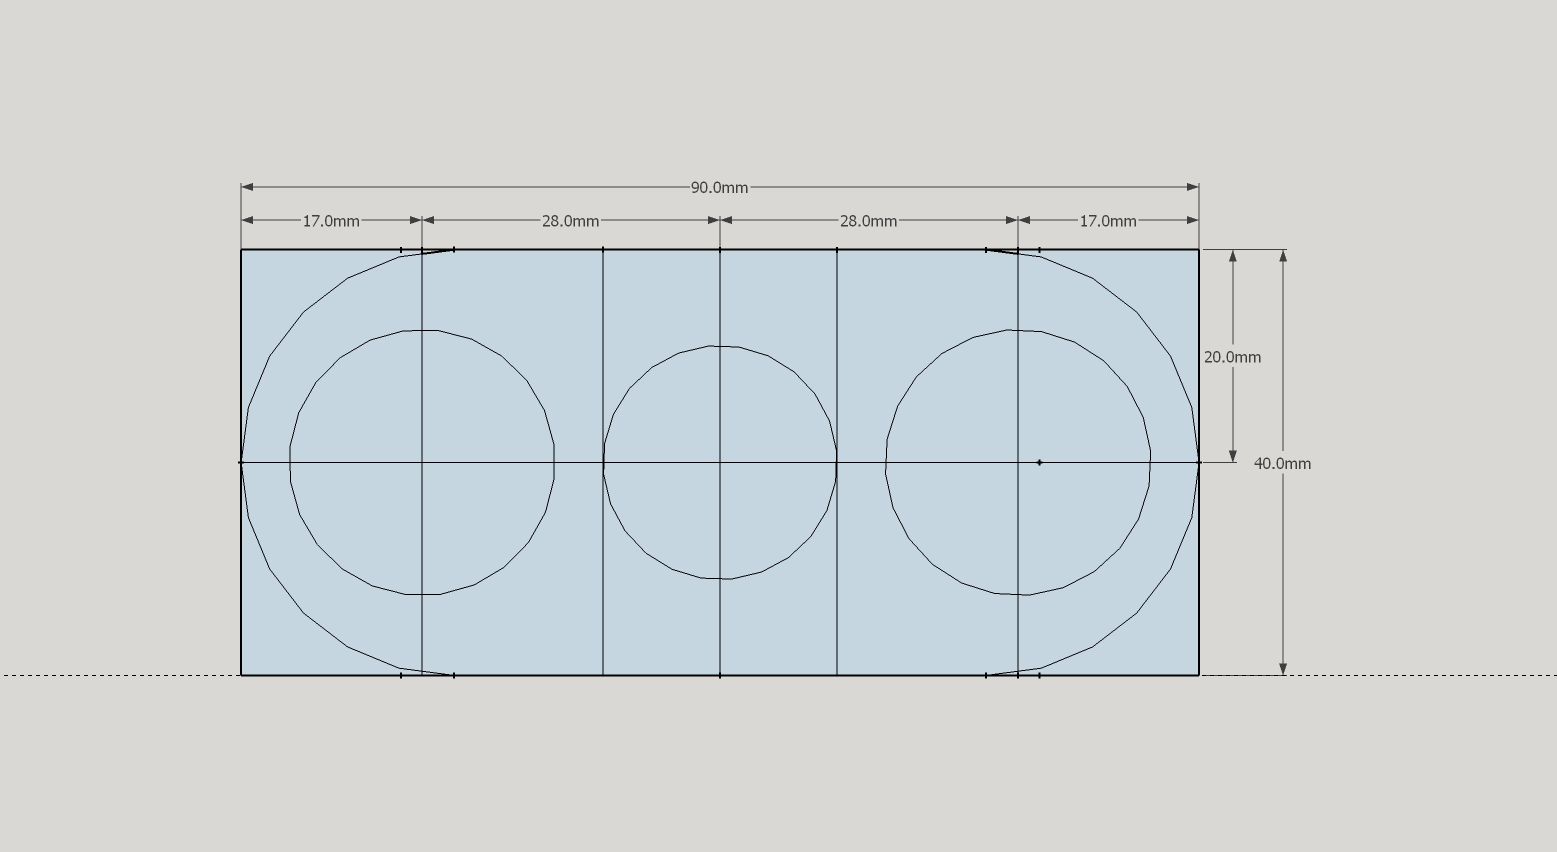

https://3dwarehouse.sketchup.com/model.html?id=23b34fd7-89ed-4d5c-b38f-916e7132be23
Cut the wood holder

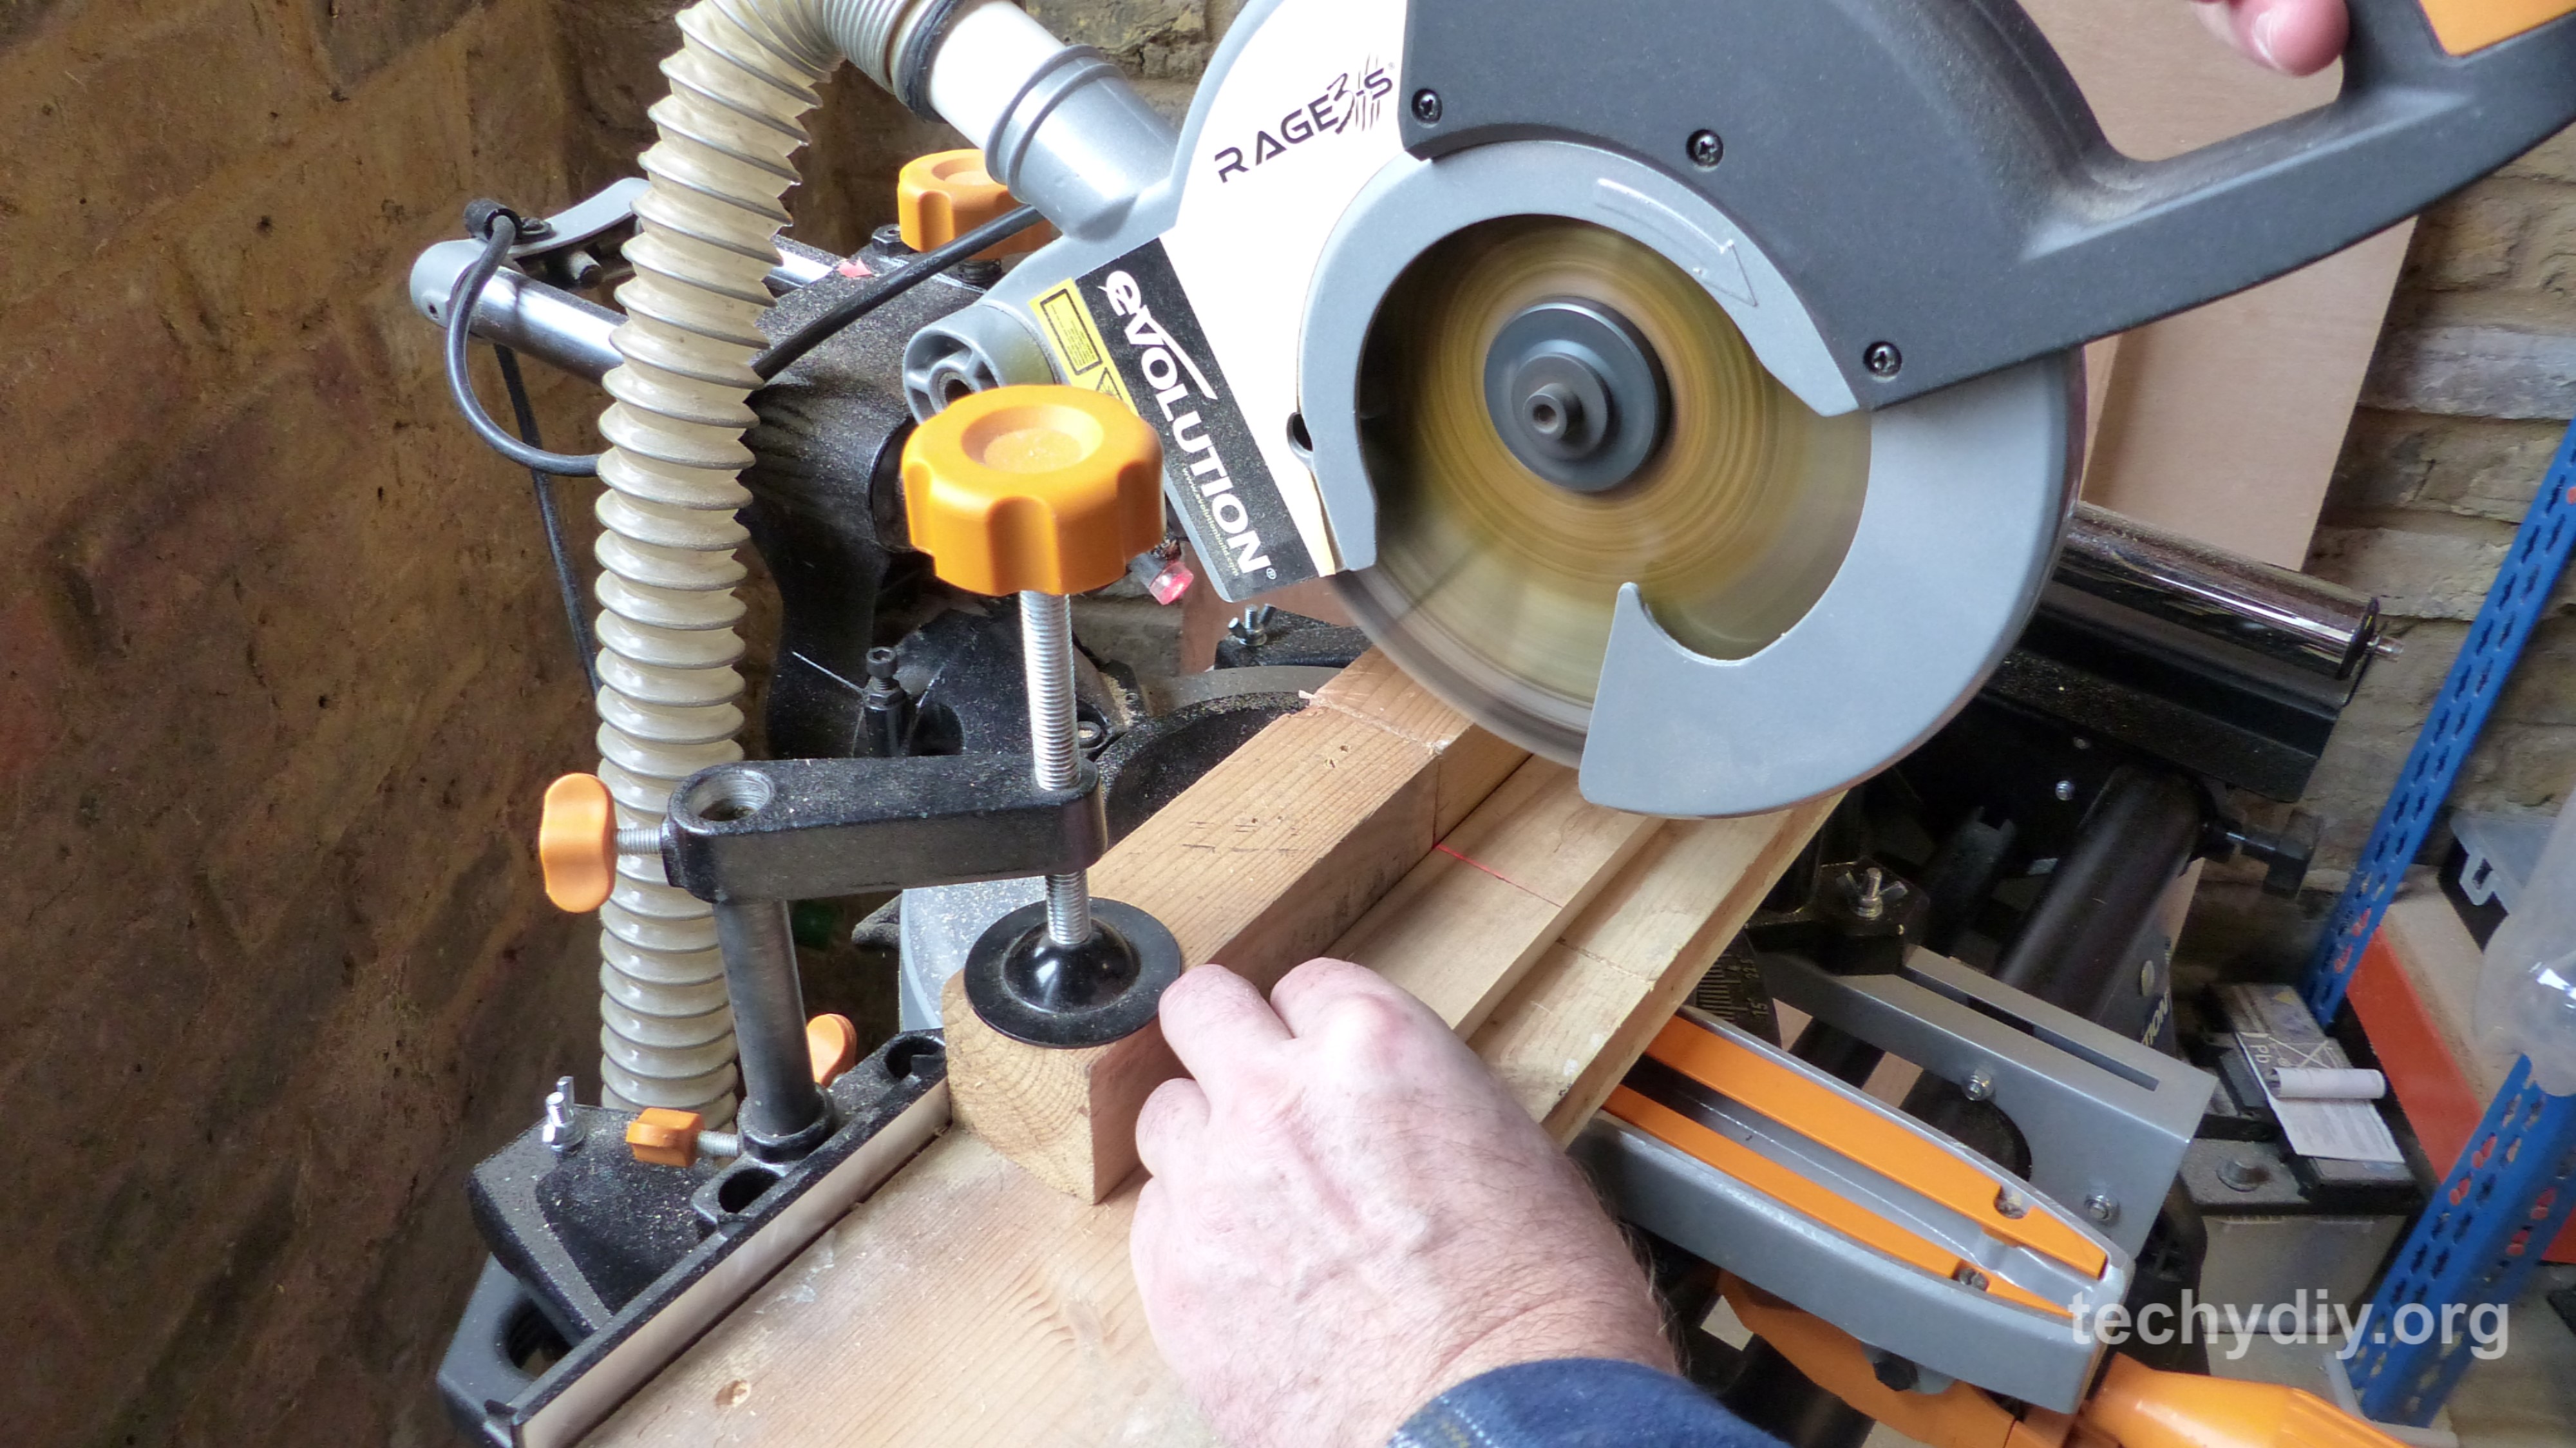
I set the table saw to 40mm and cut the wood to width.
Then I squared the end of the wood on the mitre saw.
I measured 90mm and then cut the wood to length with the mitre saw.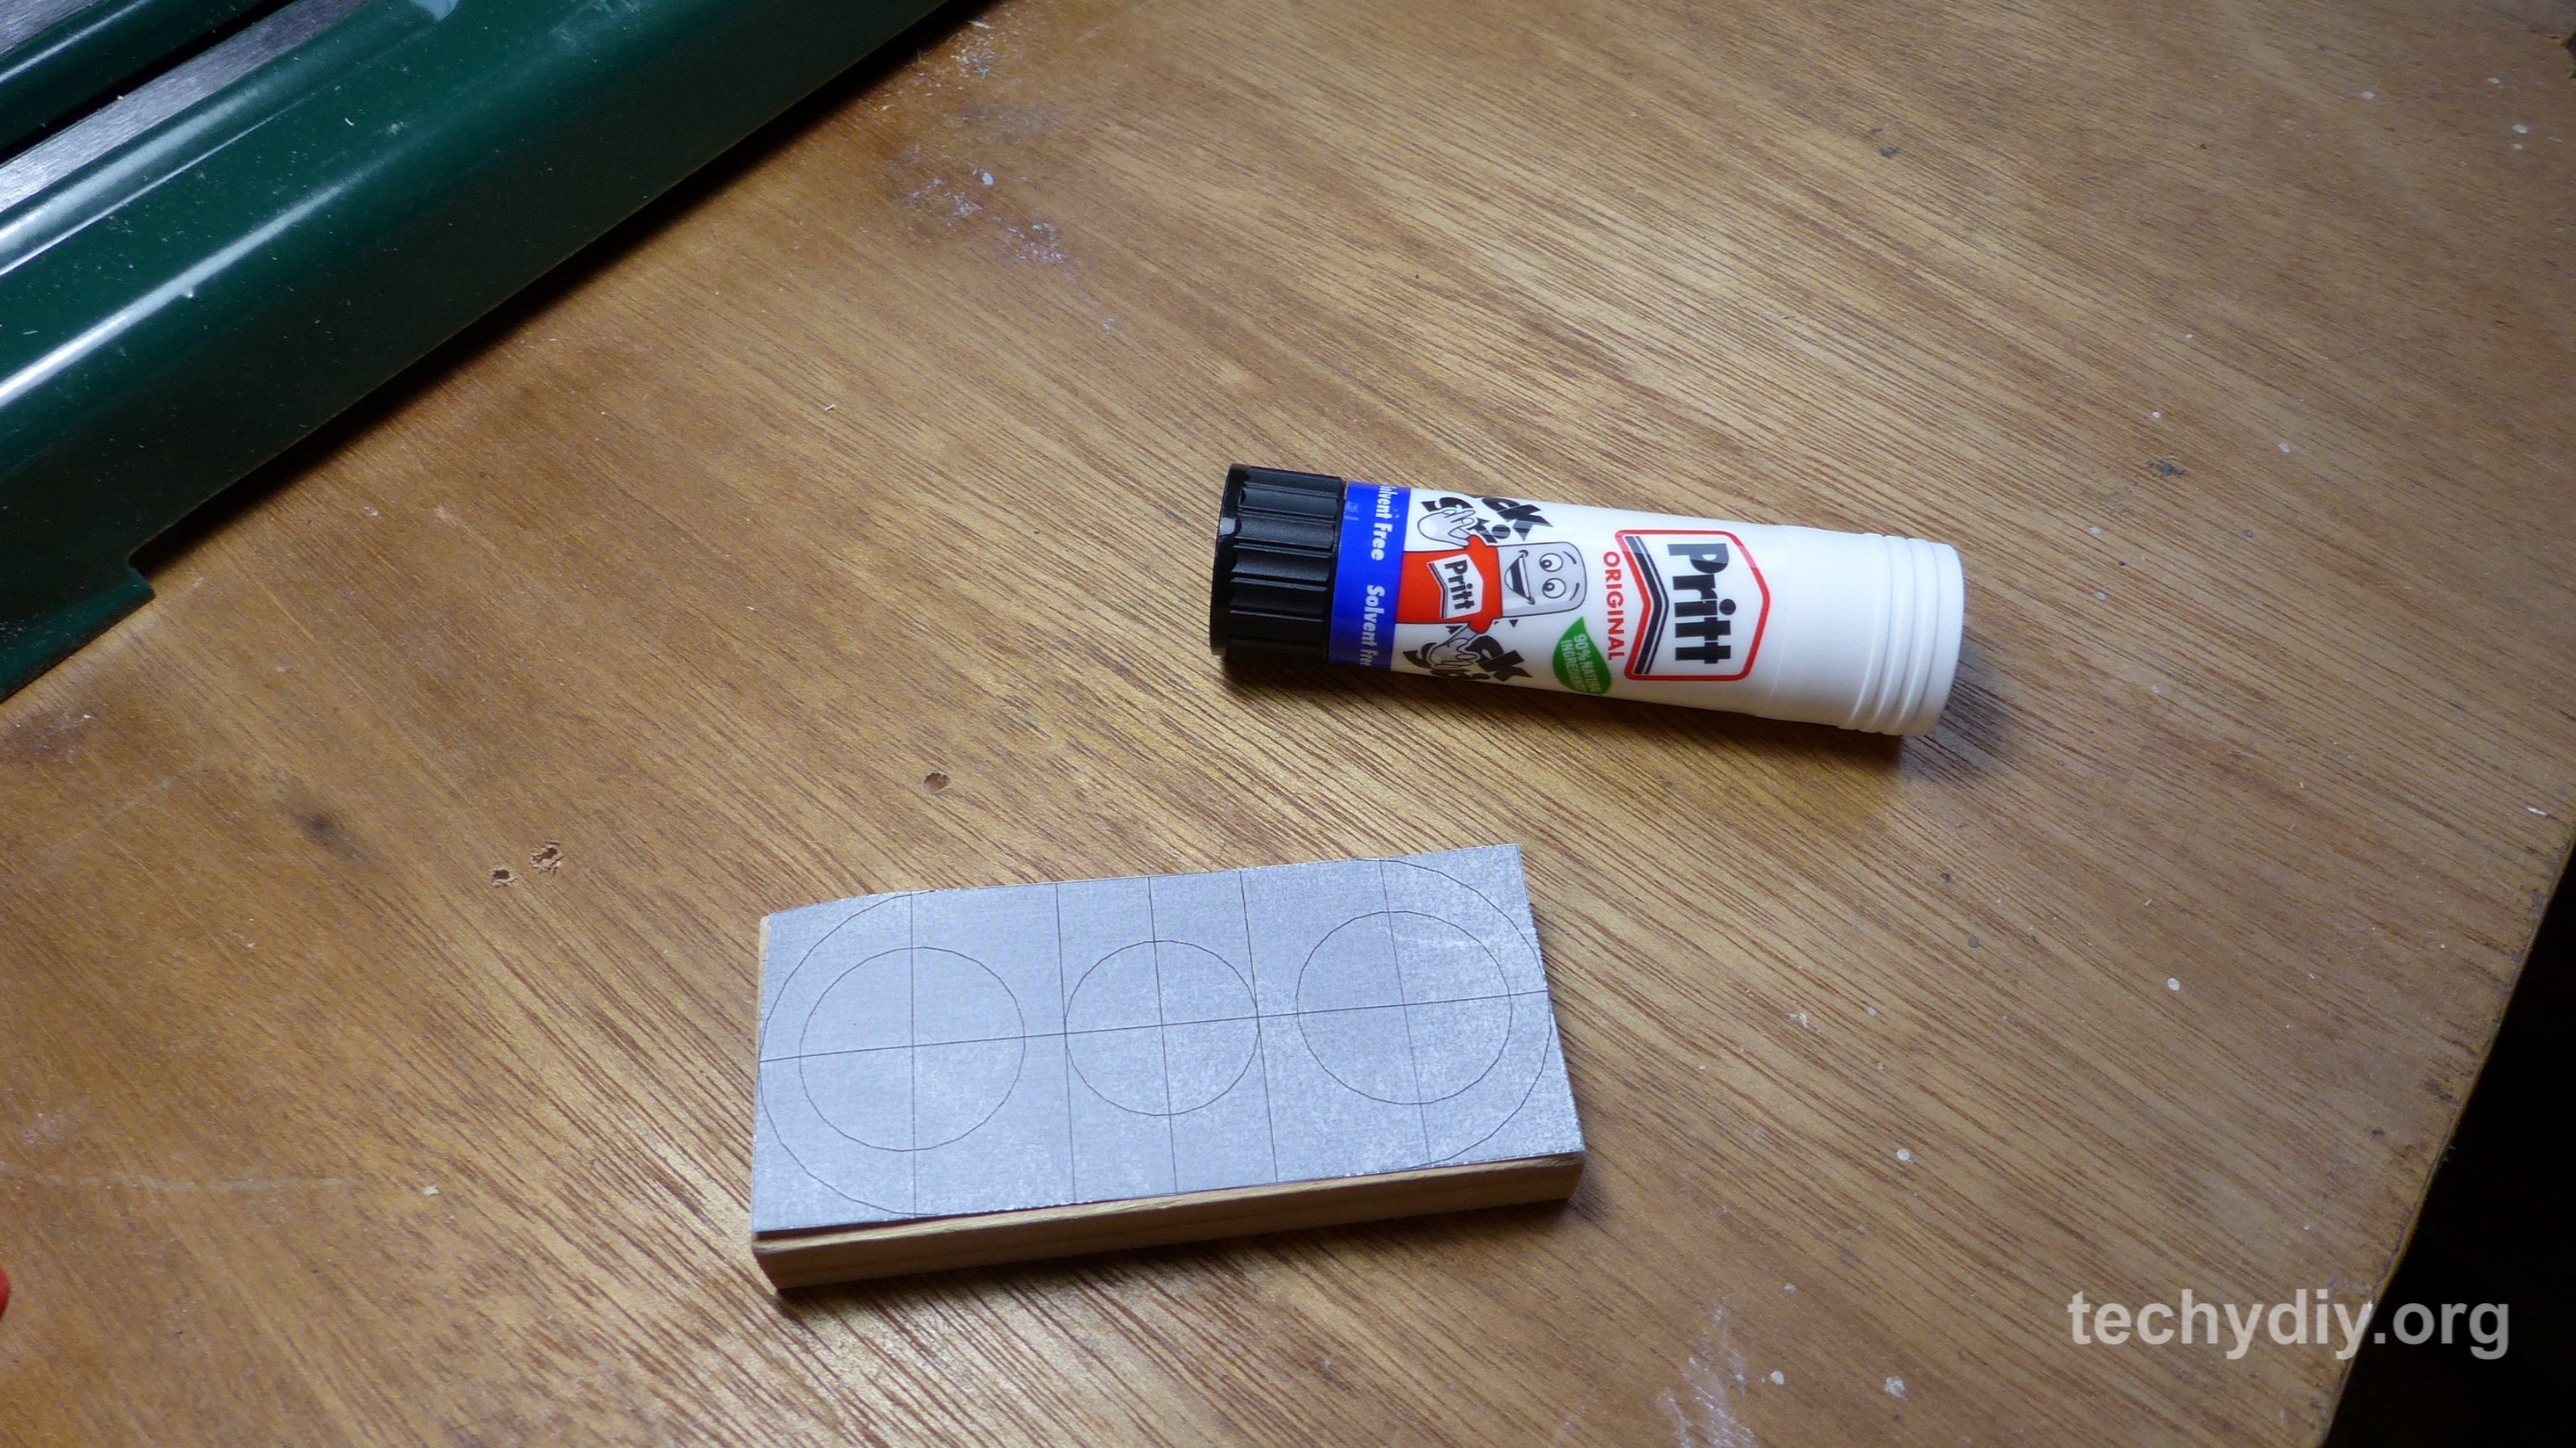

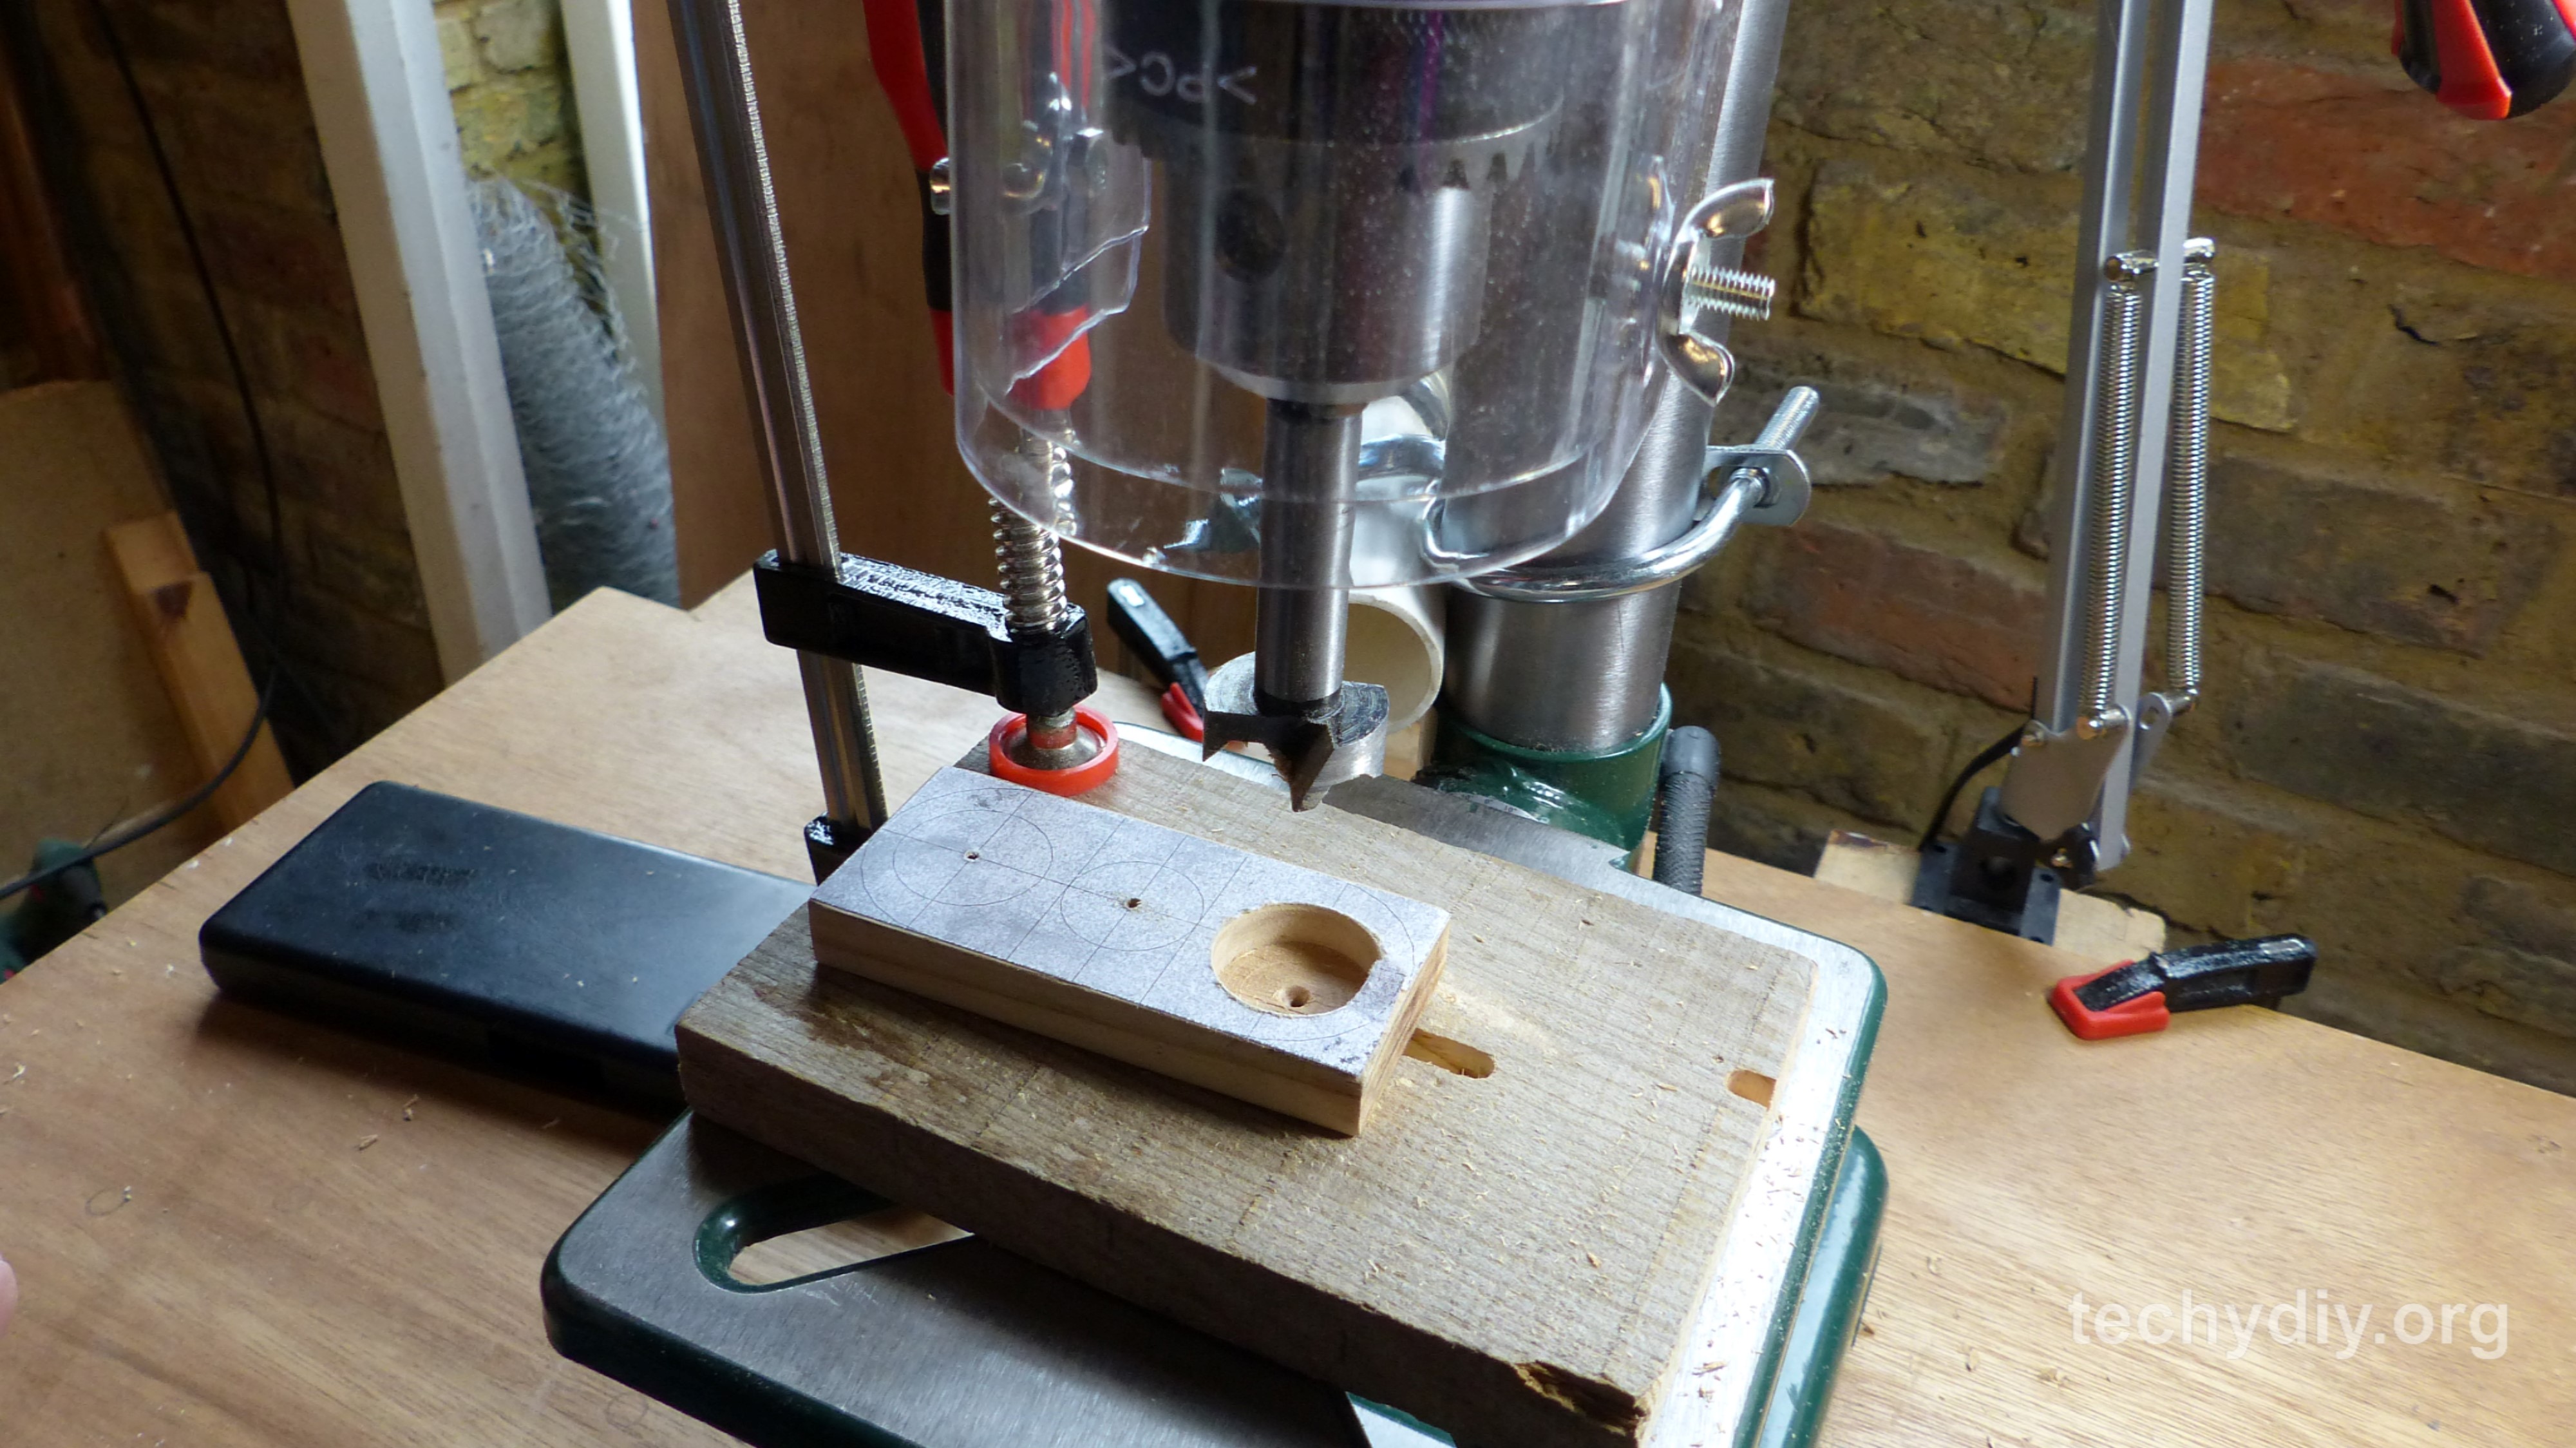
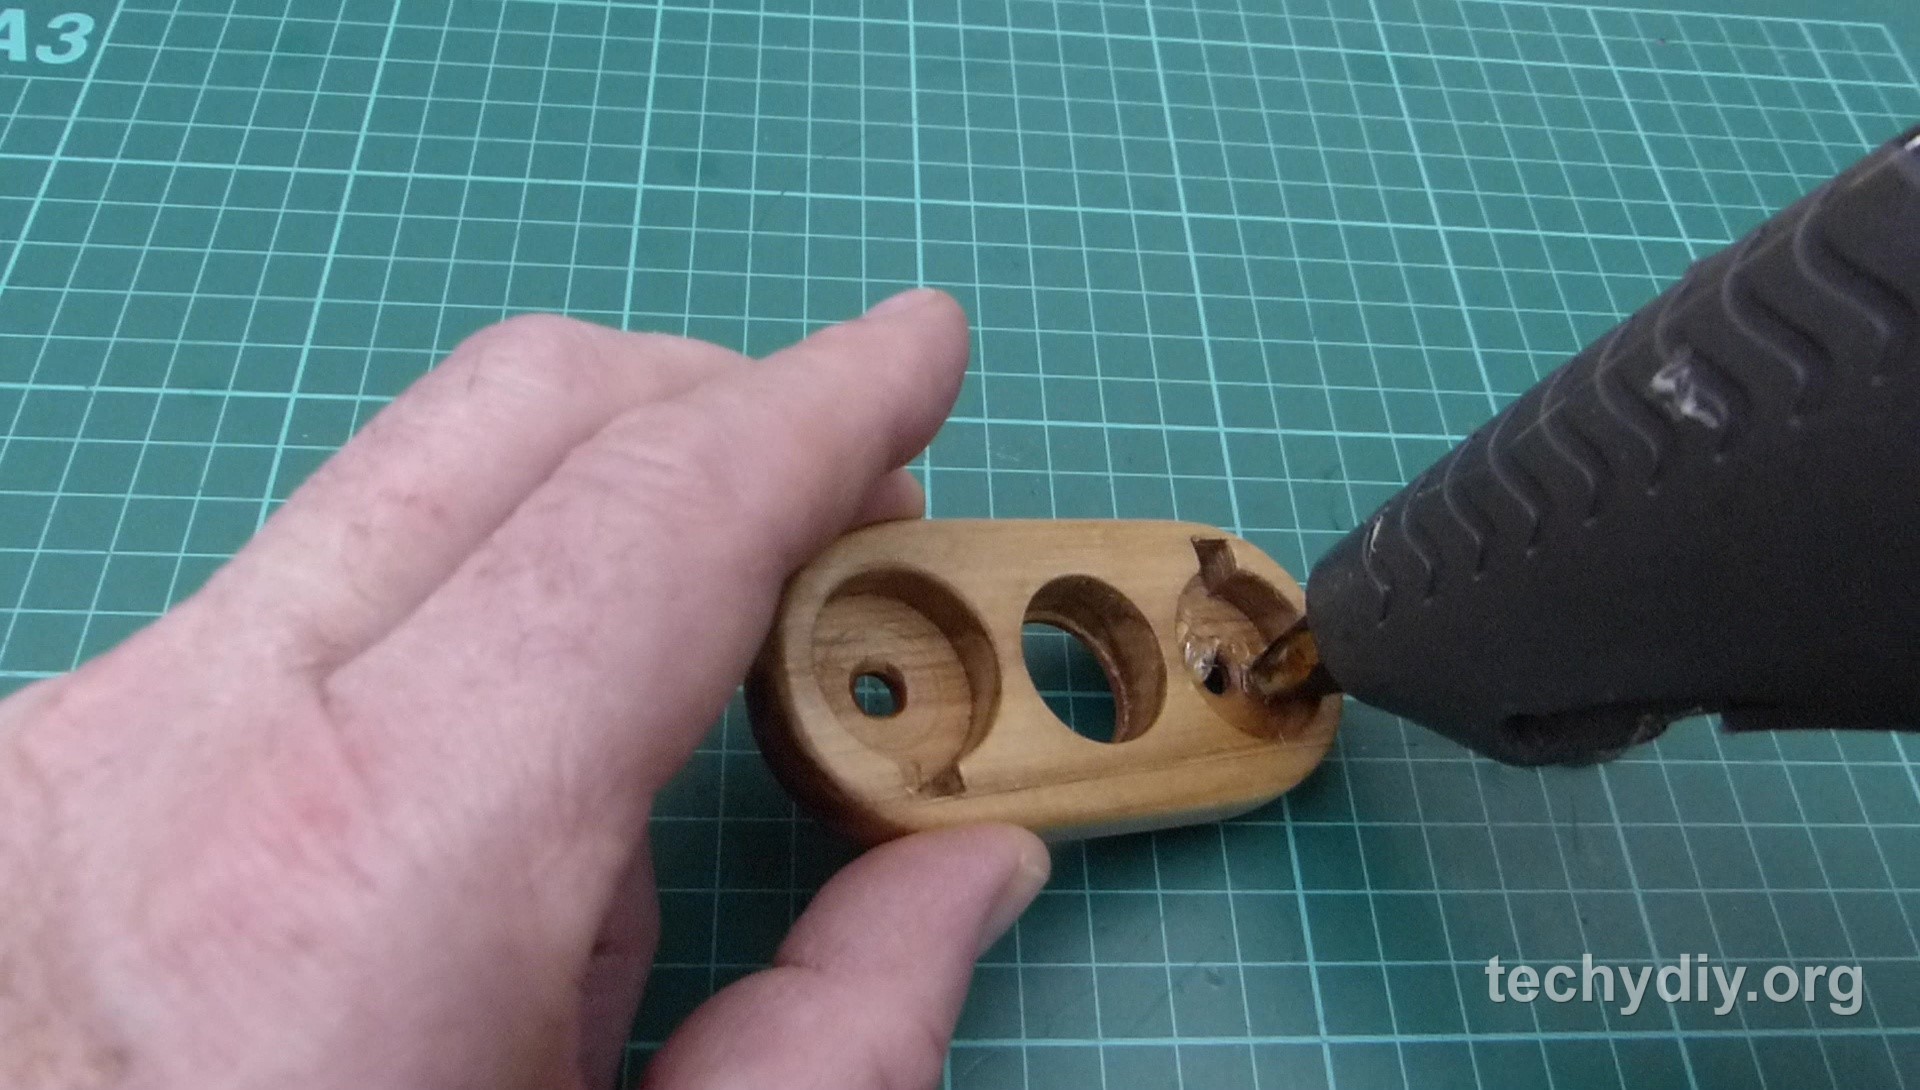
I glued the paper template onto the wood using a water-soluble glue stick, marked the centre of the three holes and then drilled pilot holes. Drill holes to house the battery holders
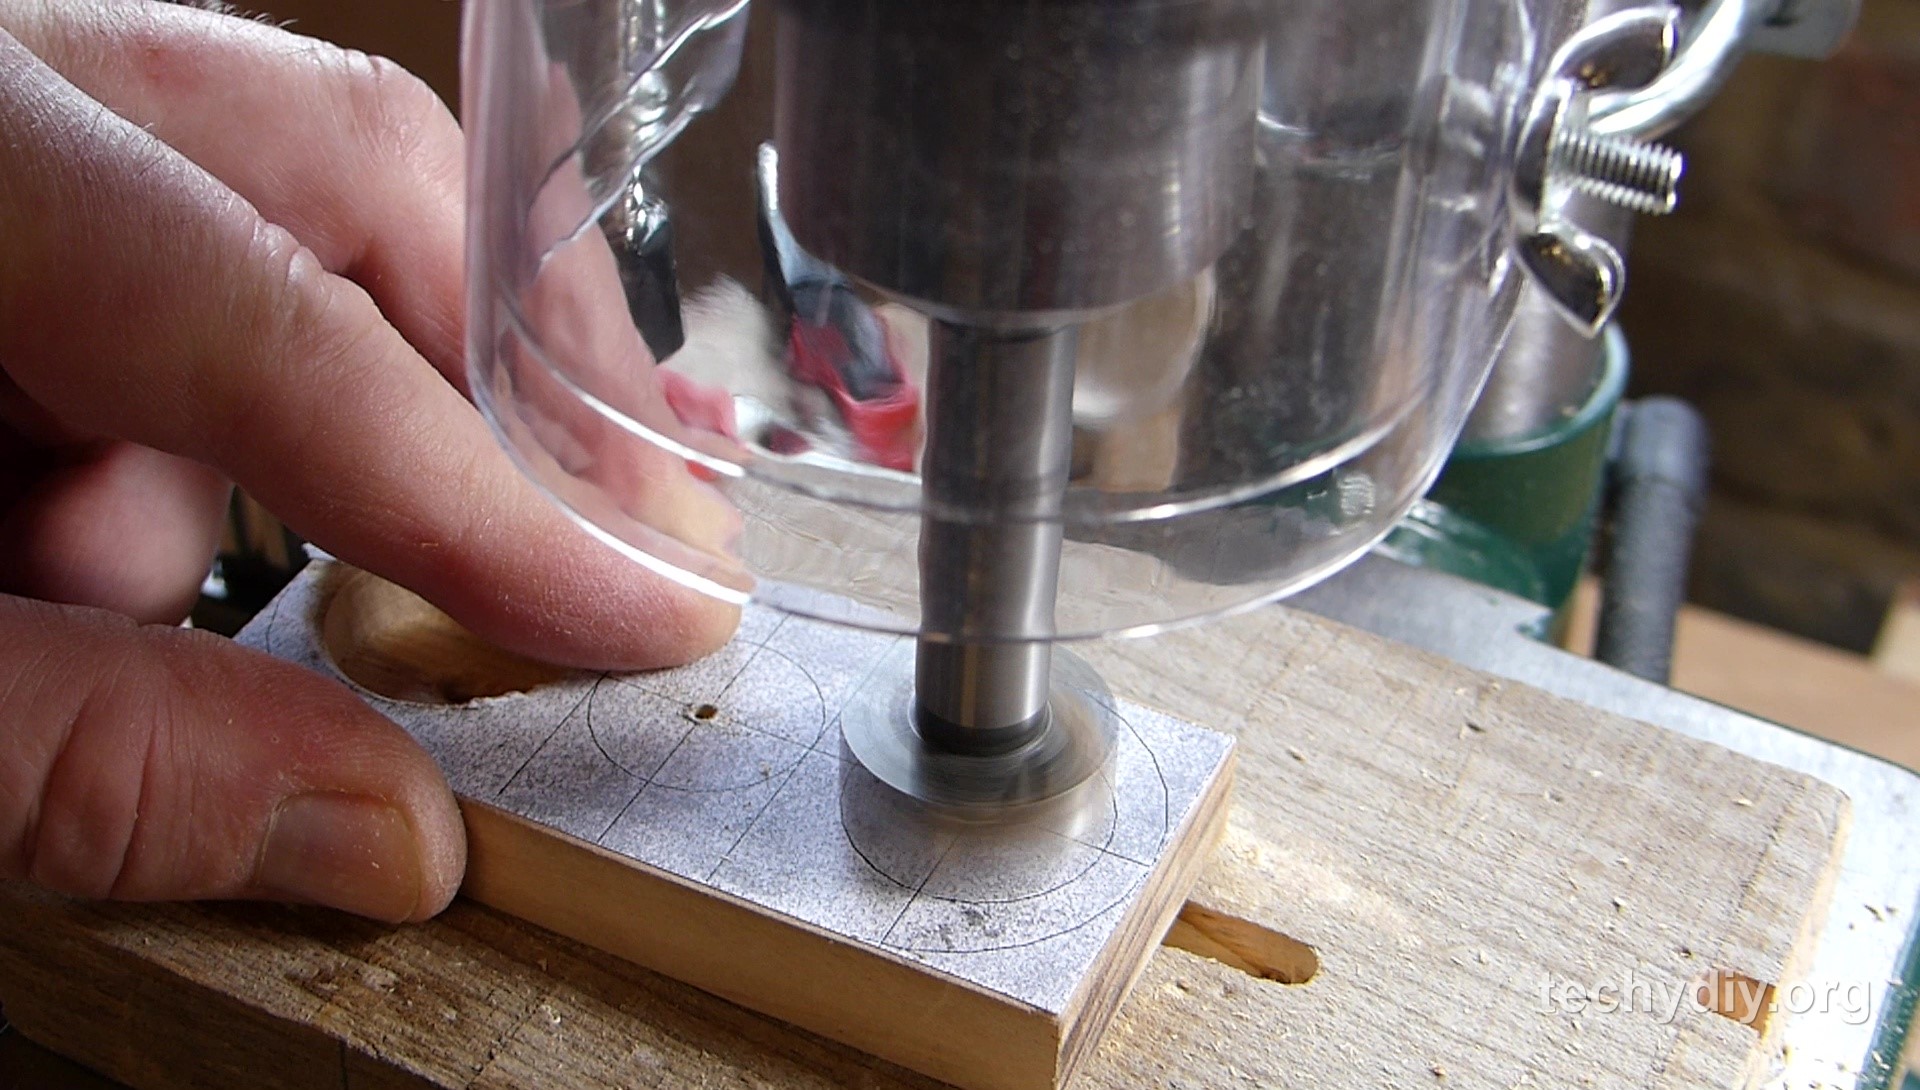
To cut the holes for the battery connectors, I used a 25mm diameter Forstner drill bit and then drilled down to a depth of 7.5mm.

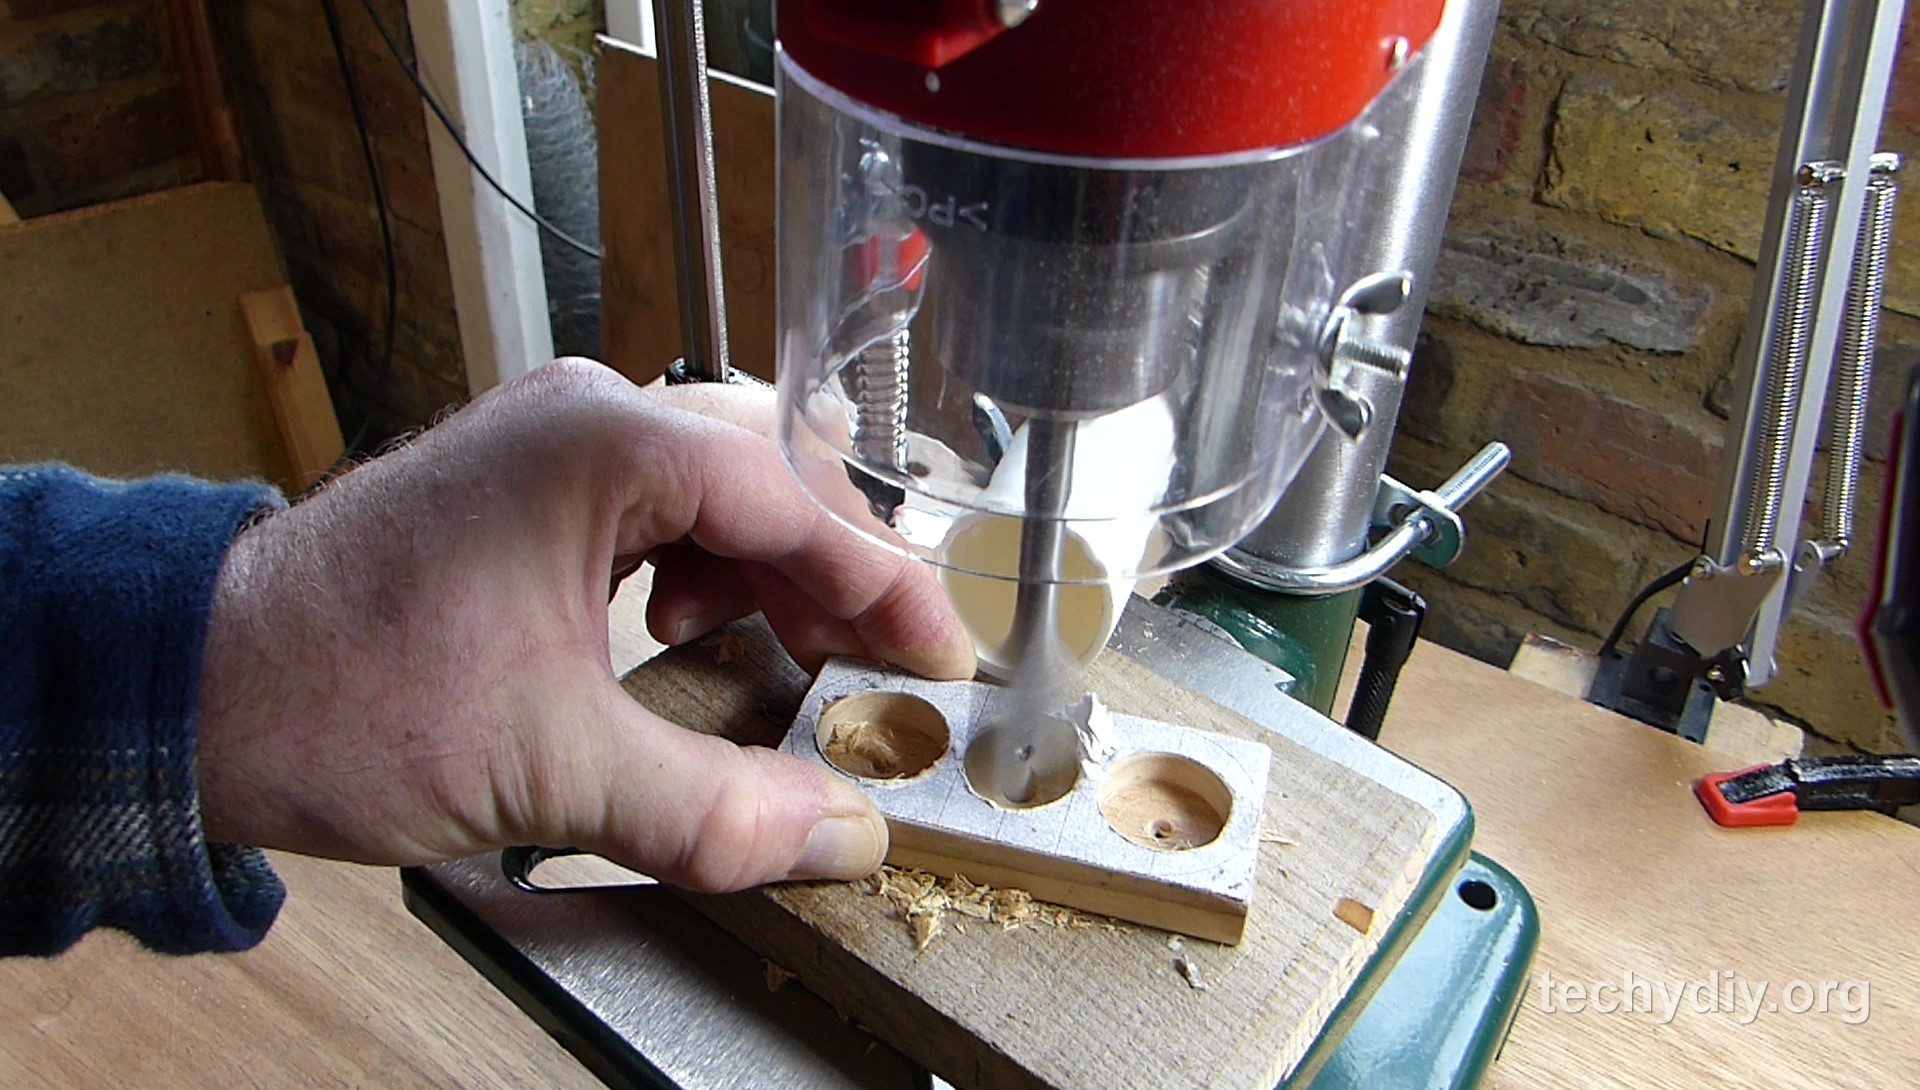
The battery holders that I used had an offset rectangular section, so I drew around one and then used a chisel to cut out the marked area.
Drill a hole for the bearing
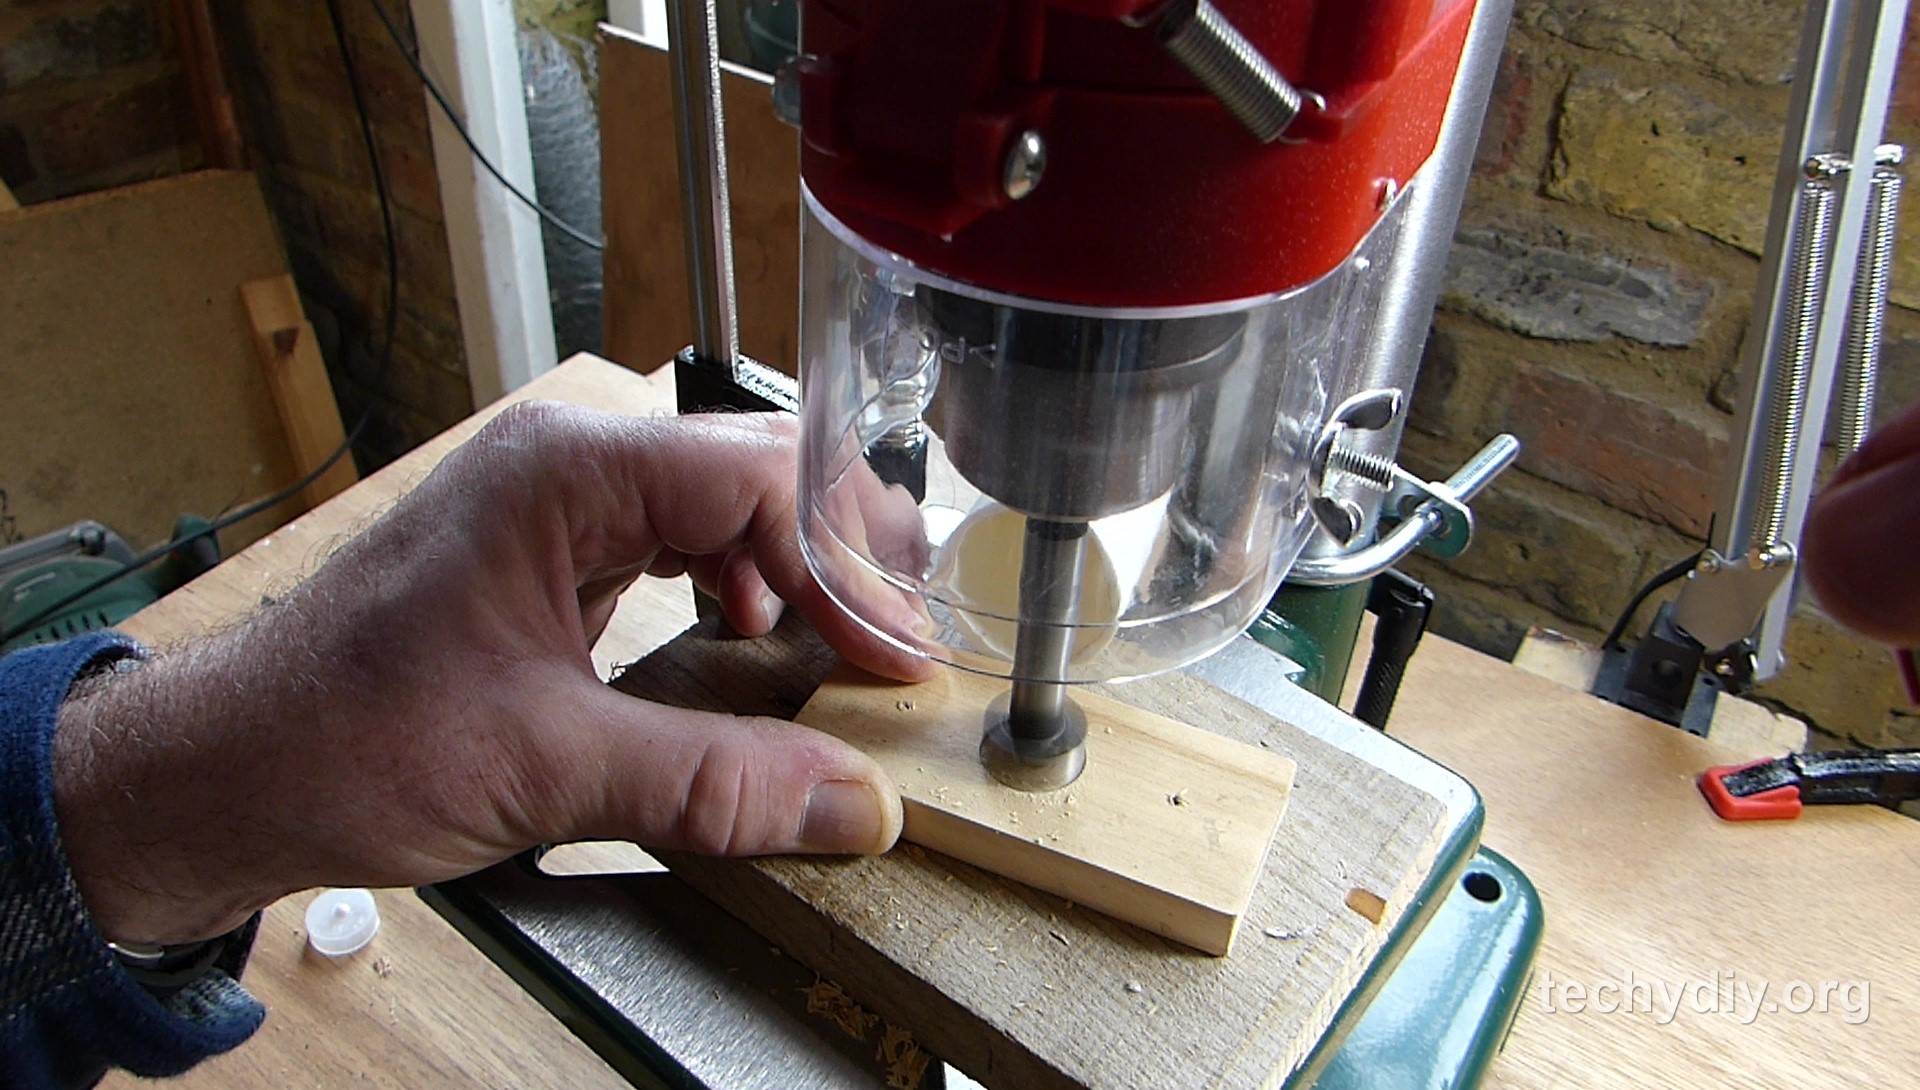
I used a 22mm diameter spade bit to cut the hole in the centre to accept the bearing, but didn’t cut all the way through the wood; instead, I stopped a couple of mm short.
Then from the rear, I cut a 20mm diameter hole, which left a ledge for the bearing to sit against.
Drill holes for the leds
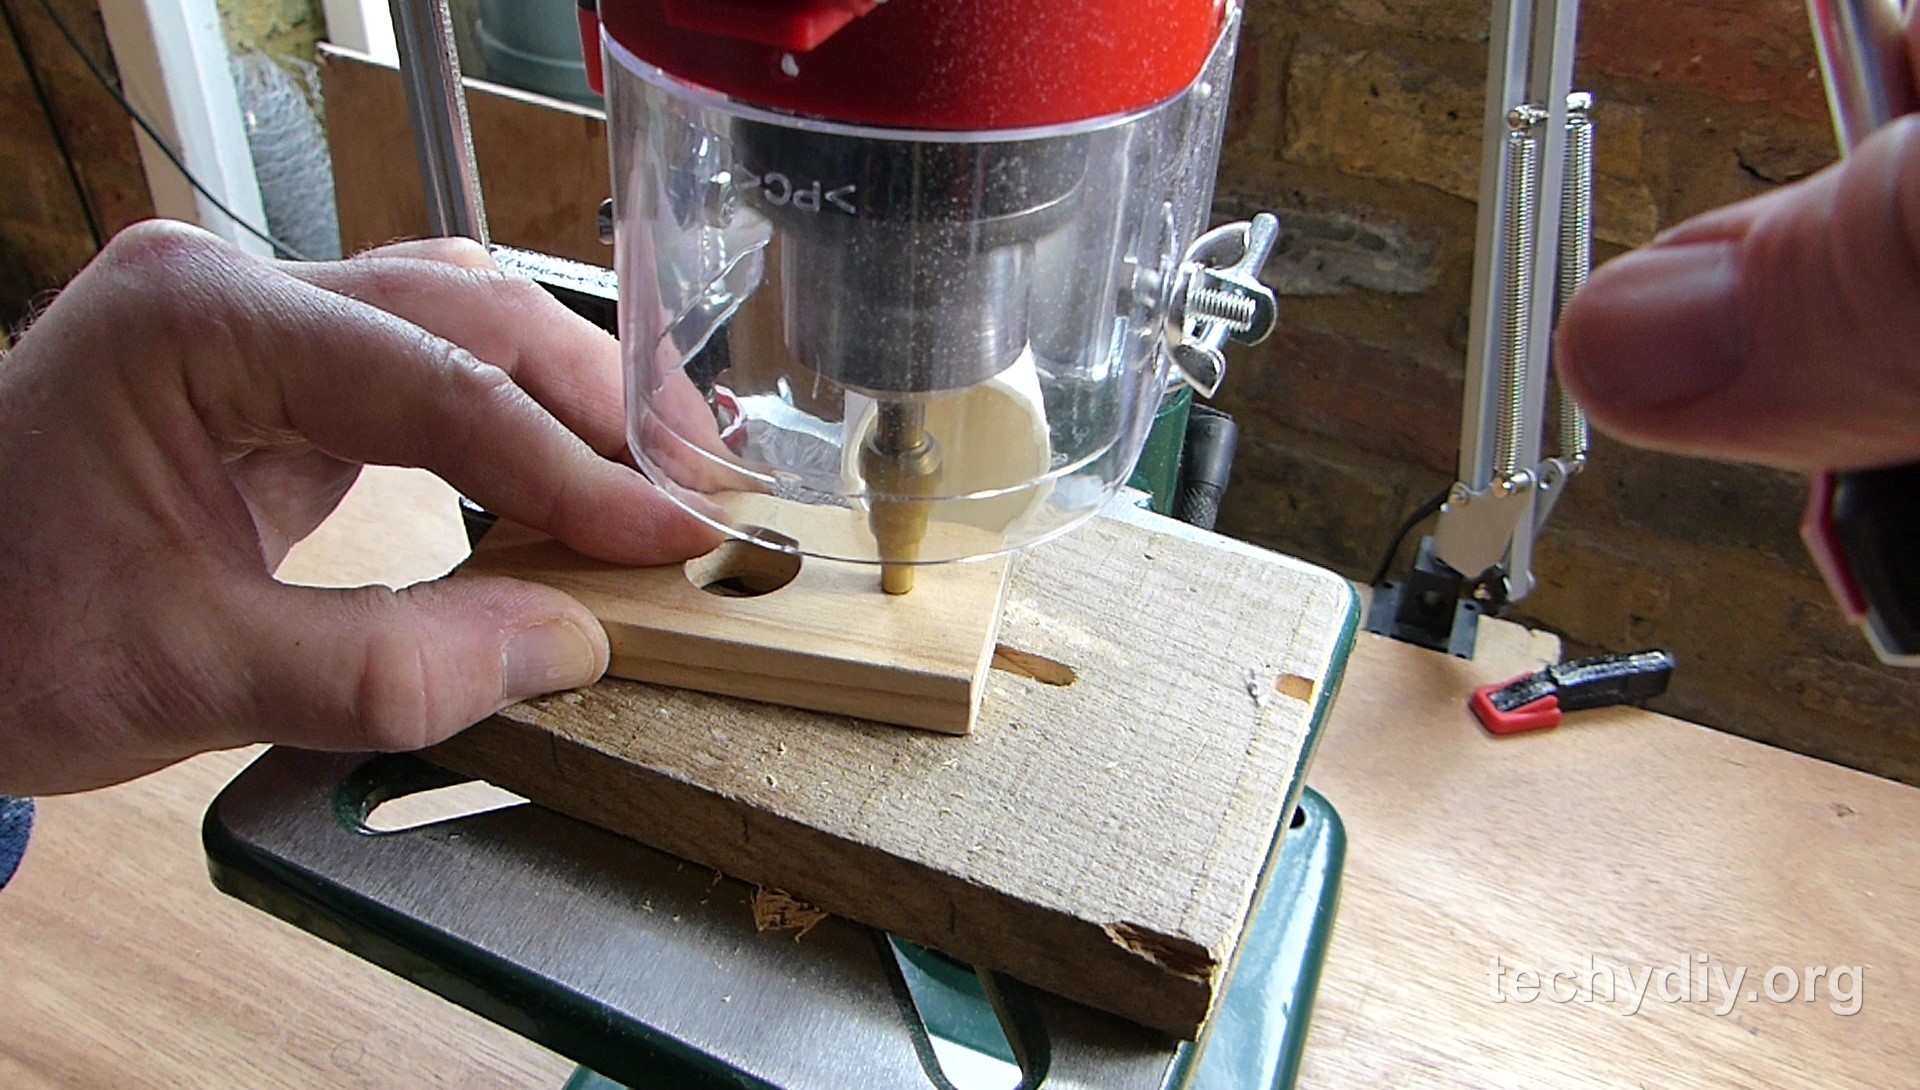 Using a step drill bit, I drilled 6mm diameter holes to accommodate the leds and then finished the holes with a countersink drill bit.
Cut out the spinner shape
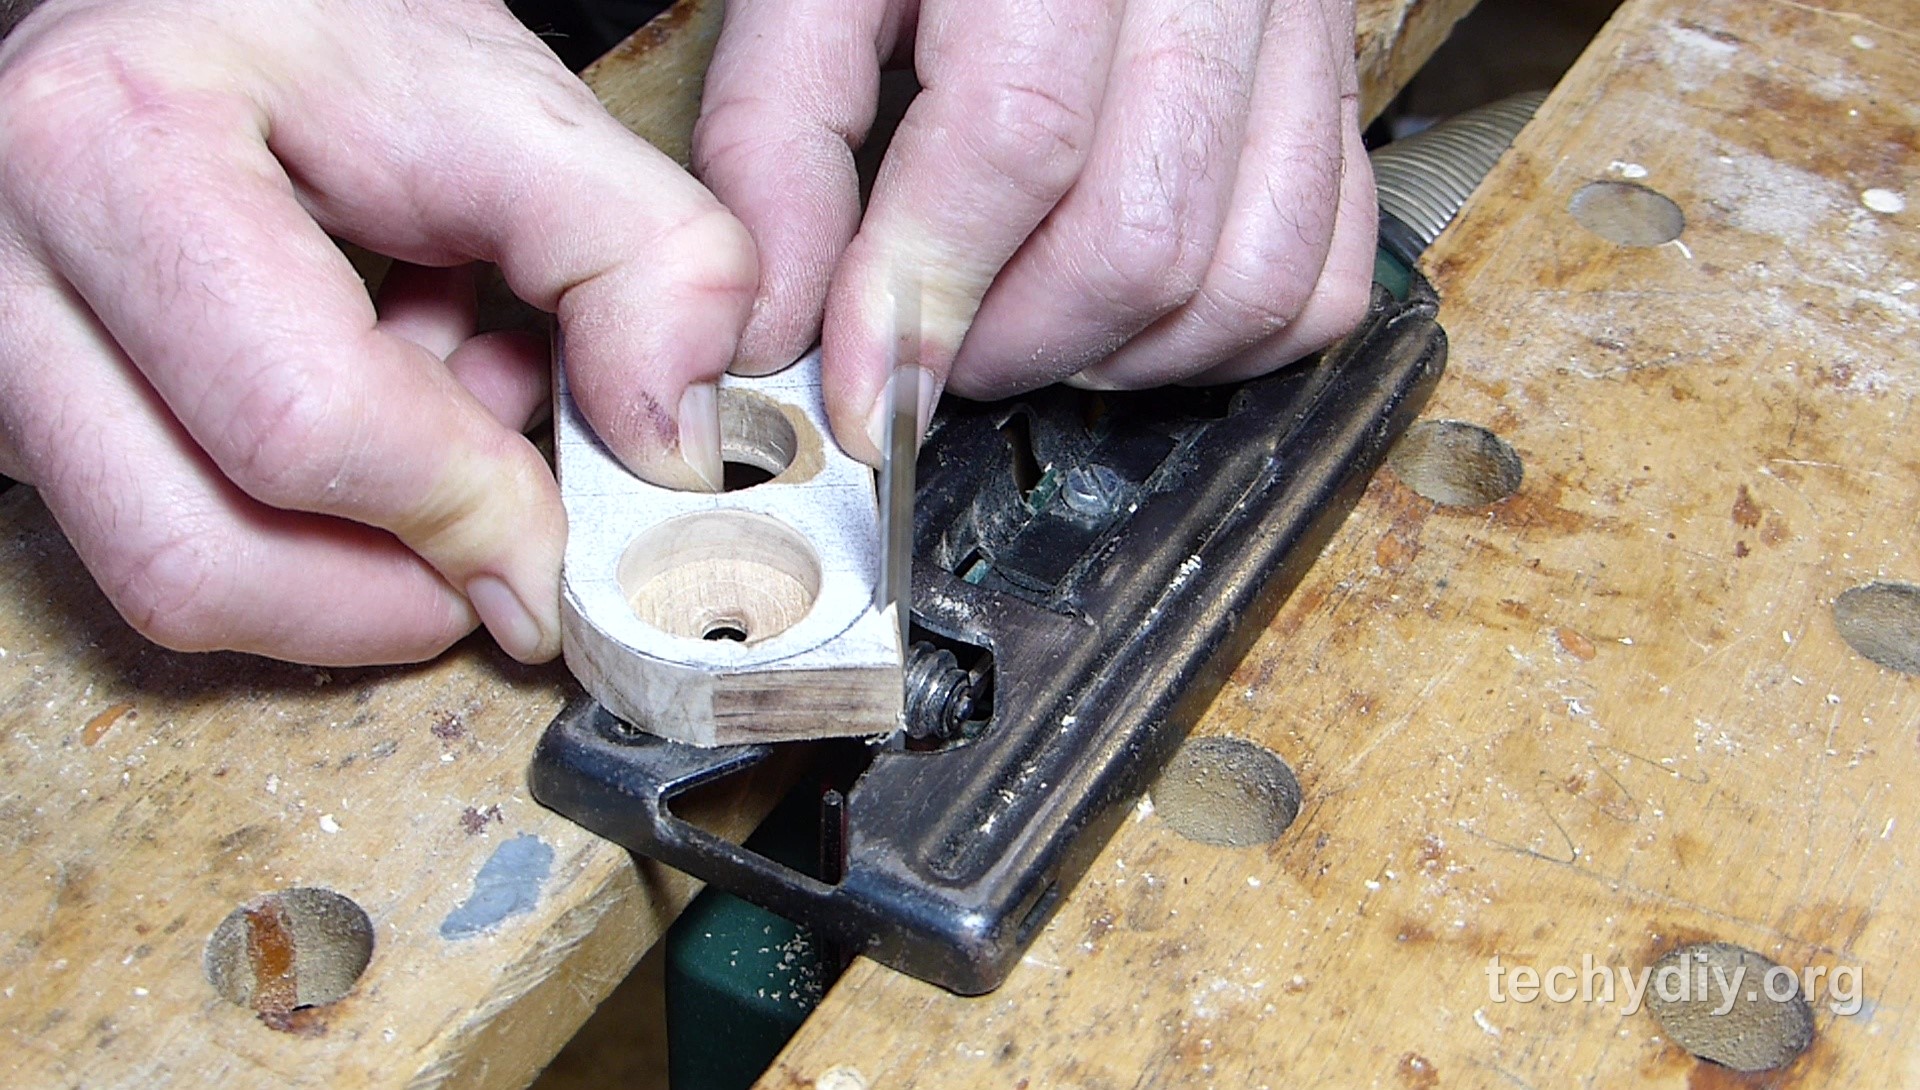
To cut out the spinner shape I used an inverted jigsaw.
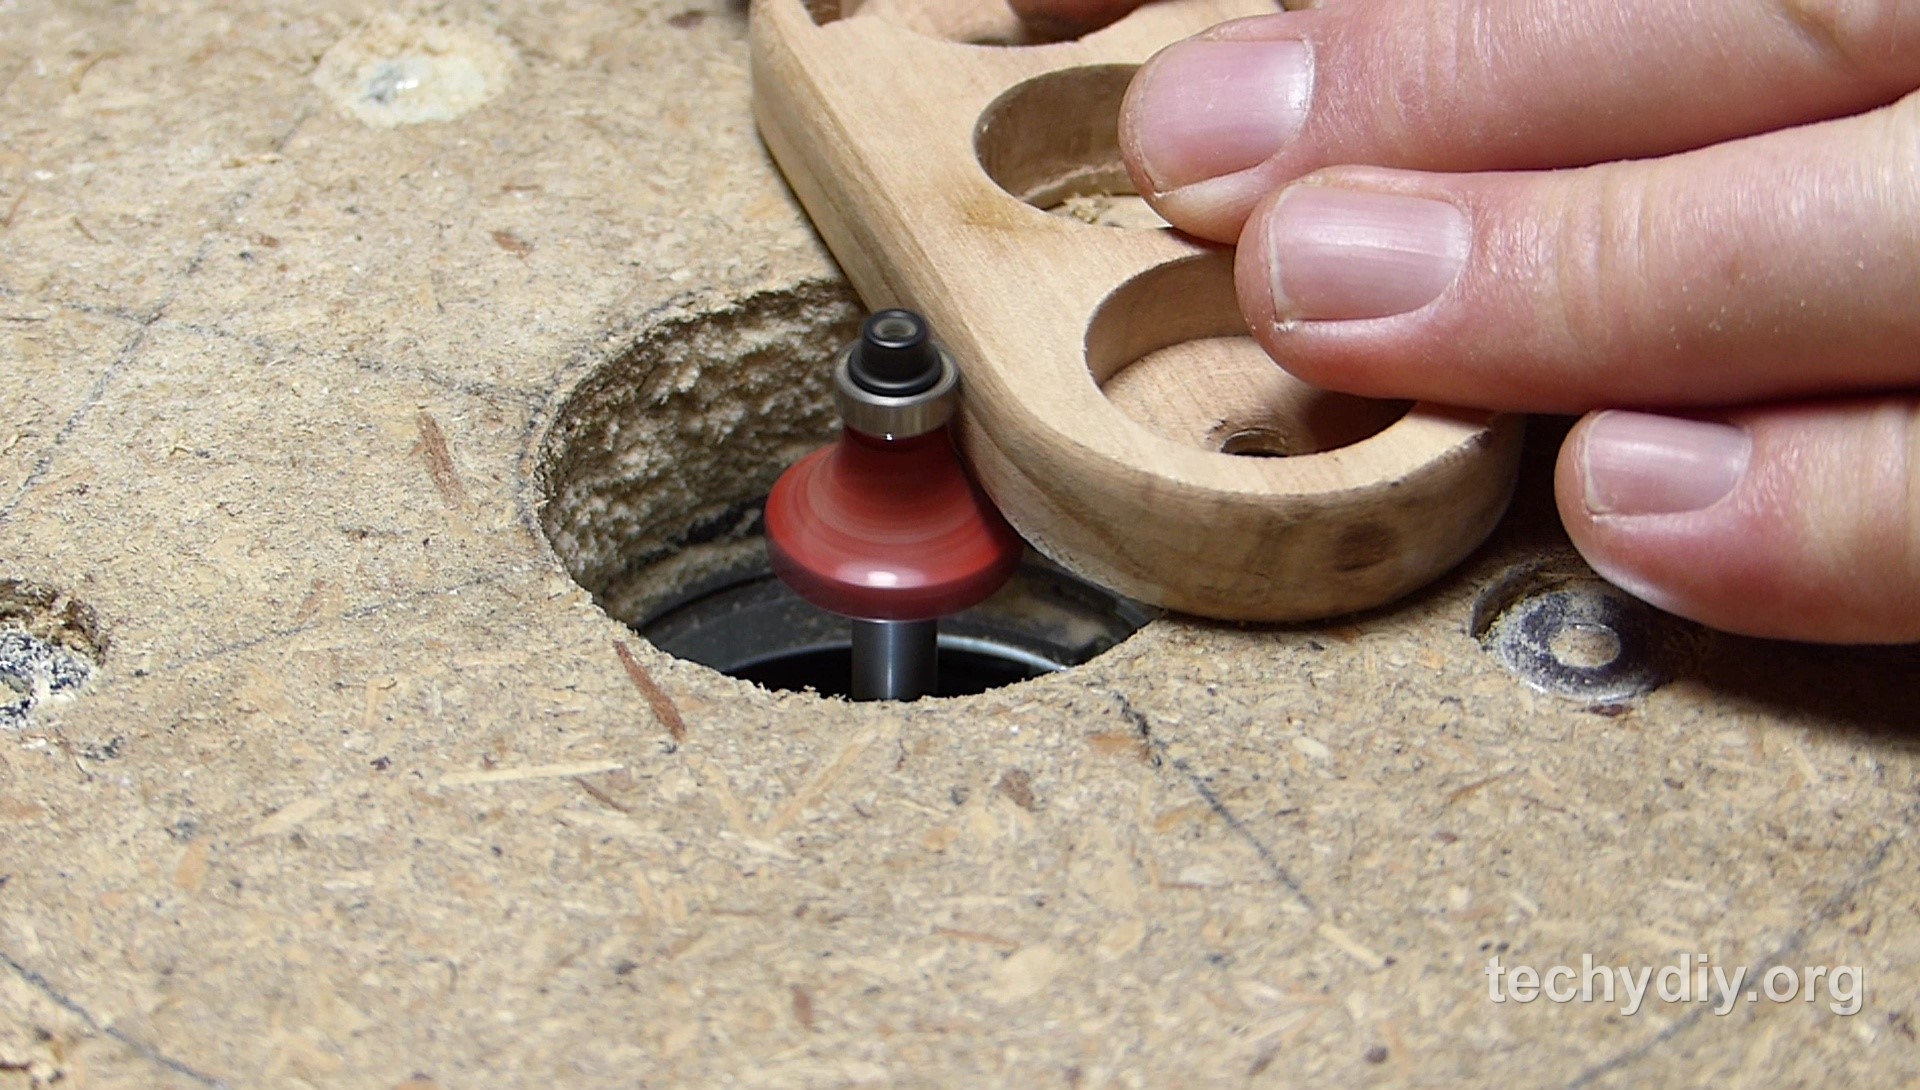
I removed the paper template and then rounded the edges using a round over bit, installed in the router table.
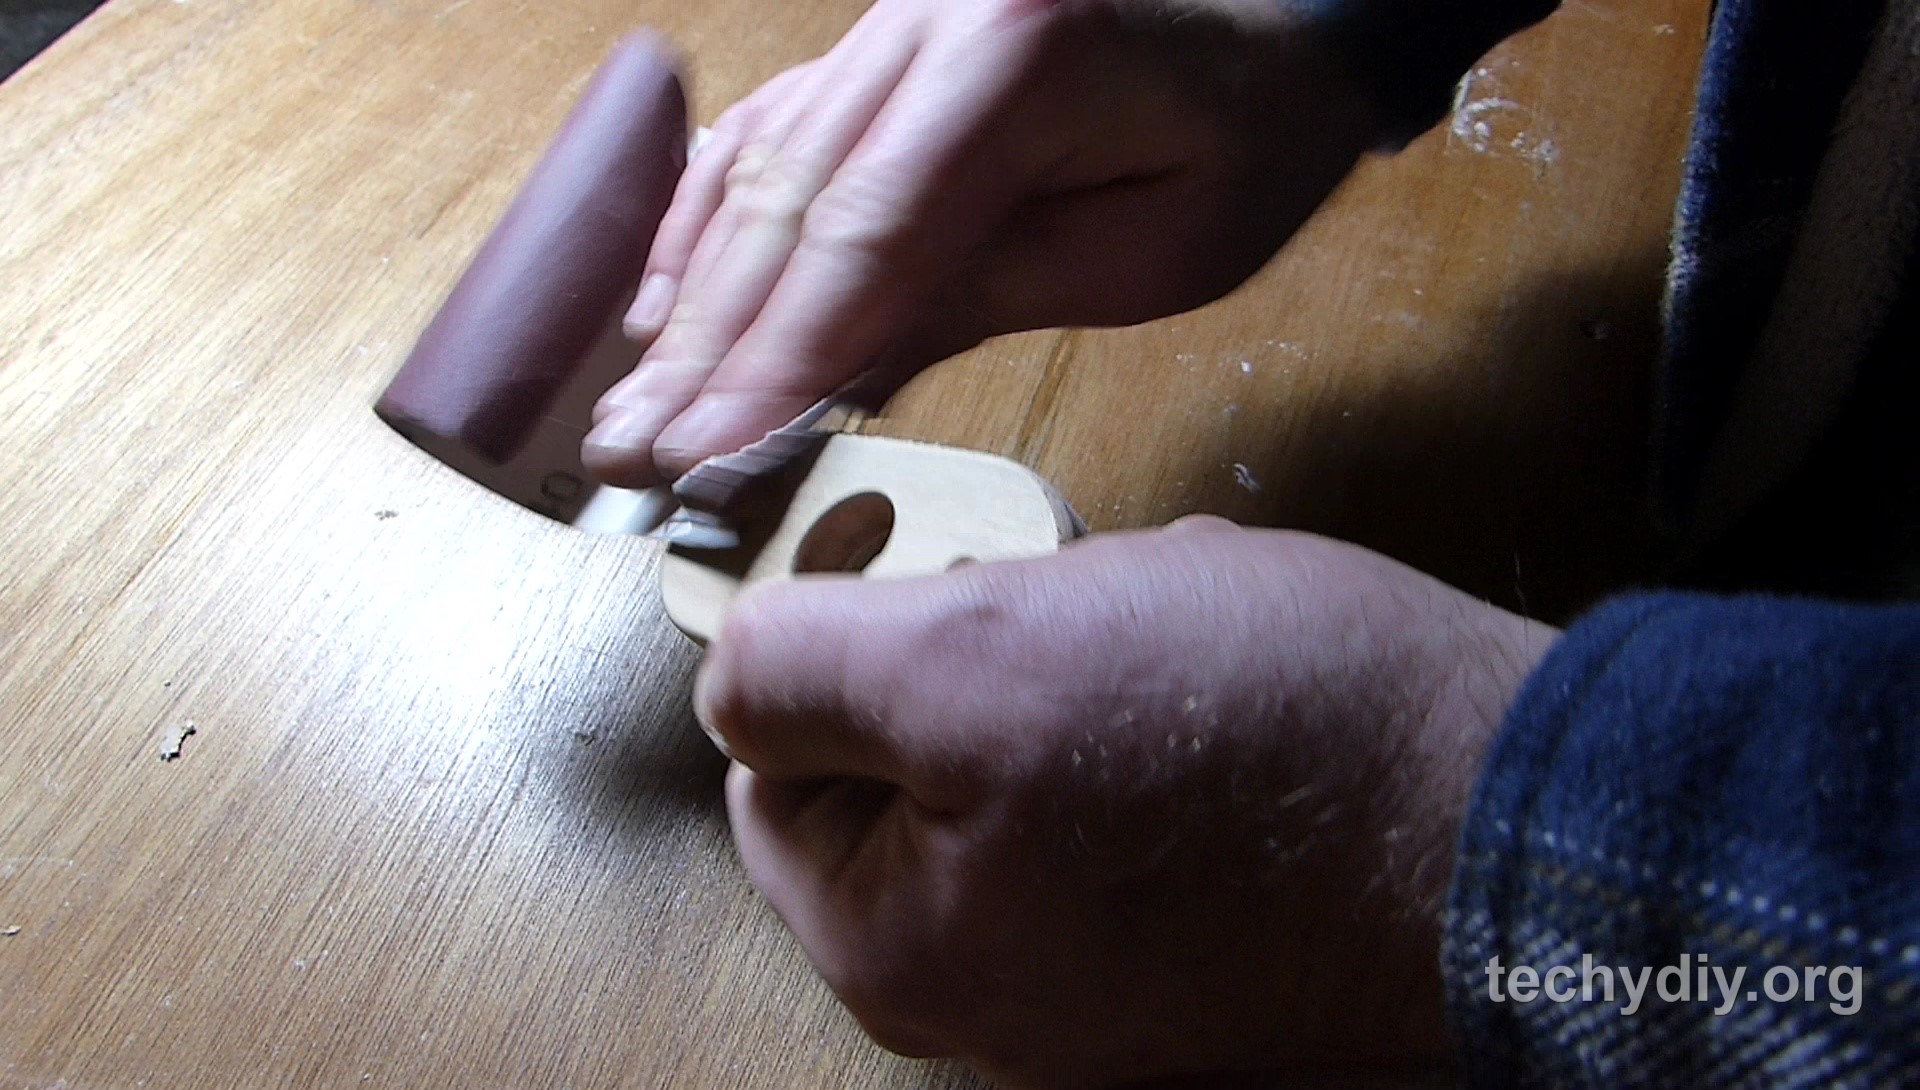
The wood was then sanded until smooth.
Lacquer the wood
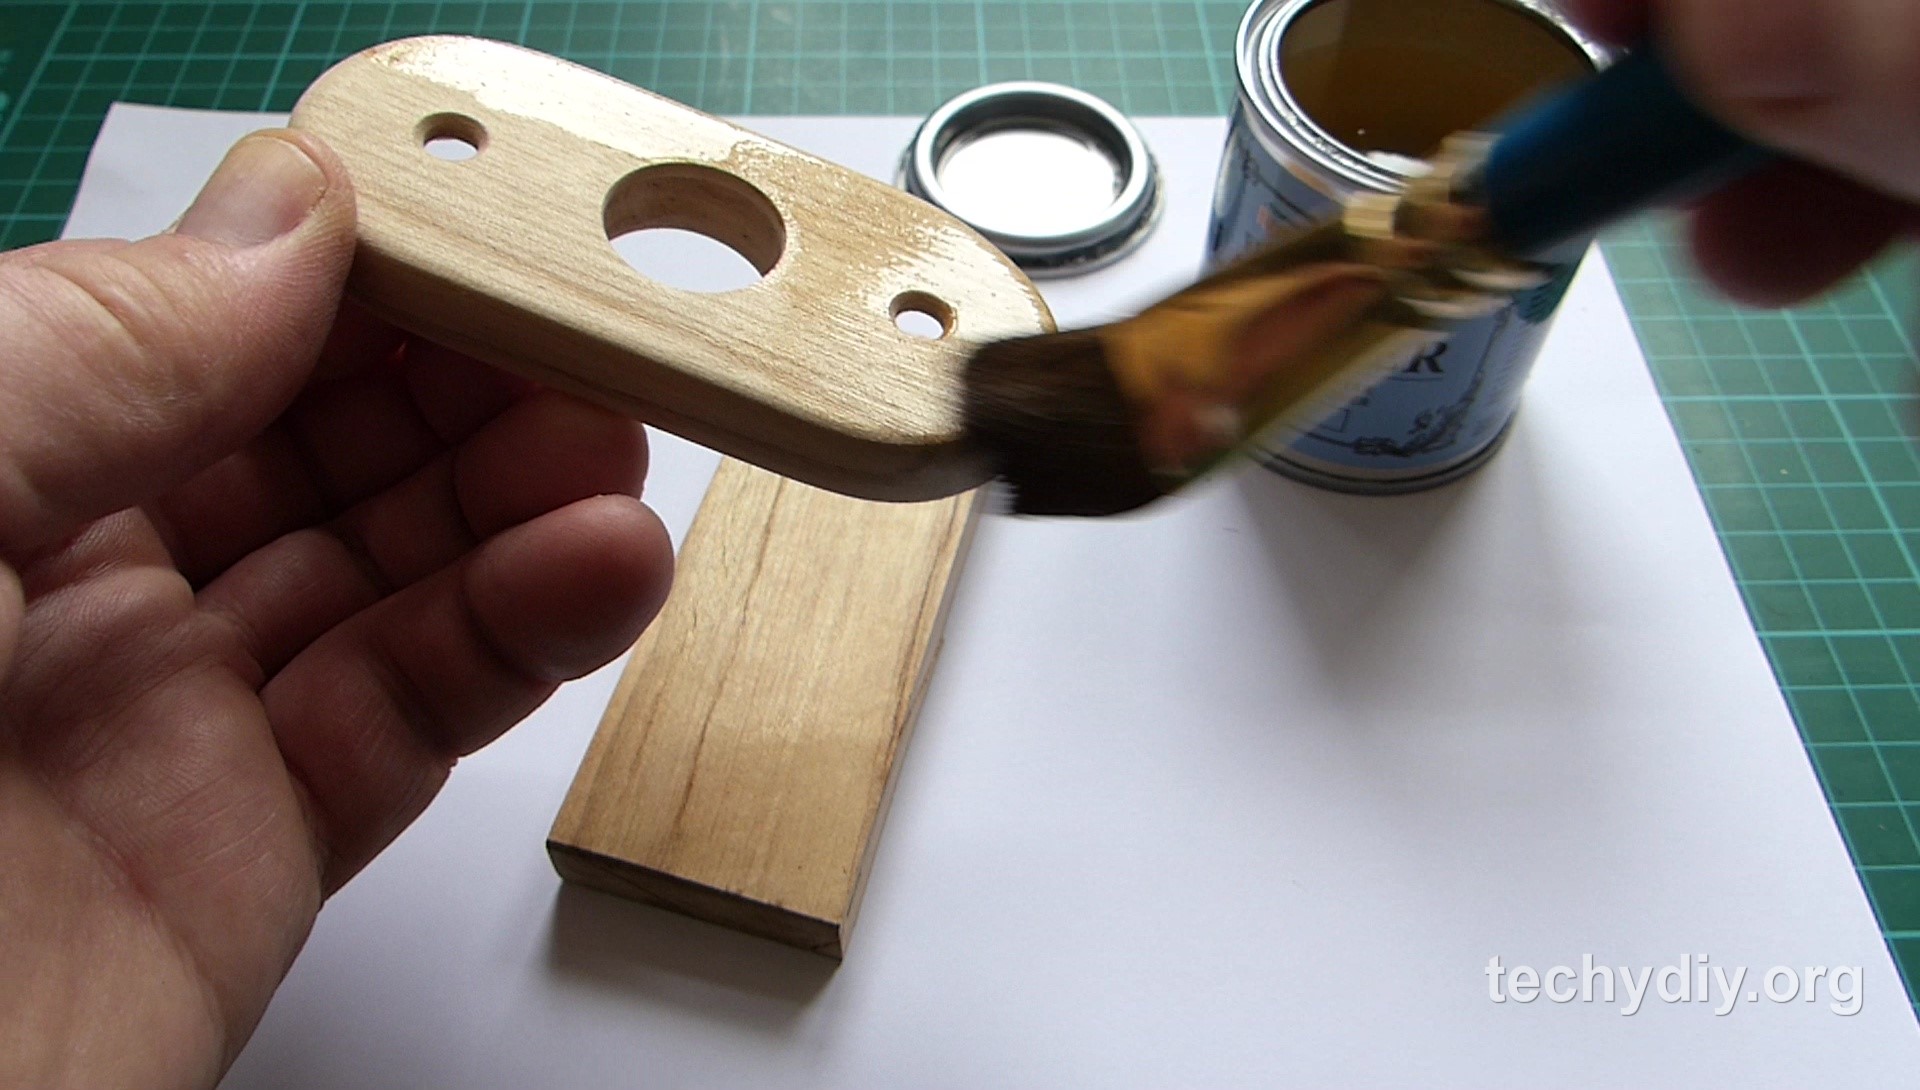
The wood was finished with a couple of coats of lacquer.
Solder the leds to the battery holders
The next task was to solder the leds to the battery holders.
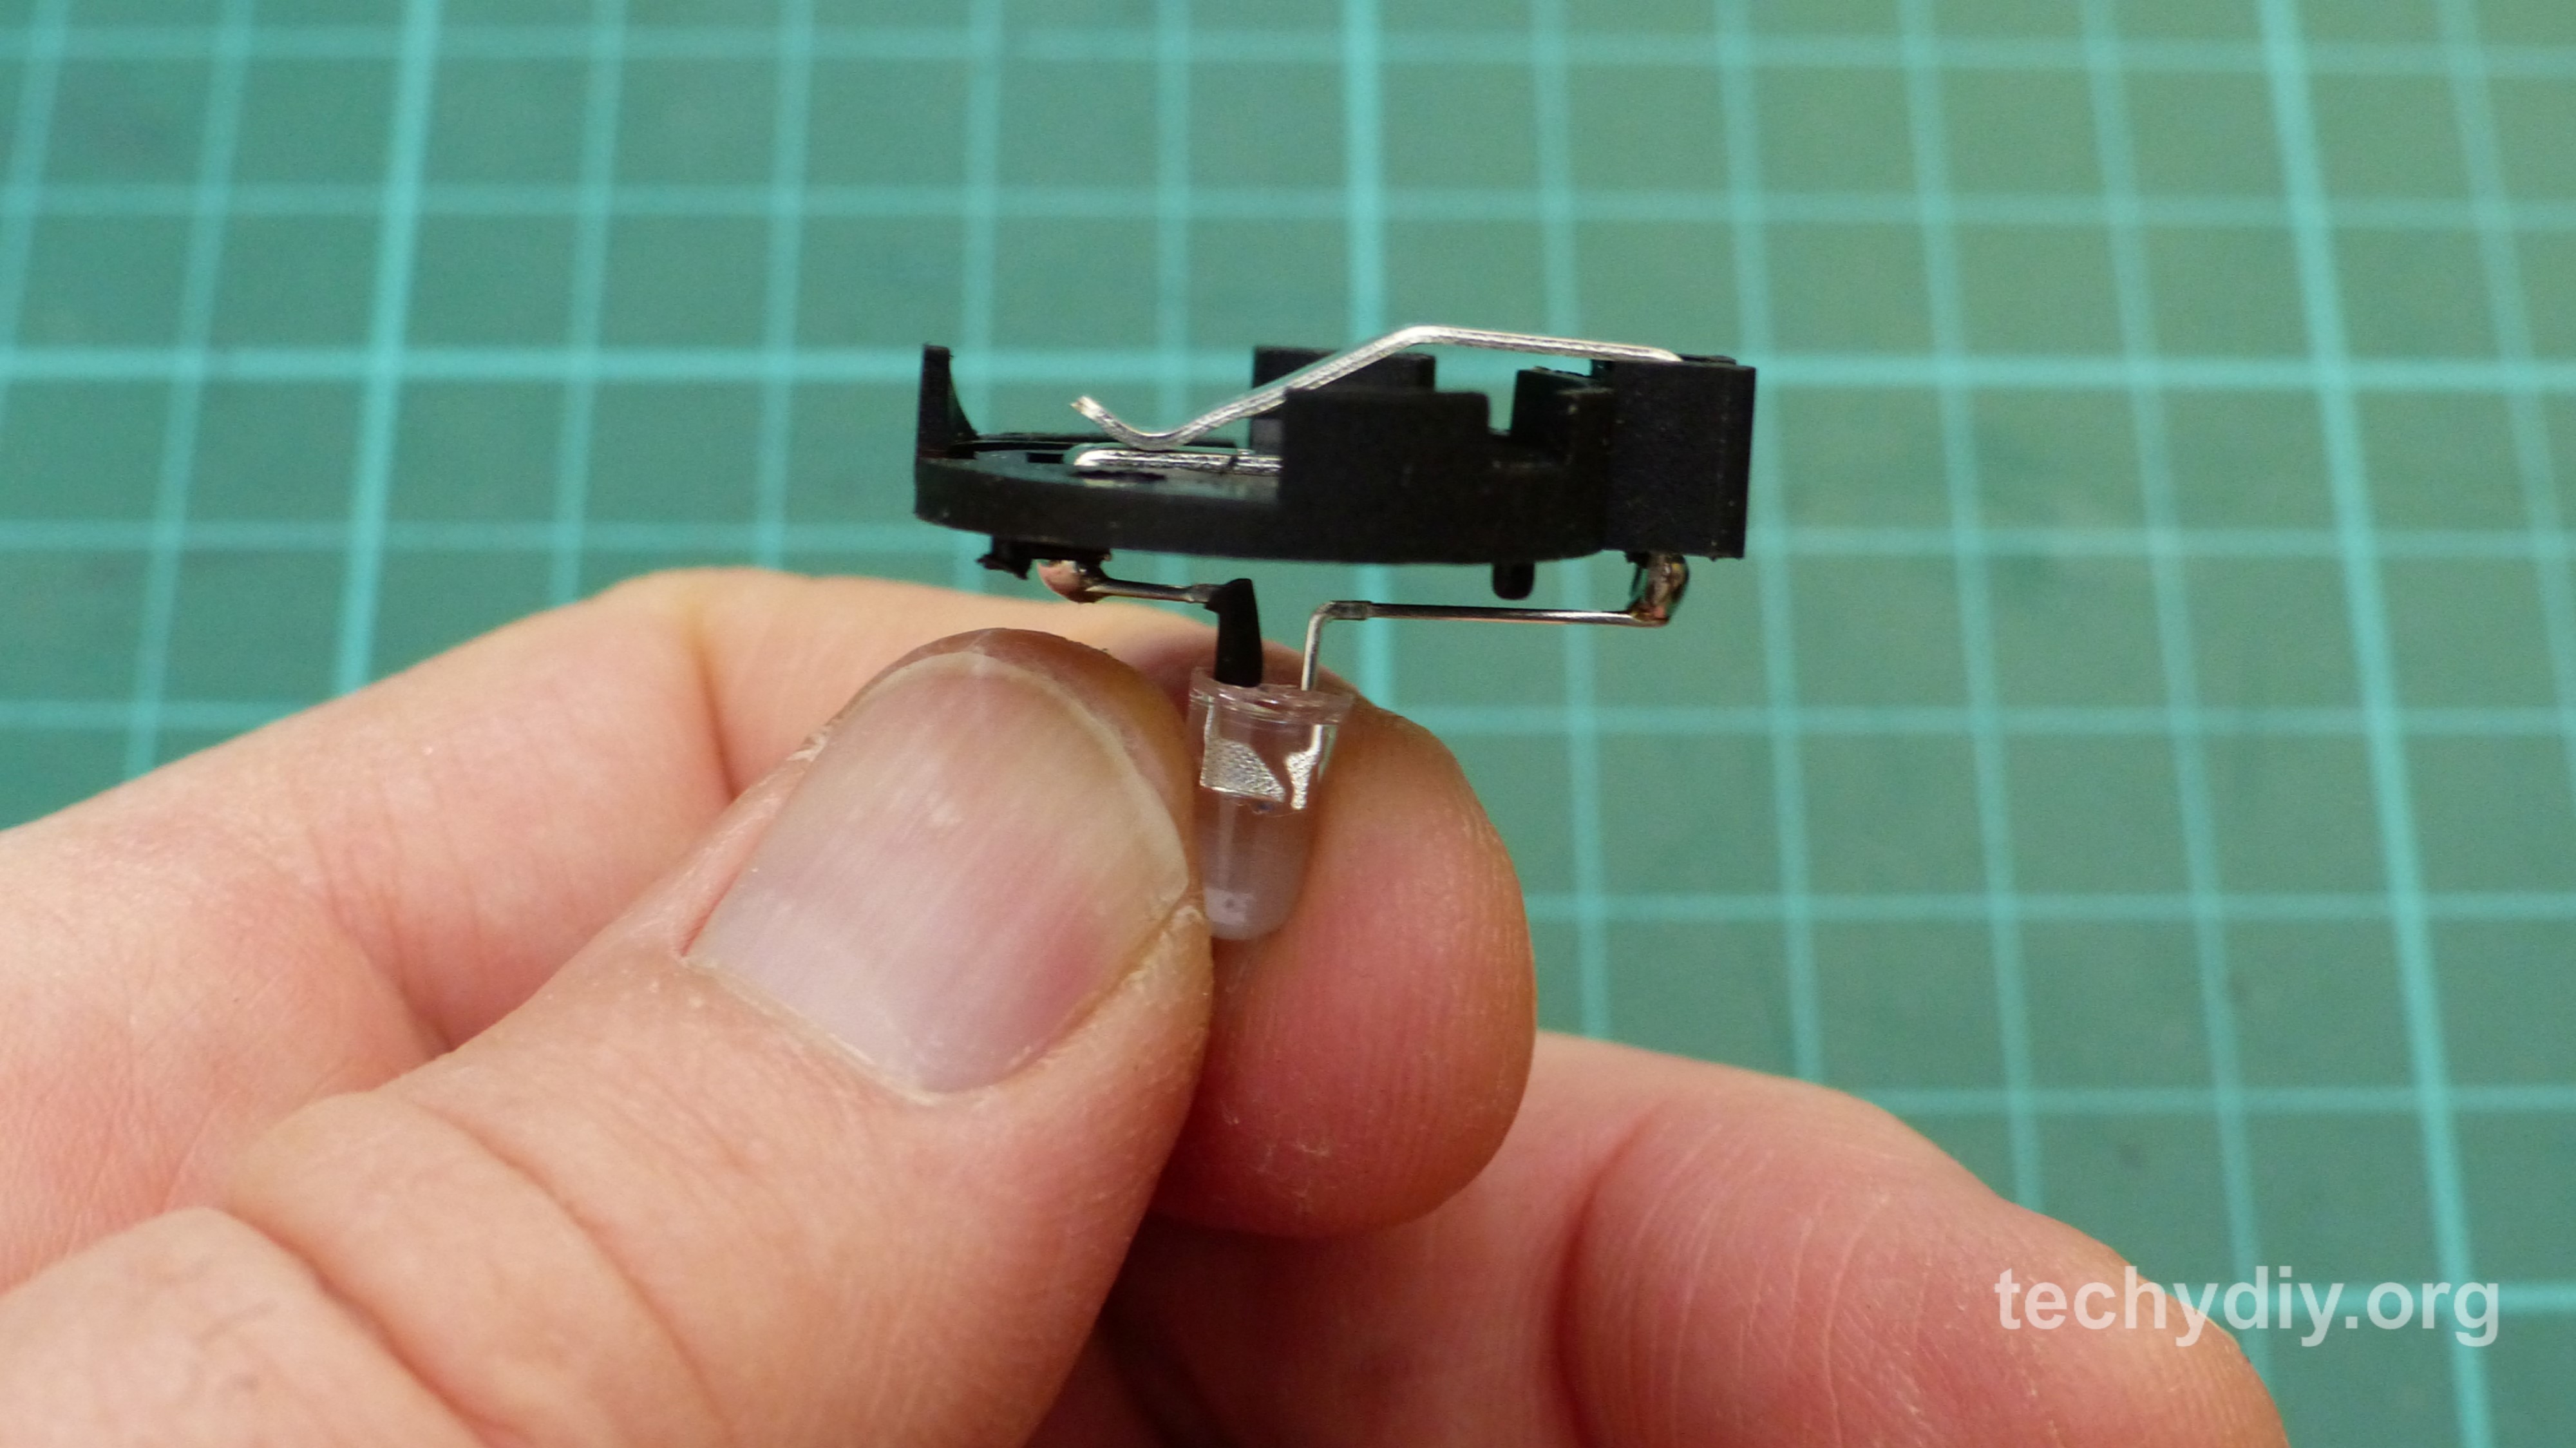

The long lead on the led was soldered to the positive side of the battery holder and the short lead to the negative side.
The led was located directly below the hole in the base of the battery holder rather than centrally between the two solder terminals.
Placing a small piece of heat shrink tubing on the short led lead to identify it, I then bent it over with some thin nose pliers.
The long led lead was bent over.
After placing the led over the hole in the battery holder, I bent the long lead around the positive terminal.
The short led lead was then bent around the negative terminal and both leads were soldered in place.
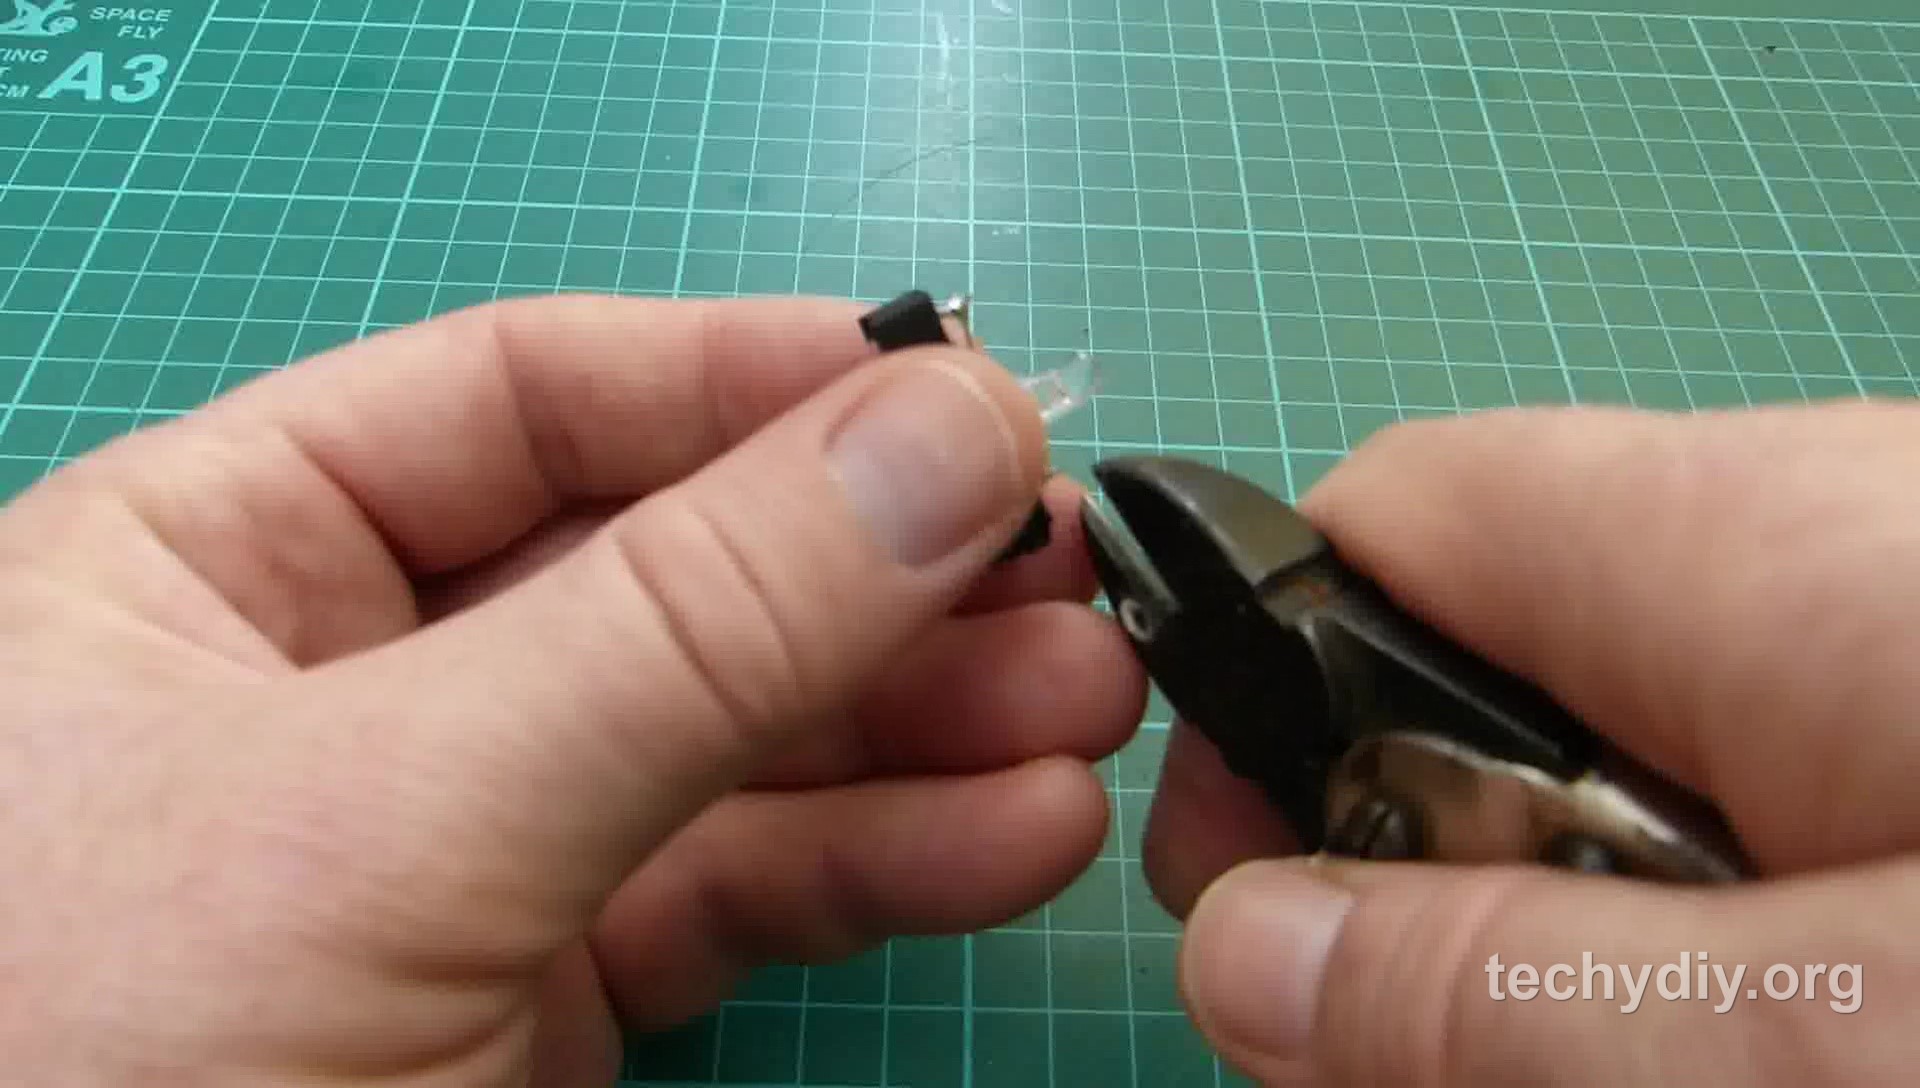
I then removed the tops of the terminals with cutters.
Glue the led assemblies into the wooden housing
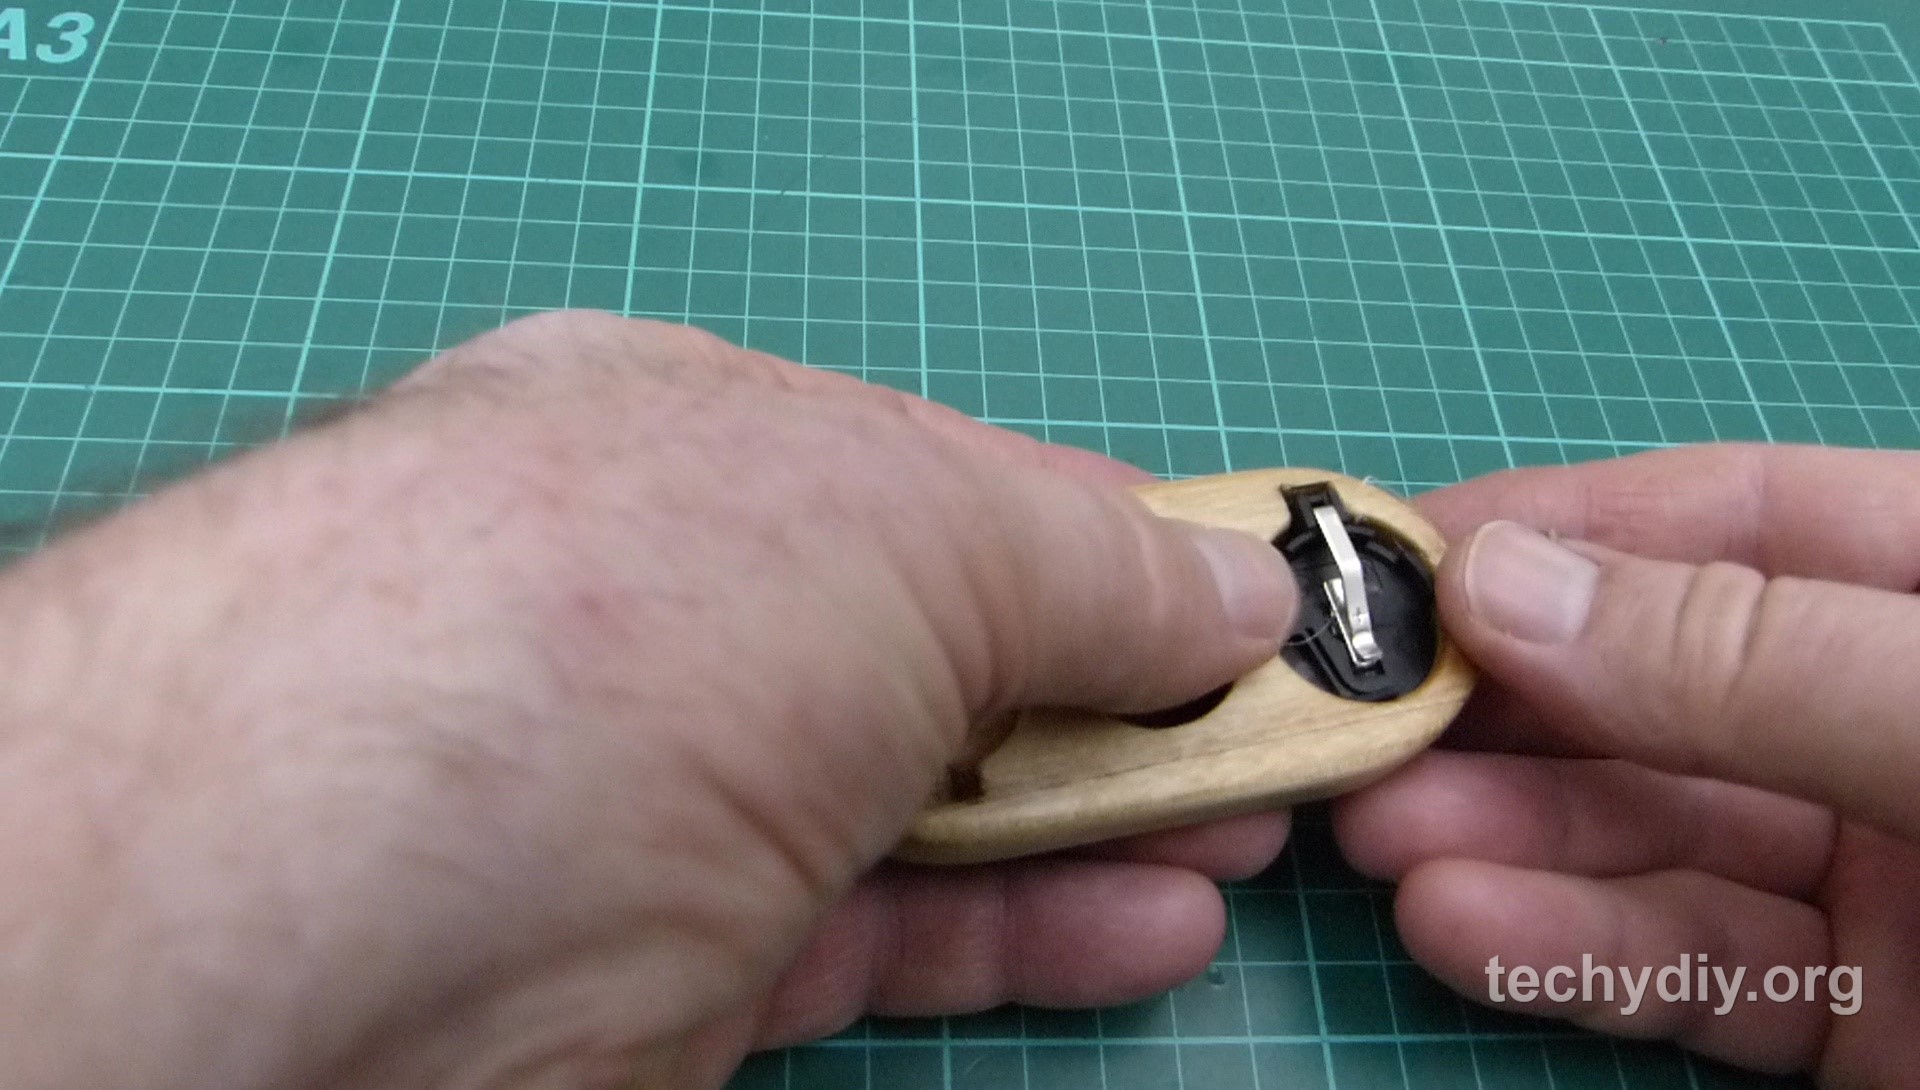
Before gluing the leds in place, I tested that they were working by inserting a battery into the holder.
I used hot glue to fix the holders into place.
Removing the bearing grease
To enable the spinner to spin faster, I cleaned the grease out of the bearing.
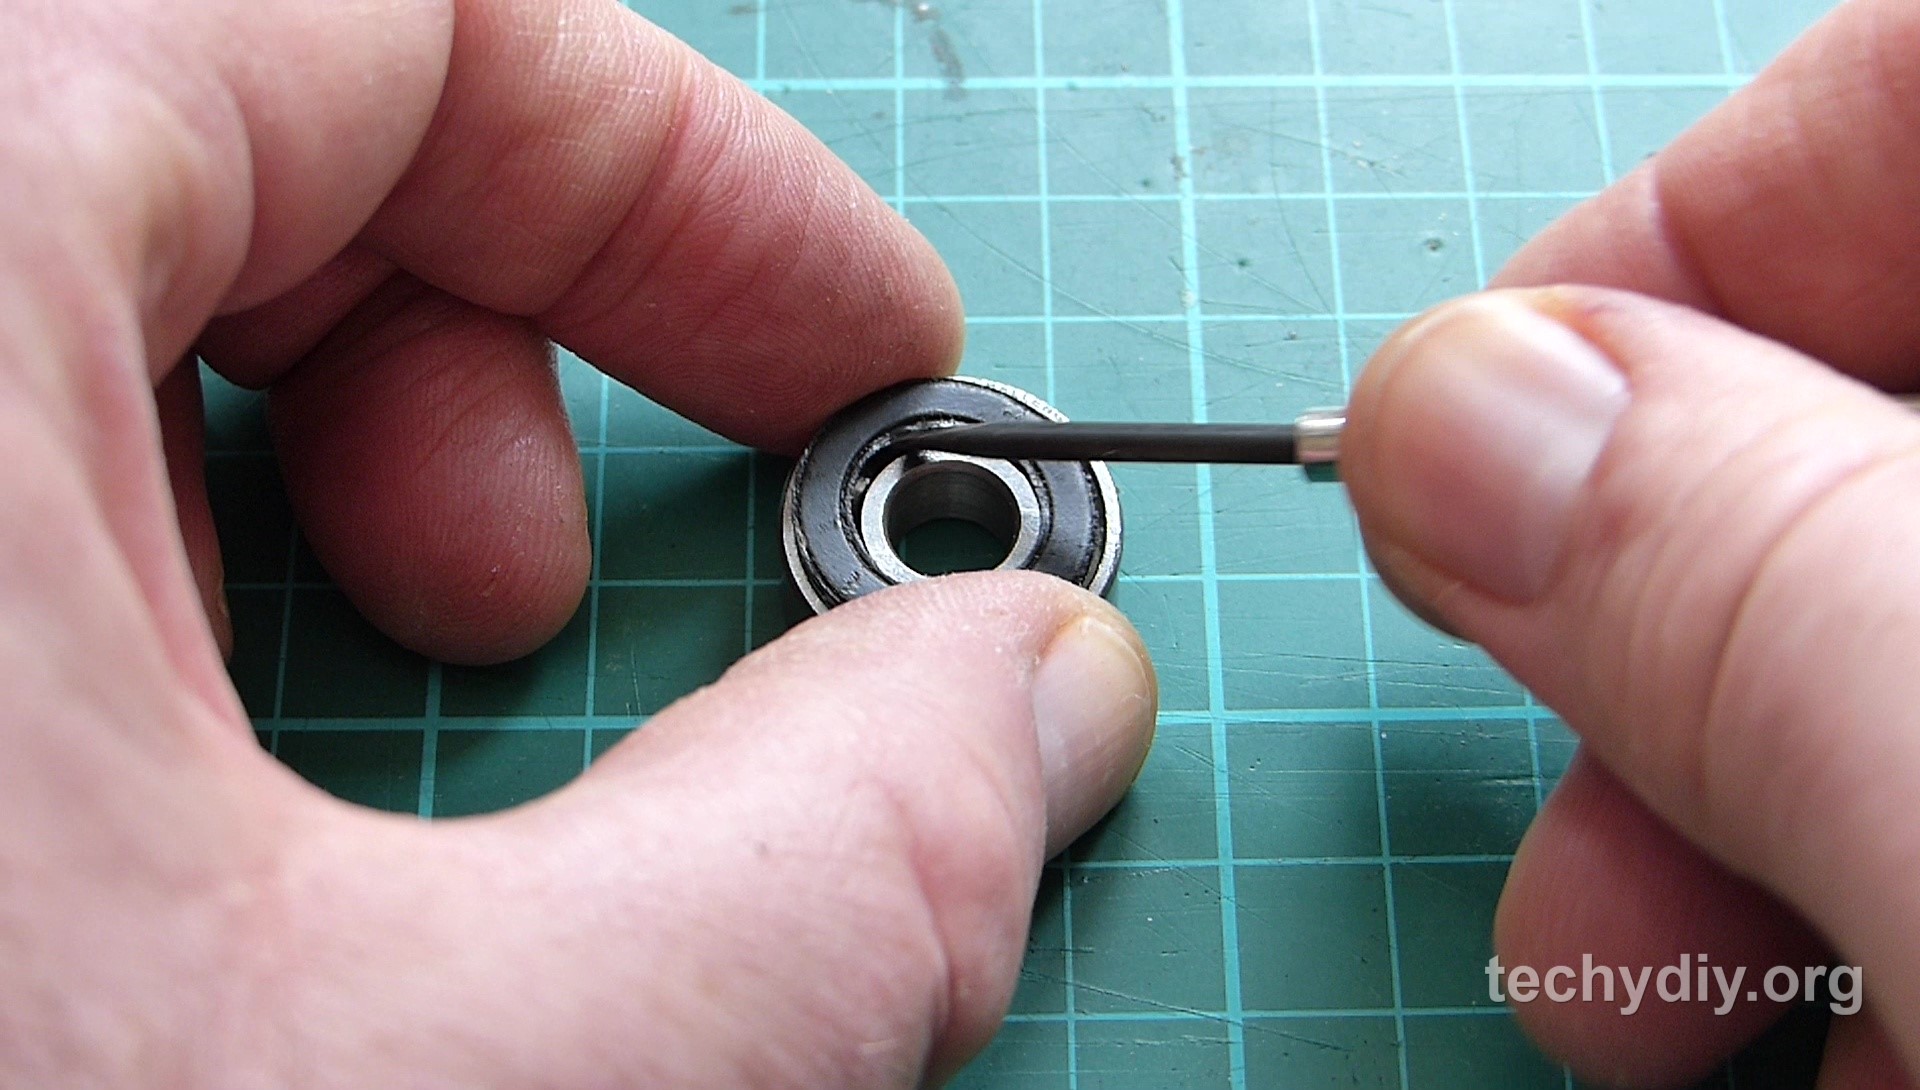
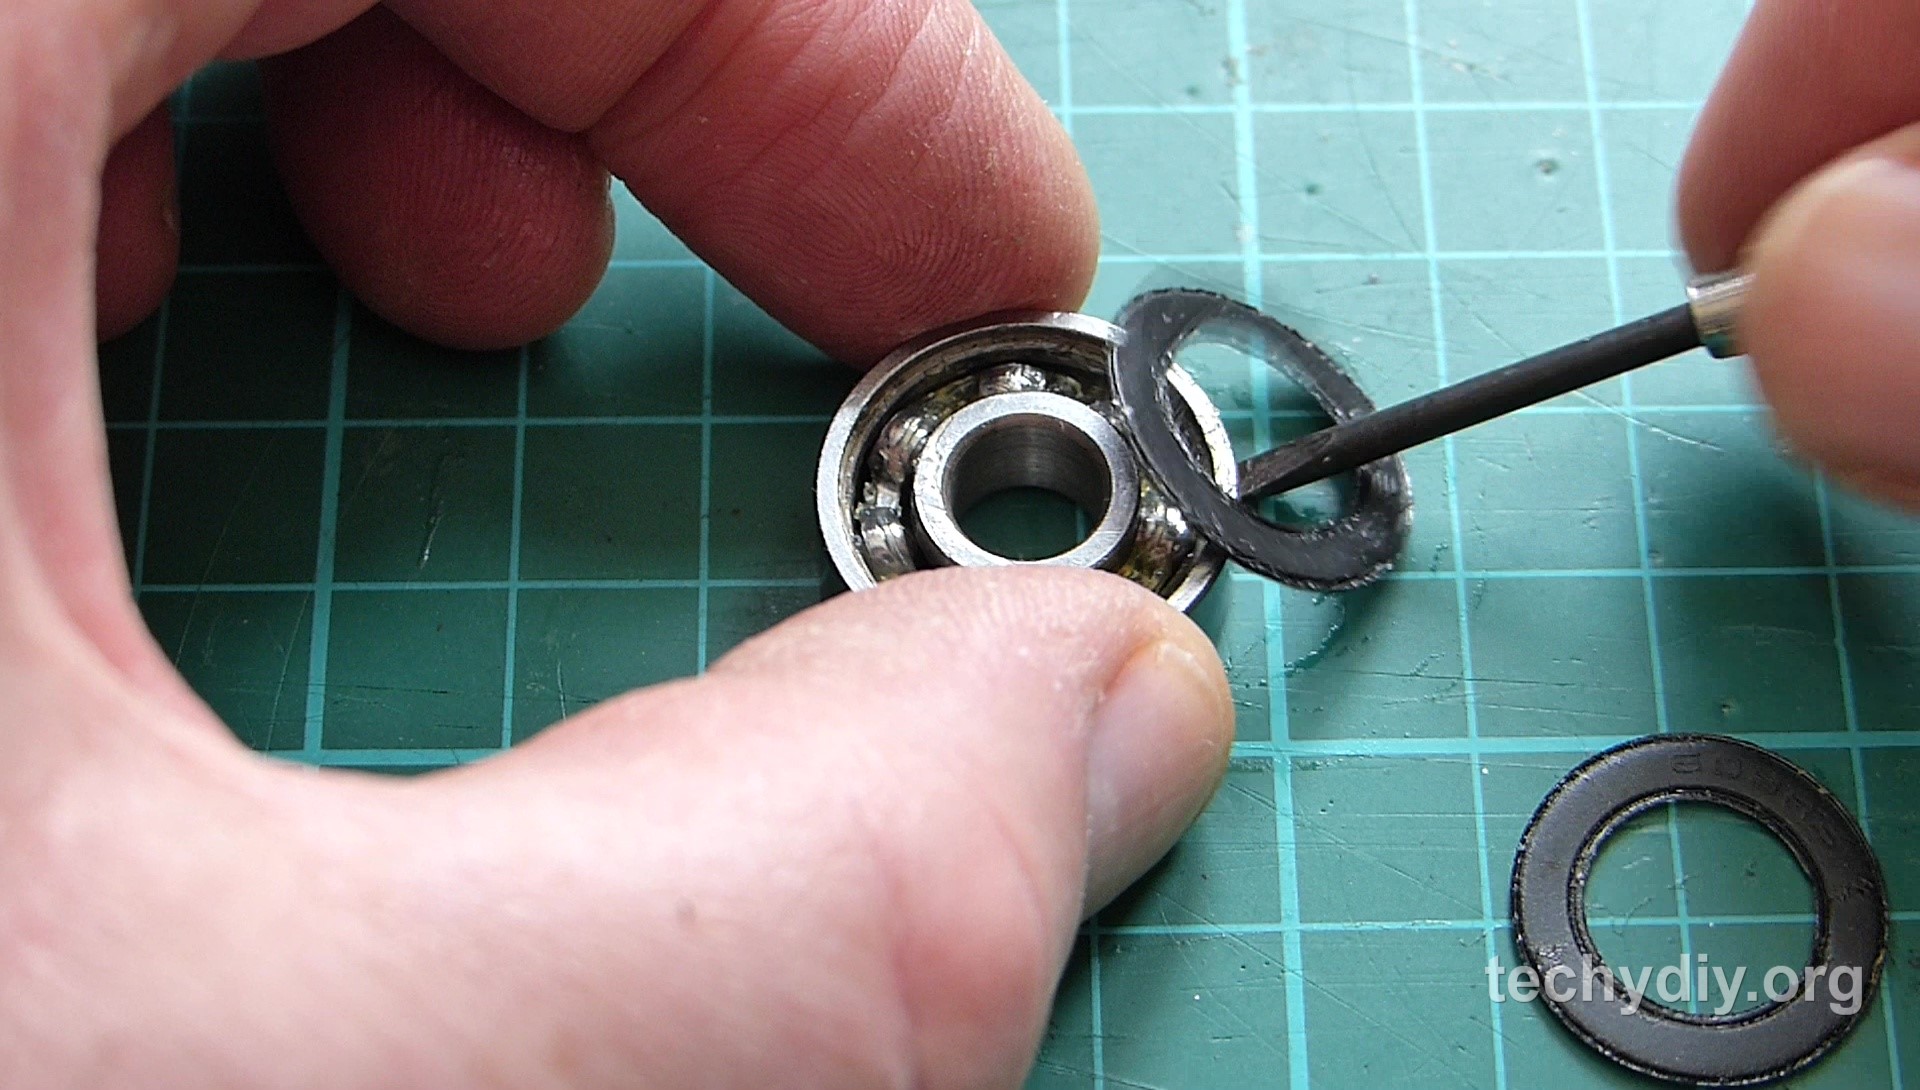
I removed the bearing’s rubber seals by levering them out with a screwdriver and then sprayed wd40 oil into it until all of the grease was removed.
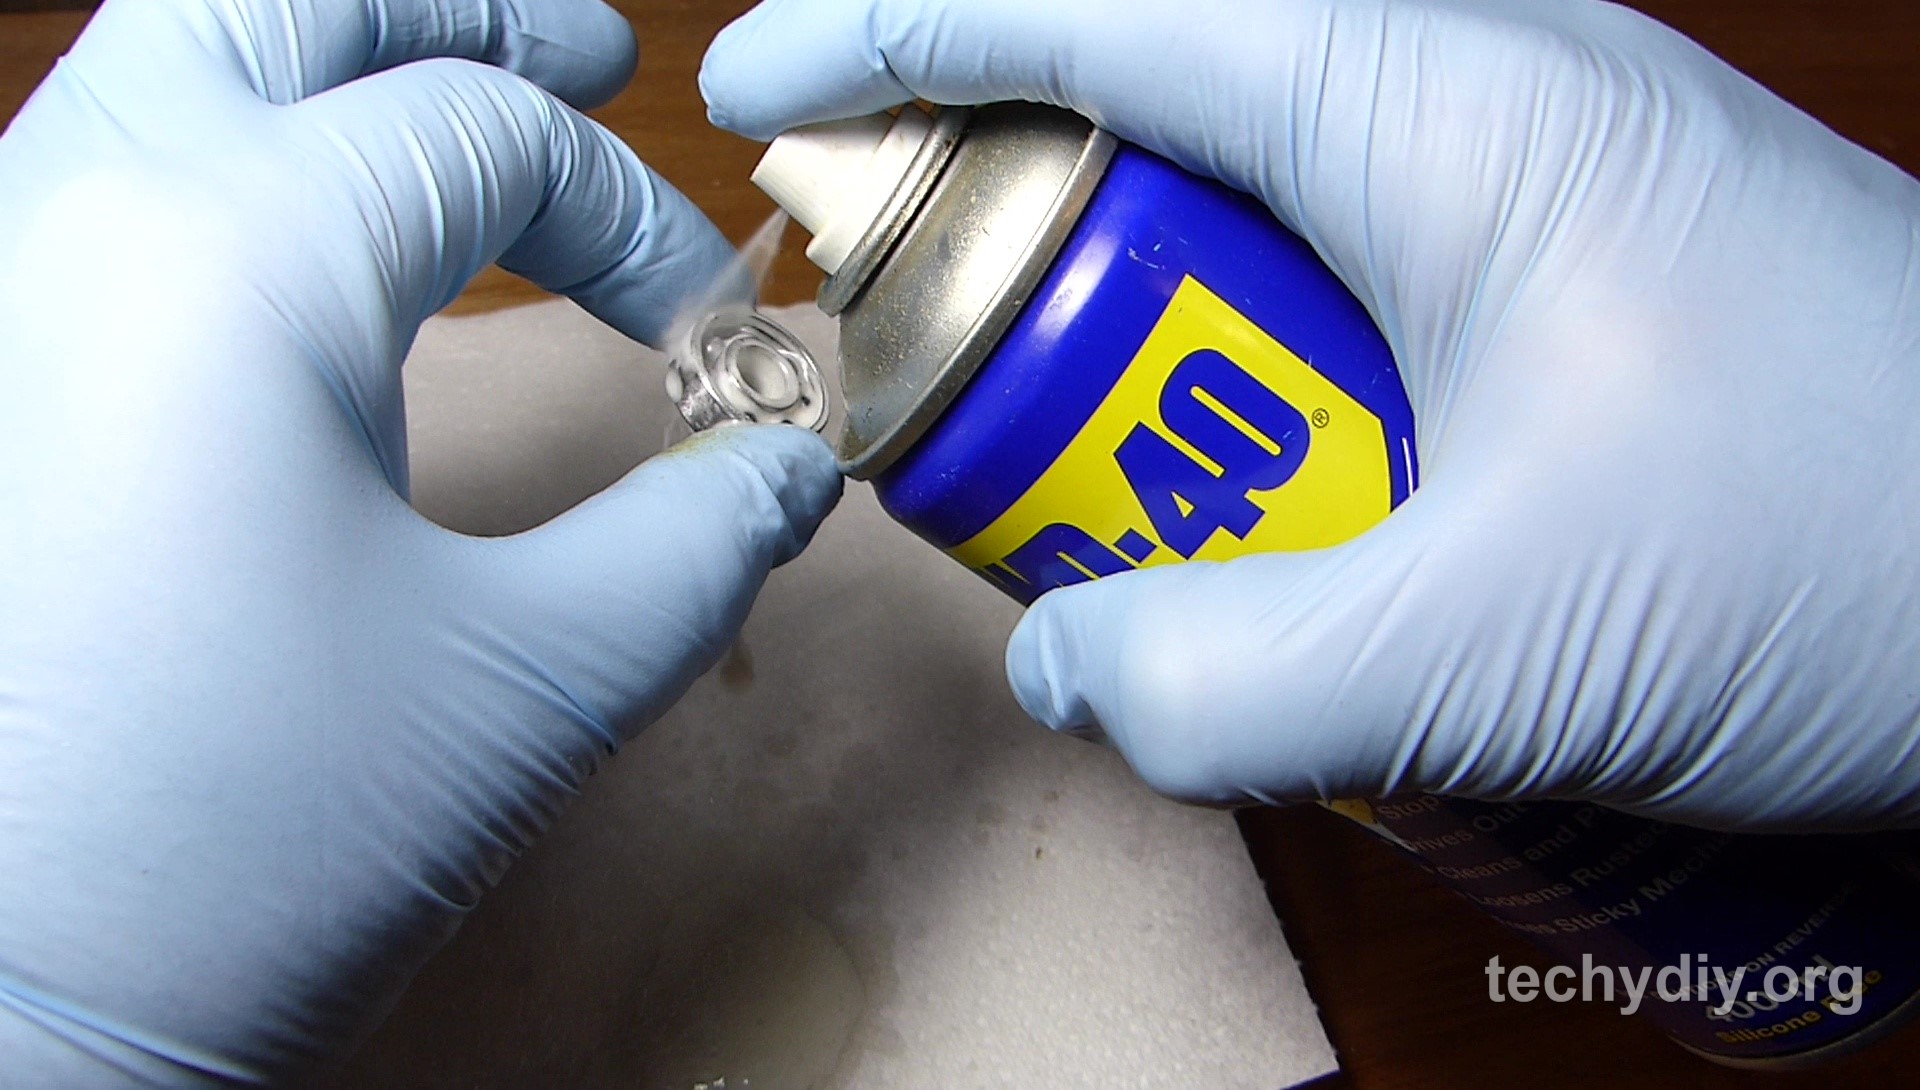
The rubber seals were then cleaned and put back on the bearing.
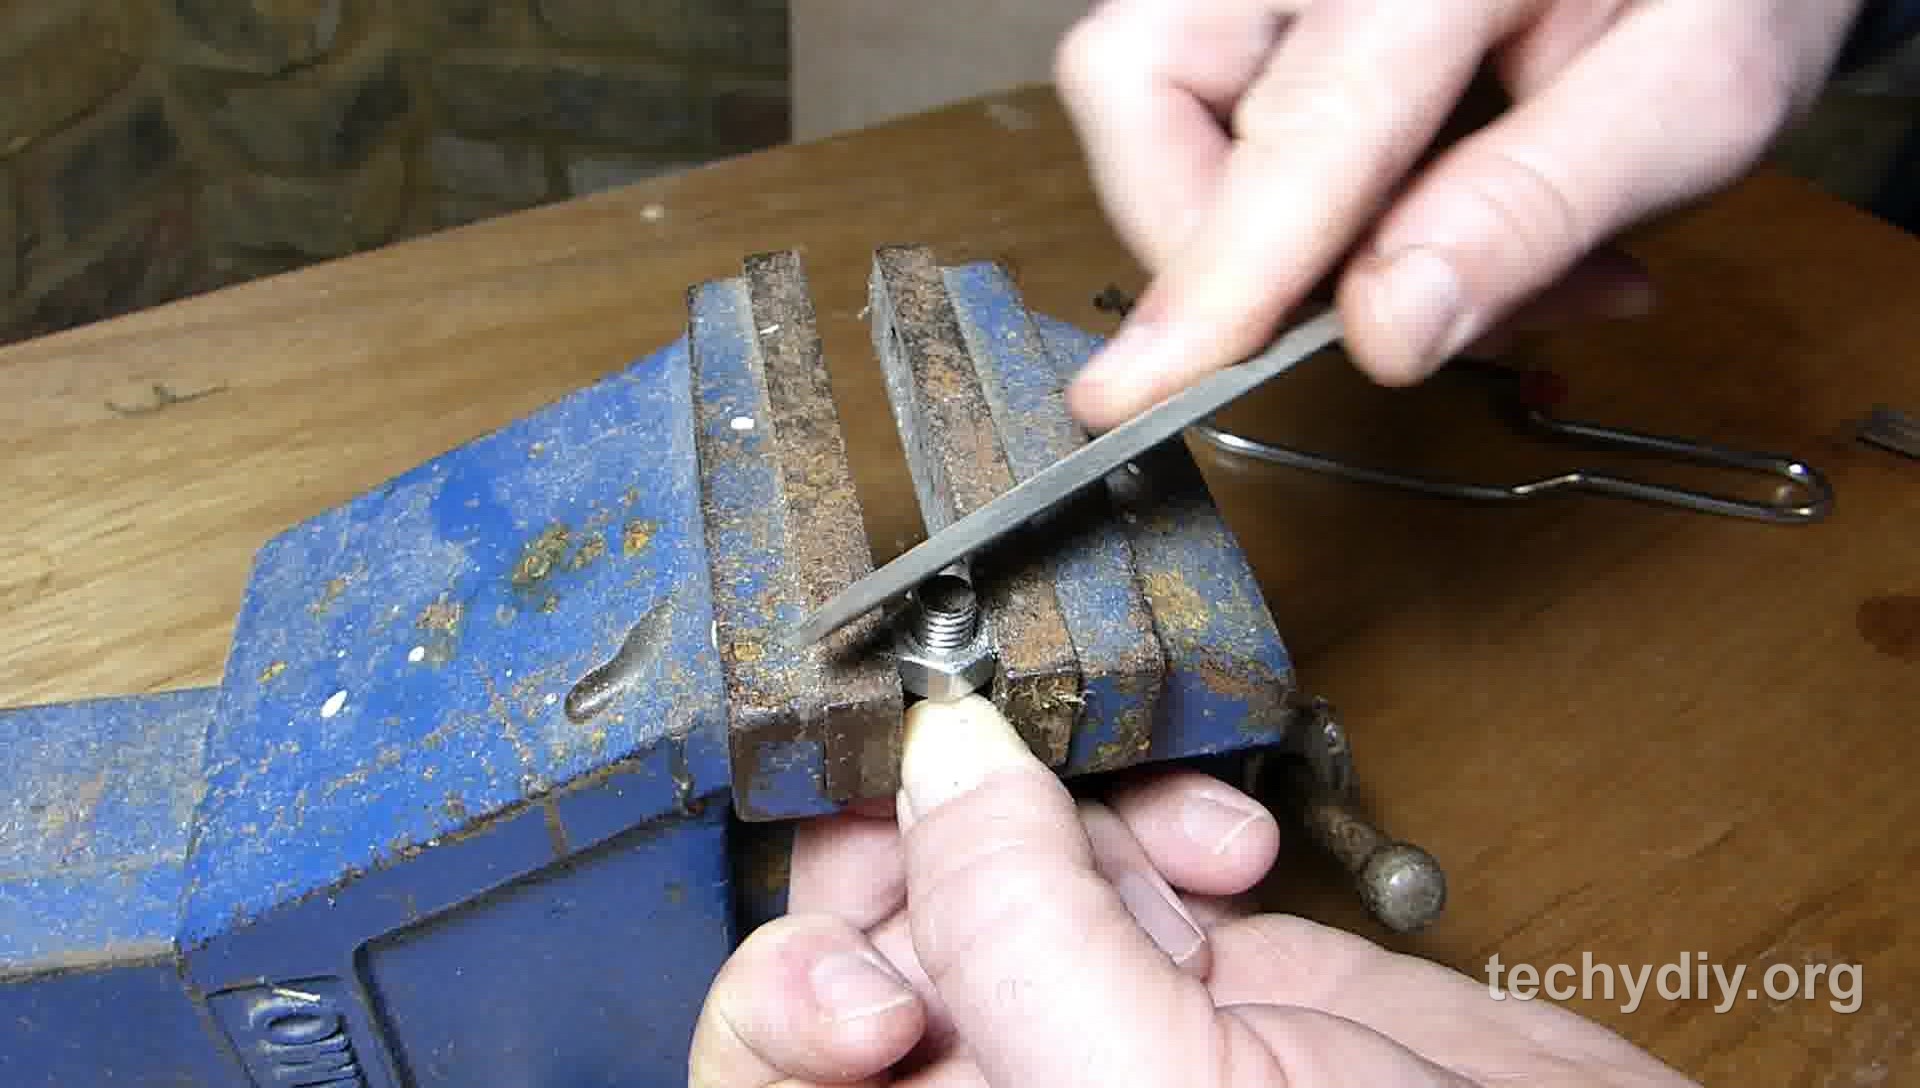
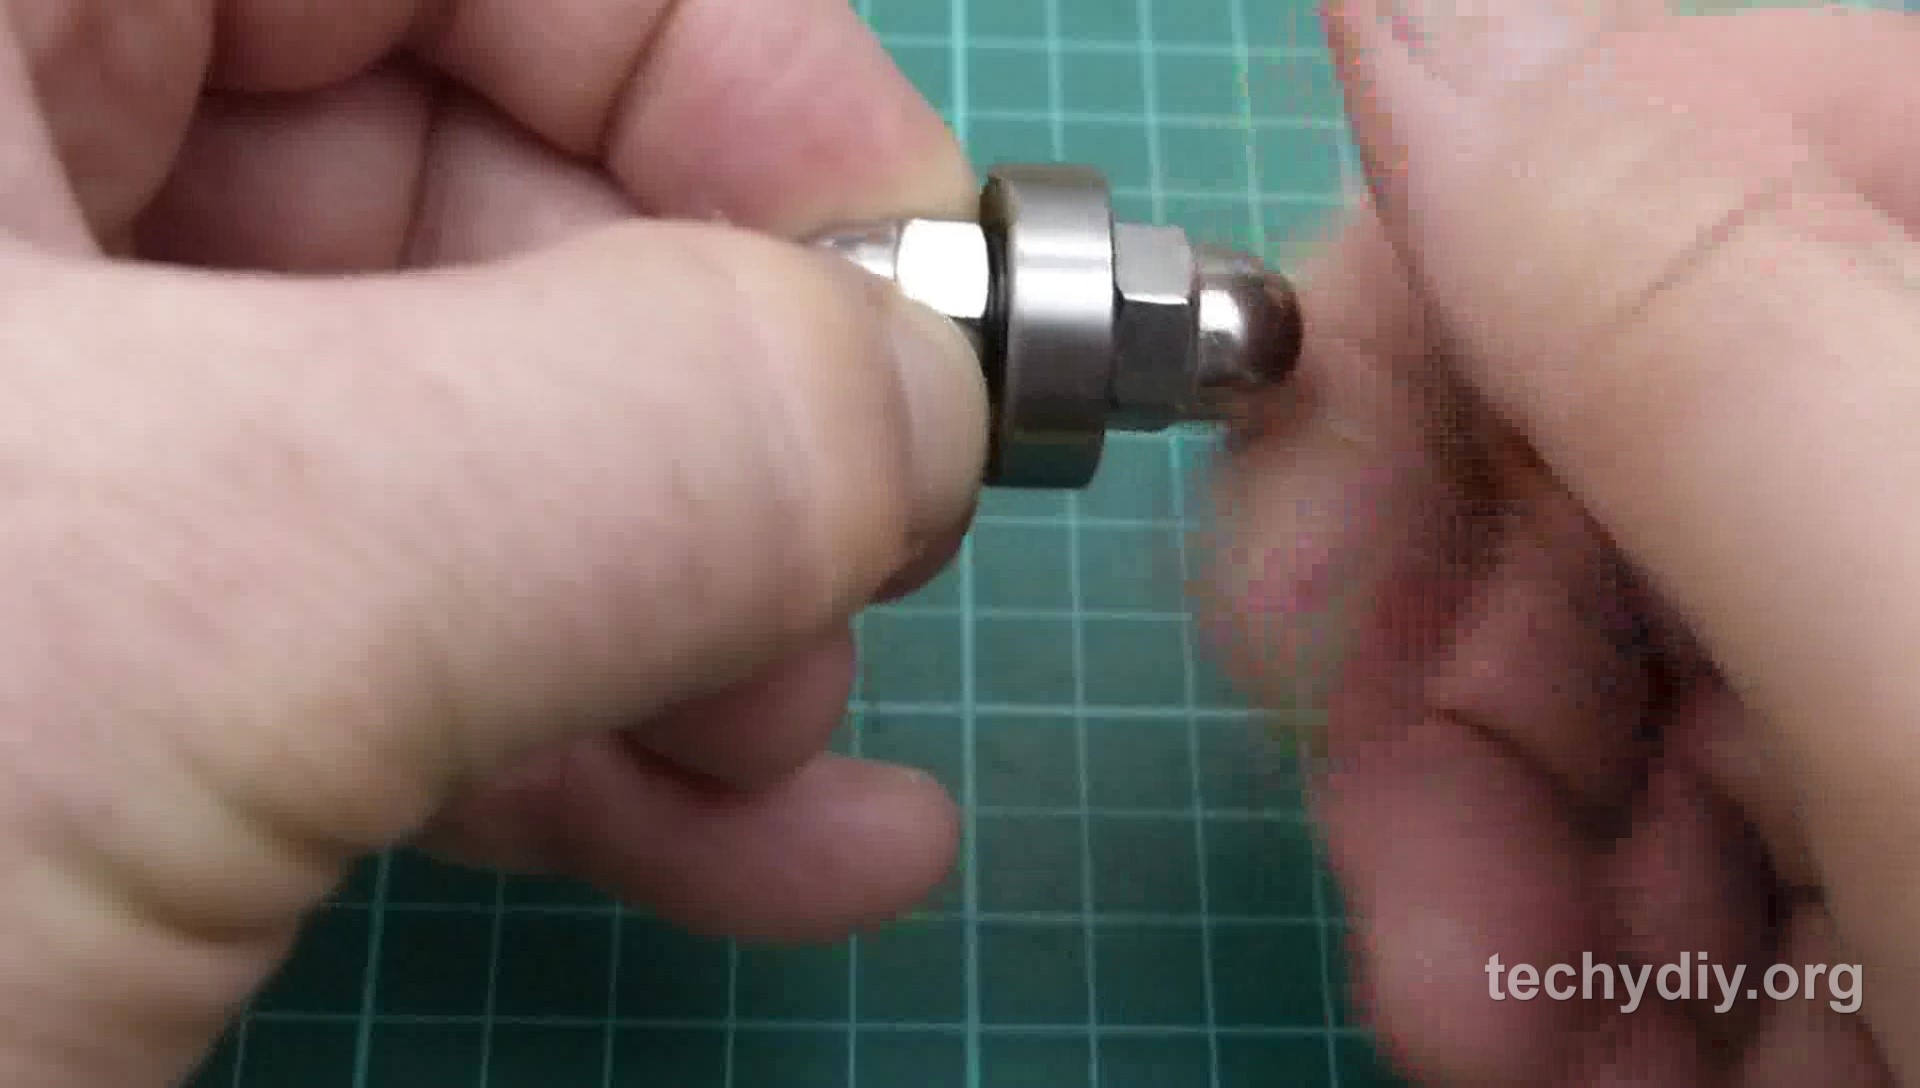
Fit the handle into the bearing
The next task was to cut off the bolt head. I did this by clamping it into a vice and cutting it off with a hacksaw. I then filed away the rough edges with a hand file.

The screw thread was then inserted through the bearing and the two dome nuts screwed onto either end.

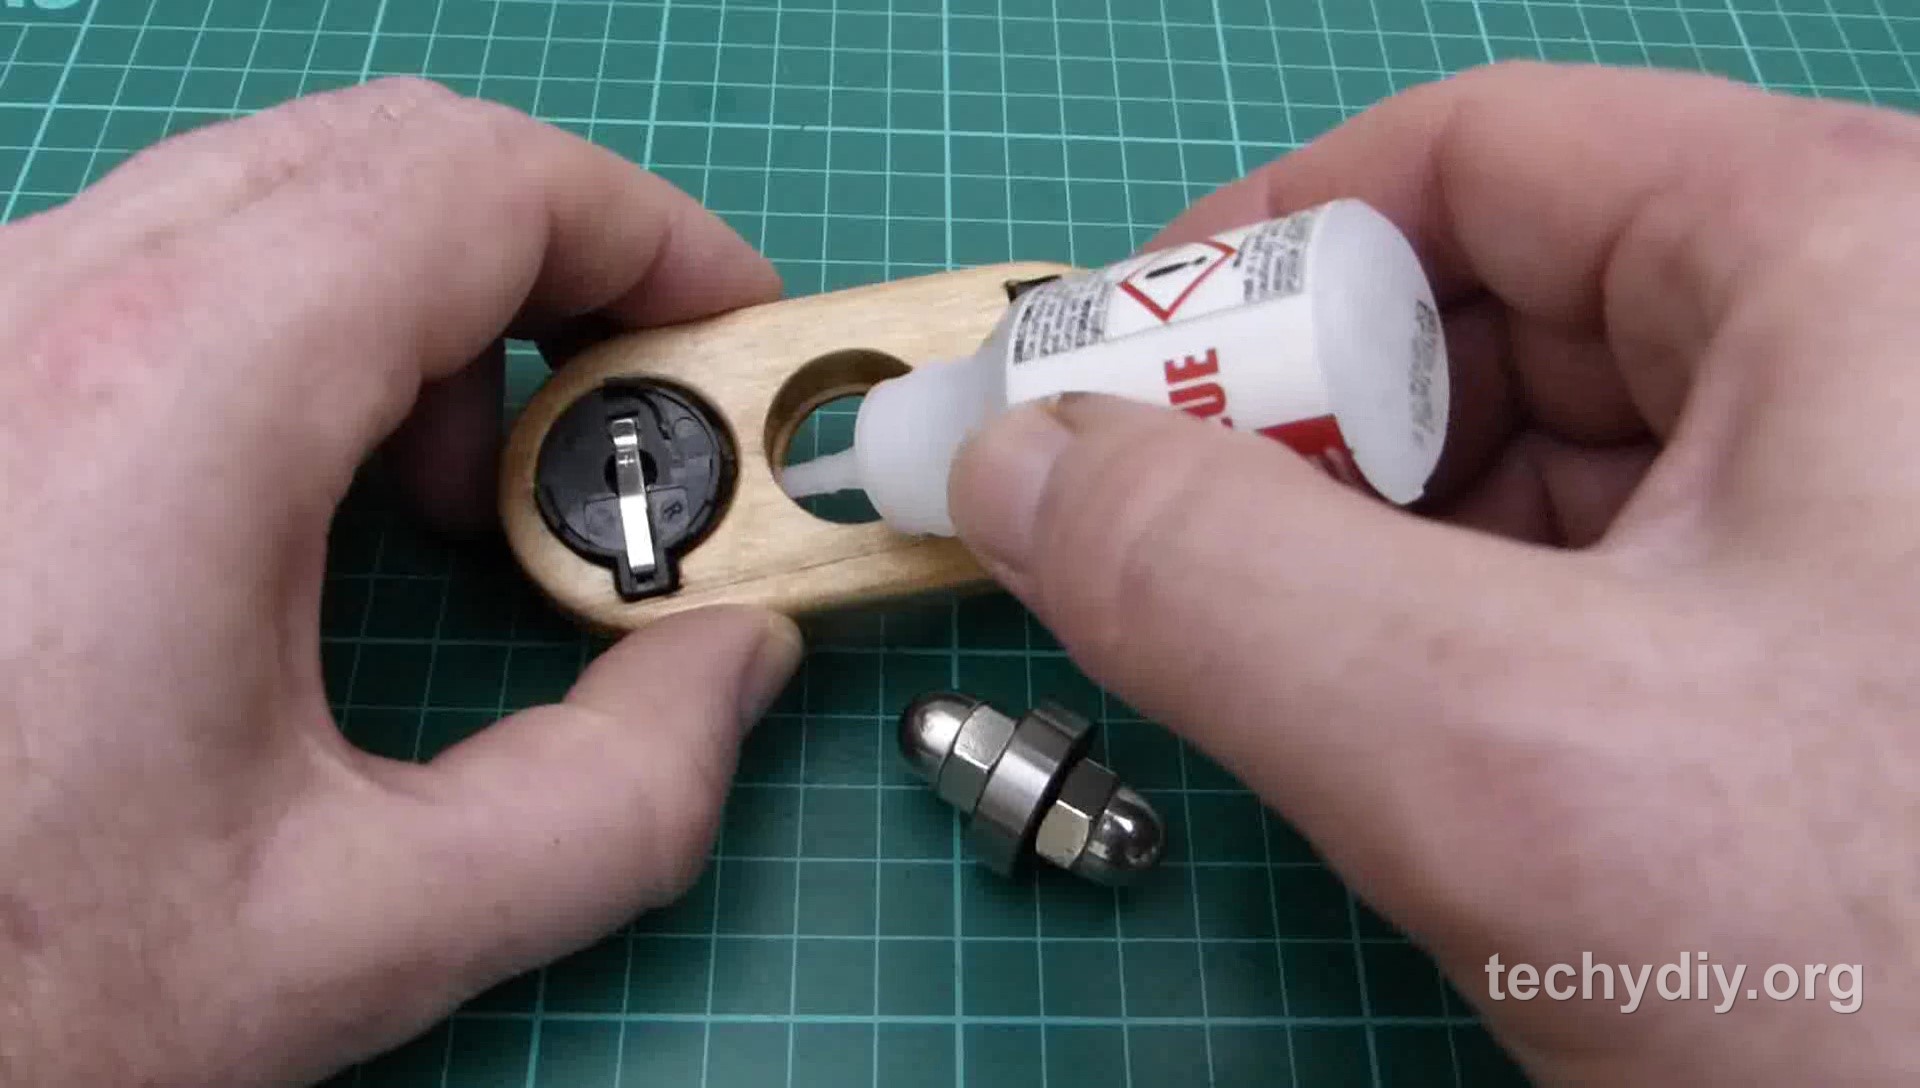
Fit the bearing into the wooden housing
The final task was to install the bearing assembly into the wooden housing. To ensure that it stayed in position, I glued it with Super-glue.
Using the spinner
To turn the leds on the batteries are inserted into the battery holders. The leds follow a pre-set program and will change colour fairly quickly.
To turn the leds off I inserted small strips of thin plastic between the battery terminals.
