Parts used
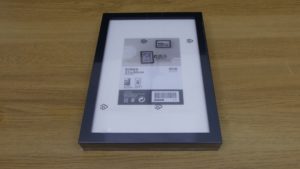
IKEA Ribba Picture Frame 21 x 30cm
Amazon US
Amazon UK
Amazon Canada
Ebay Australia
Amazon Deutschland
Two way mirror sheet A4 297x210mm 3mm
Amazon US Ebay US
Amazon UK Ebay UK
Amazon Canada
Ebay Australia
Amazon Deutschland Ebay Deutschland
Acrylic mirror sheet A4 297x210mm 3mm
Amazon US Ebay US
Amazon UK Ebay UK
Amazon Canada
Ebay Australia
Amazon Deutschland
Aluminium led profile mini
Ebay UK
WS2812B Led strip
Amazon US
Amazon UK Ebay UK
Amazon Canada
Amazon Australia Ebay Australia
Amazon Deutschland
WS2812B Led controller
Amazon US
Amazon UK Ebay UK
Amazon Canada
Amazon Australia Ebay Australia
Amazon Deutschland
Glazier points
Amazon US
Amazon UK
Amazon Canada
Amazon Australia
Amazon Deutschland
How an Infinity Mirror Works
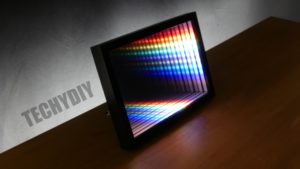
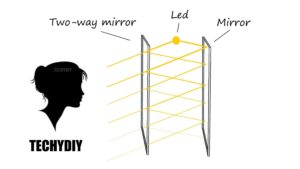
An infinity mirror consists of a two way mirror at the front, lights in the middle and a normal mirror at the back.
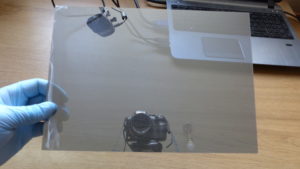
A two way mirror is a partially reflective mirror that reflects some light and allows the rest to pass through.
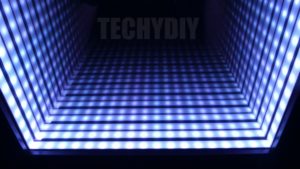
The light bounces between the mirrors with the two way mirror allowing some of the light to pass through each time. This creates a series of reflections with diminishing intensity leading to the illusion of lights fading into the distance.
How to make the infinity mirror
To make this project easily using just a few hand tools, I have made use of an IKEA Ribba picture frame.
First of all take the picture frame apart, for this project we will only be using the frame and the back panel.
Remove the metal tabs from the frame with a pair of pliers.
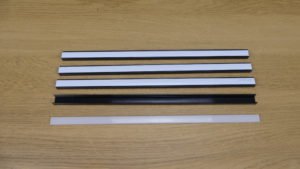
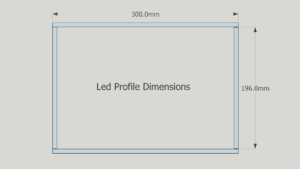
The infinity mirror will have diffused lighting and to achieve this we use four sections of aluminium led mini profile. This is cut to fit the inside of the picture frame. I have used straight cuts for simplicity but if you are able to cut mitre joint accurately then this will make fitting the led tape easier later on
A section is cut away from the end of one of the profile sections to allow the led cables to pass through.
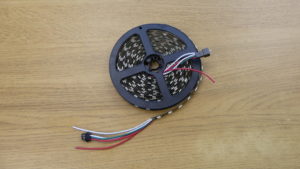
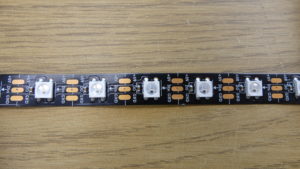
The led strip that I have used is WS2812B programmable colour led tape. This has an adhesive backing and can be cut to length at the marked positions.
Starting with the end that connects to the controller, the led tape is fitted to the aluminium profile and cut to length. This is quite a fiddly process and I found it easier to fit the sections of aluminium profile into the frame while I was installing the tape.
The diffused covers for the aluminium profile can now be cut to length and fitted.
To assemble the infinity mirror, the two way mirror is installed first with the acrylic side facing outwards and the aluminium side facing inwards. The video demonstrates how to determine which side of the two way mirror is which.
Then the aluminium profile is fitted, followed by the normal mirror and the back of the picture frame. The led cable is routed out through a gap between the frame and the cover.
The back cover is secured in position with glazier points. These are fairly easy to push in with hand using a screwdriver or another blunt edged blade.
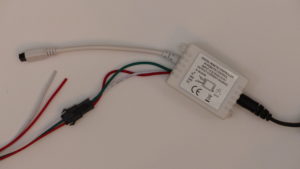
The led strip can now be connected to the led controller and tested. I secured the controller to the back of the frame using double sided tape, with the receiver for the remote control just visible from the side of the frame.
if you liked this project please checkout some of my other infinity mirrors:
How to Make a Modern LED Infinity Illusion Mirror
How to make an Led Infinity Illusion Mirror

Hi I m in india chennai I want to buy this led infinity illusion mirror.